Tree bark. What can be made from bark. Crafts made from straw and pine bark Pictures made from tree bark
The whimsical outlines of the branches involuntarily attract attention, and you want to capture this subtle beauty not only in memory or in photographs, but also in real life. If desired, you can add an unusual decorative touch to the interior by creating interesting compositions or creative products with utilitarian features. Crafts from tree branches are an excellent hobby that allows you to create beautiful decorative elements with your own hands without investing any money. financial costs. The interior of a house, decorated with this natural material, acquires a special sophistication, where everything is aimed at emphasizing its individuality. Before starting work, the blank for the future craft should be carefully prepared, taking into account the individual characteristics of the wood.
Crafts from branches - material preparation
For creative activities to decorate the selected room (this could be, and even) you will need well-dried branches. They are easy to collect during forest walks, and also to pick up in a public garden or park. You can independently dry the branches that remain after performing sanitary pruning measures.
Before working, dry the material carefully for further use:
Inspected for cracks;
Cleans from dust and dirt;
Peeling areas on the bark are sanded.
To prevent the appearance of unwanted larvae in the house, it is necessary to carry out disinfection using a low concentration solution of potassium permanganate, known to many. Depending on the design, the branches can be painted in the desired tone, covered with stain or varnish.


Decoration of various items
Having brought home a bouquet, you can quickly make a creative vase using branches. To do this, take any suitable jar - tin, glass, and cut pieces of branches slightly longer than the height of the container.
They are placed close to each other in a vertical direction on the outer surface of the jar and secured by tying it with a beautiful braid or ribbon. You can plant twigs on glue. Flower pots are decorated in the same way.


To make this wonderful vase, in addition to the glass base, you will need: a glue gun, dry willow or birch sticks, and wire cutters.
- Harvested branches need to be cleared of bark. It is better to do this when the wood has not yet dried, so it will be much easier to remove the bark;
- Next, using wire cutters, cut the bare branches into small pieces. Their size should be calculated based on the height of your workpiece;
- After the material has dried, we glue each stick to the base so that we get a kind of lathing;
- It remains to give the glue time to dry for 10-15 minutes. Congratulations, the twig vase is ready!
Crafts made from branches will always find their worthy use in decorating the interior of a house or apartment. Their shape and size can be completely different, because for their manufacture you can use various material. Products made from bark, wood chips, driftwood, sawn logs or large branches, etc. will look good. It all depends on your imagination and personal preferences.

Branches installed inside a glass jar in a continuous layer along the entire side plane will look no less original. To prevent them from falling apart in a makeshift vase, the bouquet should be quite voluminous.
For the products described above, you will need fairly even trimmings from the lower ends of the branches. The upper thin stems will help create a delightful evening with the flickering of candles. To do this, simply place them in a glass container so that they rise above it, pour no more than half the volume with water and lower the floating candles.


Charming compositions from branches
To bring an unusual accent to a room, for example, a bedroom, trunks topped with a web of thin branches, placed at the head of the bed in a niche cut into one side of the coffee table top, will help. A tall floor vase containing dried cereals along with branches will look elegant in a dining area or office.
Bizarrely curved branched thin tree trunks are placed in a vase and decorated with colors that match the interior decorative elements. These can be sparkling stars or snowflakes on the eve of the New Year, bright valentines on the eve of the corresponding Valentine's Day, or simply butterflies with fancy patterns on their wings, birds, flowers, fruits, leaves from any available material.


Having secured the graceful branches on velvet fabric, the color harmonizes with the overall decor, and placed, after gluing on cardboard, the resulting composition in wooden frame, you can get an elegant interior decoration.
A beautiful branch can be complemented with golden bows, New Year's balls or forest cones. This decoration will help good mood and evoke only positive emotions. In addition, New Year's decorations will create a festive atmosphere on the eve of the main winter celebration.


Branches in the interior: step-by-step master class
Tall trunks of shrubs (usually willow) will allow you to do this in an unusual way. For example, separate the sofa corner from the rest of the space in the living room. This partition is made very simply:
- To do this, use it as a stand wooden beam the required length. You can use absolutely any type of wood.
- Two rows are drilled in the timber in a checkerboard pattern through holes, in which prepared branches are fixed vertically to glue. Their length should be about a meter less than the height of the room. The step depends on how openwork the resulting screen should be.
- To make the product look stylish, it is varnished.


Current bedroom design ideas are limitless - birch trunks in the interior are proof of this

Trimmings of trunks with a diameter of 8-10 cm with branches extending upward from the side acute angle with durable branches they can easily be transformed into sweet hangers. They can be mounted on the wall in the hallway, creating a natural corner with a specific intended purpose. Among the designer finds you can find birch trunks that act as cornices and even posts near the bed for attaching a canopy.
Will complement the picture coffee table, the base of which is a bundle of branches fastened vertically into a stable cylinder, and the tabletop is durable glass of a round or oval shape.
You can make an option with an unexpected effect by fastening the branches in the shape of a cube and laying it on the floor on the side edge. A plastic or glass square table top is placed on top.


Often decorated with branches wall mirrors. They can be glued along the entire perimeter perpendicular to the frame or along it. There can be many options. Craftsmen easily make frames for photographs, children's drawings, and reproductions of favorite paintings from scraps of thin trunks.
A gracefully curved thick branch can become the basis of a table lamp. A branch with many branches, mounted on the wall near the mirror on the dressing table, will allow you to easily place all the jewelry.


This type of work requires gentle female hands and special attention.

Creative inspiration is the main incentive for a person who wants to create beautiful crafts made from branches with your own hands.
In spacious hallways, one wall can be turned into a fairy forest by installing trunks reaching to the ceiling behind a high plinth with a wall mounted near the floor. LED backlight. This is one of the best ways Give your interior a picturesque look. Both thin and thick tree branches can be used as material.
Small items made from dried driftwood will look original. For variety, you can use tree bark and wood chips, later combining everything into a single composition.
We make decor from branches with our own hands
Crafts made from branches are always distinguished by their originality and unique design. With the help of these simple sticks and twigs you can create beautiful designer decor on absolutely any theme. , paintings, wreaths, flower pots, fancy animal figurines - this is just a small part of what can be created from this wonderful natural material.
- Making a wreath from branches is probably one of the simplest tasks that even a child can do. Take thin rods of willow wood and weave them together into a tight ring, then carefully tie them copper wire. As an additional decoration for the wreath, you can use tree leaves, flowers, and forest cones.
- You can revive an inconspicuous tree branch using ordinary snowflakes. Cut them out of paper, foil or colored felt and hang them on each branch. Such compositions will look great in the house against a wall with beautiful wallpaper.
- If you have any broken light bulbs, they can also be used as decoration. Use soft wire to make a special mount with which you can hang them on a branch so that the bulb base is at the top. Next, through a hole specially made in the base, the light bulb is half filled with water. All that remains is to give our miniature an elegant look. To do this, the branch can be decorated with decorative braid, ribbons and bows.
Despite the fact that the process of creating some crafts is quite long and labor-intensive, the result of the work done will be amazing.


Even the most ordinary painted twigs can be an excellent material for making fun crafts. For example, unique products made from star-shaped branches will look very beautiful and fun in interior design. You can make them with your own hands on a regular table.
- Preparation of material. For each craft we will need 5 sticks. These can be branches of any tree, the main thing is that they are even and of the same length. The material should be dried and varnished in advance, so your products will last longer. We also need thread, rope or thin ribbon. With their help we will tie the ends of our sticks.
- Making a star. Place the sticks on the table so that they form a closed pentagonal star shape. Tie each formed corner with thread or rope and decorate with satin ribbons. The resulting star can be hung on the Christmas tree or given to friends.

To create something unique for your interior, do not copy someone else’s ideas, but try to do everything yourself. Feel the mood of your home, think about what exactly is missing in it, what things and objects could highlight your own style. Write down everything that comes to your mind in a notebook - these thoughts may be useful to you when creating an interior design.
Pay attention to the little things. They are the ones who are in creative union with non-standard design solutions create an unsurpassed atmosphere and focus on a specific element of the interior.


An original floor lamp is a creative interior decoration


Crafts from branches are not only beautiful, but also profitable. The main advantage is that their production does not require any funds, because the material itself is literally lying under our feet. Moreover, all compositions can be created with your own hands, involving your children in this entertaining process.
Crafts made from branches can be sold easily and quickly, because this is a unique decor that is always in high demand. You can also earn extra money by teaching paid master classes on creating designer jewelry for beginners.


We really hope that this article was useful to you. Create, create, experiment and perhaps this interesting hobby will develop into your professional field of activity.
A boat made of pine bark is an interesting craft made from natural material for boys. The simplest boat can be made by 8-9 year olds. A complex boat with small details will be a worthy task not only for the child, but also for the father. Pine bark is a unique natural material. It is very easy to work with and is ideal for teaching boys basic knife and woodworking skills. In addition, the pine bark ship model has the most important quality of crafts for boys. She is active! The ship will really float! Moreover, you can run it not only in the bathroom, but in a spring stream, lake or river. True, having sent him on a river journey, you will most likely have to say goodbye to him. After all, there are no control buttons to return it to the shore. But you can compose any, most incredible and heroic story about the adventures of a brave boat, and at the same time expand your fidget’s geographical knowledge.
How to make a boat from pine bark
Step 1
Before you start making this craft for boys, you need to go into the forest and find thick pine bark. The most best source This natural material for crafts is old, already dead trees, the bark of which is already falling off on its own or, at least, peeling off. Having chosen a sufficiently thick piece of bark, we plan it with a knife to a more or less even block.

Step 2
Take a sheet of paper (preferably checkered) slightly smaller in size than the resulting block. Let's use it to make a template for the future bark boat. Inside the template, draw an internal line at a distance of 0.5-0.7 cm, repeating the template. If you are making a boat with a very young master, then it is enough to make only the external template, and skip step 4 when working.
Step 3
Cut out the template along the outer line and transfer it onto the bark using a pencil or felt-tip pen. Then cut out the pattern along the inner line and also translate.

Step 4
Now let's start actually cutting out the boat from the bark. First, take out the middle along the inner marked line. The easiest way to proceed is this: we cut with a knife along the line of the pattern, and then we stick the knife next to the cut line and “break off” pieces of bark. In this case, the edge of our side turns out to be quite smooth.

Gradually remove the entire middle. This is what should happen.

Step 5
Now let's plan off the excess bark from the outside of our boat. It's practically ready.
For a more solid look and to finalize all the irregularities and flaws, we will sand the boat.

Step 6
Now you need to equip the boat with sails and a mast. To do this, plan out an even stick of suitable length and sharpen it at one end. You can use a toothpick or a wooden kebabs skewer for these purposes, depending on the size of the boat.
We tie two straight, short sticks to the mast. We'll get a mast with yards.

Step 7
Cut out a trapezoidal sail from a piece of paper. Let's put it on the mast.

Insert the pointed end of the mast into the bottom of the boat.


The pine bark ship is ready to sail!
***
Such a craft made from natural material can have many options. For example, you can vary the sail material. To make the sail less wet, you can rub a paper sheet with paraffin (candle) or multi-colored wax pencils. The sail can be made from thin polyethylene or from thin pine bark or birch bark.

A boat with pine bark sails.
You can do without a sail altogether and make a boat out of pine bark. Then, when making the body, you must not forget to plan the can seat. You can insert it as a separate part. It is easy to make oars from pine bark and sticks, and a lifebuoy tied with threads will give the boat additional decorativeness.

A boat made of pine bark is a craft for boys from 10 years old.
But this is a more complex boat, with more details. It is suitable for experienced carvers. Such a model, of course, will also float, but its purpose is rather decorative. Such a bark ship is a wonderful souvenir of a summer vacation in nature.

A ship made of pine bark is a craft for boys from 12 years old.
If you don’t have pine bark on hand, you can make or.
Today we want to talk about how, using the bark from our trees, you can create (wall still lifes and panels; first of all, we want you to remember well - you should never use the bark of living, growing trees.
You can only work with the bark of fallen, dried or cut down trees. There are species of trees and shrubs that from time to time shed outer part its bark. For example, birch in winter or hawthorn.
Bark from a fallen perennial birch tree - too good material. Both sides are used - both the front and the morning. Such bark can be a landscape for a still life or a panel, from it you can make a cloudy sky in a mosaic, and by combining both sides in one panel - and the whole landscape, from the thickened parts of the bark you get excellent mountains with peaks covered with snow. In a pine forest, it is not difficult to find dead wood, near which there is fallen bark on the ground, eaten away by a bark beetle. such pieces can easily be turned into cliffs, mountains, cliffs or the ruins of an old castle.
How is a bark landscape made?
First of all, you need to choose a base. It can be a board, plywood or sewn cardboard. The wooden base itself can serve as a background, and veneer (veneer) needs to be glued onto the cardboard. Each type of wood has its own veneer color and its own unique pattern. Therefore, for the sky, veneer of lighter tones is selected, for land - darker tones, for the sea it can be with stripes reminiscent of waves. If you want to depict winter, then make snow from white, for example, birch veneer, and the sky from veneer in darker tones.
It is very important that the joint of the pieces of veneer in the picture is not noticeable. Therefore, two pieces are folded so that one rests on the other (see Fig. 1), and both of them are cut at the same time.

When you have the entire background prepared and all the pieces are carefully adjusted to each other, start gluing them onto the base. Select glue: carpentry PVA or No. 83, lubricate the background and base with it, connect them together, cover flat board and put a load of 15-20 kg on it. If you have a clamp, then clamp it with a clamp and leave it for a day to dry. Glue the details onto the finished background. Start with background details and gradually move to foreground, close-up details.
Look at the picture (see Fig. 2). In the distance you see mountains, a lake in front of them and a pine tree in the foreground. To get such a picture, draw a faint outline of the drawing with a pencil. Weak because the shape of the pieces of your bark itself will tell you the contours of the mountains and, perhaps, they will bear little resemblance to your drawing. For distant mountains, use light-colored tree bark (such as birch or aspen), darker for closer ones, and the darkest for the foreground. In our example, in the very foreground you see the trunk of a pine tree. Make it from thinner nipple bark, for example, from thin scales that the tree periodically sheds. To depict tree crowns, you can stick on pieces of finely chopped bark without highlighting the details.

In the picture below on the left you see a sea with waves. This impression is created by veneer with pronounced stripes. The sailboat is made from birch bark, and the rock in the foreground is made from a piece of bark. If you want to depict birch trees, then first be sure to draw a birch trunk on a sheet of paper (putting a carbon copy so that reverse side the drawing was visible and gradually stick on pieces of birch bark.
To prevent the joints from being visible, glue a thin peel of bark over them. Then cut out the outline of the trunk with scissors and glue on the dark spots characteristic of a birch trunk: at the butt (base) it is almost completely, and the higher up to the top, the less frequent. Try to keep the spots as natural as possible. To do this, try to draw a birch tree from life and remember the location of these spots.
The material for them can be a dark dried leaf or dark part bark. For birch branches, you can take small branches of dried bushes. The Christmas tree is easy to cut from a dry dark sheet. To prevent it from being fragile, lubricate it on the back side with glue in advance. From well-cleaned birch bark with a smooth surface, you can also make flowers for the winter dry season. decorative bouquet or for panels on a wooden or linen background.
For the core of such a flower, take a pine cone, crown or any dry thorn. Petals of any shape are cut out of birch bark and inserted with glue between the scales of a cone, thorns, or into slits made in the crown. It’s good if you leave the pine cone, thorn or crown on the natural stem, but it won’t be a big deal if you glue a dry branch to them.
The picture below (see Fig. 2) shows a panel made from scraps of veneer and bark. On a rustic board pre-tinted with potassium permanganate or stain (darker at the bottom), glue flowers and leaves cut from scraps of bark; for the stems, dried stems of climbing plants (loaches and grape leaves). In a pine forest on the ground you can find thin flakes of light brown pine bark in the most bizarre shapes. Take a close look at them and you will see silhouettes of people, animals and fantastic animals. By selecting and gluing these pieces, it is not difficult to create interesting genre scenes from them. The basis for these figures can be wood or rough canvas.
Bark goes well with a wooden base and does not go well with paper and cardboard, so when working with bark you should always use wood as a base, not paper. If finished work If you want to glaze, then be sure to glue thin strips of cardboard or sticks along the edges of the picture, then the glass, resting against the protruding parts of the picture, made of thick bark, will not be crushed.
Glue two loops on the back side so that the picture can be hung on them. These loops should be sealed on top with a strip of cardboard almost as long as the width of the picture and 3-4 cm wide (Fig. 1. (2)). I would like to say a few words about bark processing.
When you bring bark from the forest, be sure to boil it in water for 15-20 minutes to kill the larvae, which are always abundant in dried wood. If this is not done, they will ruin your work and damage household items. Place the boiled bark on newspaper, and to prevent it from warping when it dries, cover it with a smooth board and place a weight of 18-13 kg on top.
Bark coconut tree – natural material. There is no artificial replacement for it, since it is simply not needed. Palm bark looks great and can be stored for a long time if it has been properly processed. You can buy palm bark at any florist shop. You can buy coconut palm bark inexpensively here...
What can be made from coconut tree bark:
- Crafts made from palm bark. Any base (for example, a foam ring or a figurine, or a cone) can be covered with palm bark and get original craft into your interior.
- Palm bark paintings. Stretch coconut tree bark onto a wooden or metal frame, secure it, and create your masterpieces!
- Gift wrapping using palm bark. You can line the bottom of the package with bark or wrap the entire gift - whatever you like. Use a stapler and jute rope.
- The basis for a photo shoot. Just lay the bark on the table and take pictures. A very beautiful and contrasting background for photos of various objects, especially those made by yourself.
- Palm bark topiary. Wrap the foam ball in bark and secure it with a stapler. To secure the fastening, you can wrap the ball with jute rope. You can attach any decorative elements to the bark - flowers, berries, buttons, small cones and beads. Coffee topiaries on this basis look beautiful. The "hairy" part of the bark can also be used as an element decorative tree– you can glue it to the leg or decorate the pot with it.
- Palm bark flower pots. You just need to wrap the pot and secure the bark to it. Plants look very beautiful in such flowerpots. Both live and artificial.
- Hanging planters made of palm bark. You've probably seen it in the store hanging planters from palm bark. But you can make them yourself. To do this, you will need a metal frame - a base for a flowerpot, wire and palm bark. Read more in our articles.
- Artificial palm trees made from natural palm bark. Palm bark is widely used in the production of artificial palm trees. At the same time, artificial plants look very natural. You can make a palm tree with your own hands, or you can buy a ready-made one in the Sosedka online store.
- Coaster made from coconut palm bark. You don't even have to do anything. Just a sheet of bark will serve as a stand for you. But if you want, you can cut a stand of a certain shape from the bark.
- Palm bark rug. Having cut strips of a certain size from the bark, you need to intertwine them together and fasten them together. Such rugs can be placed on the threshold of the house or on the floor in a summer gazebo.
These, of course, are not all the ways to use coconut palm bark. There are many more of them. If you have any ideas, write to us in the comments or send your work to the competition. Send us interesting master classes on making something from coconut palm bark for evaluation. We buy master classes and pay with money, not coupons or merchandise!
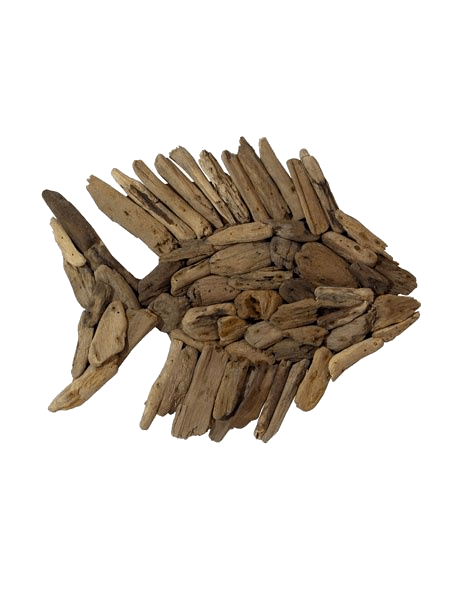
Tree bark is an excellent tool for creating your homemade products - this excellent material. There are as many types of bark as there are tree species on earth – there is a huge variety. And in coloring, and in strength, and in the structure of layers, and in texture - just look, imagine and create. The bark can be used not only for stands for large works, but also for cutting out figures of animals, birds, and fish. Thin birch bark - birch bark - will emphasize the picturesqueness of homemade products.
It is necessary to collect bark only from dried or cut down trees. Do not undress under any circumstances. The bark should be stored in dry rooms. Pine bark delaminates when it dries, so before working with it it must be coated with wood glue, and when the glue dries, varnish the top and dry well. from pine bark, which you can easily make.
Animals made from tree bark
Make a crane stand from a piece of bark. Then cut the body out of the bark for the crane and for the baby crane into. Take the hairpins from your mother, bend them a little and stick them into the stand, place the body on top. Make the birds' necks from pins, their heads from bark, and cut their noses from goose feathers. 
If you make cranes, then it will not be difficult for you to make other animals from bark, such as a rooster and a chicken.  Even a camel or an elephant can be made from bark.
Hunter and dog, tree bark pug
For the hunter’s arms and legs and for the paws, you need to select curved twigs. The little pug, who also went into the forest with the hunter, is carved from two pieces of bark. Pug paws are made from matches. 
Trees and bark mushrooms
Thin bark makes excellent trees. Under trees made of bark. From this magnificent and pliable material you can make excellent models of a forest or garden. 

Gardener and shepherdess with geese
The gardener himself is made of bark, and his pitchforks and rakes are made of twigs. The gardener's wheelbarrow is also made of bark, and its handles are made of wire. Shepherdesses and geese can be made from bark. The shepherdess holds a real small twig in her hands. 


Sailing boat, gate, car and mill
The sail can be made from paper or a piece of thin fabric. These crafts are carved from a thick piece of bark. The wheels and steering wheel of a car, as well as the wings of a mill, can be made from cardboard. 

Croquet on a tree bark table
The hammer is made from a piece of bark placed on a match; do the same with the stands from which they begin to drive the ball. The gate is made from two circles of cork and thin wire. The figure shows a plan of how to place the goal for the game on the table. 
Bark chess
You can also make excellent ones from the bark. The picture shows all the figures that need to be made. King (with 4 circles), Queen (with 3 circles) - make them two figures; elephant (with 2 circles) - they need to be made into four figures; pawn (with 1 circle) - sixteen of them need to be made, knight and tour - four pieces each. One set must be painted white or red; the other set should be left unpainted. 
Tree bark for chairs and stools
The basis of the furniture is thick bark. Legs and backrest bars are possible. 
 Making pancakes with sausage is an easy and rewarding task
 I dreamed of a squirrel: different interpretations from dream books
 The best games about knights Strategy with large-scale battles on PC
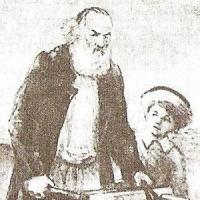 Nekrasov's poem "Grandfather": analysis and characteristics of the work
 Why do you dream about a house fire?
 Red fish in the oven - the best recipes for simple and original dishes
 How to solve irrational equations