Laying tiles on the wall. How to lay tiles in the bathroom. Technology for preparing walls for laying.
1 Required Tools
To prepare for laying tiles you will need:
For laying tiles you will need:
2 Glue
The choice of the “right” adhesive is significantly influenced by the type of surface on which the tiles will be laid in the future:
3 Necessary materials
Primer emulsion
The primer is the basis of finishing work. The primer emulsion is applied to the prepared substrate with a brush or roller before applying the leveling mortar or adhesive. Penetrating into the porous surface, it strengthens it, creates a protective layer between the base and the adhesive, improves the adhesion of the tiles and the base.
Enhancers
They are added to the adhesive to improve the adhesion, elasticity and water resistance of the adhesive. Facilitate leveling of the base.
Adhesives
Two main types are produced: thin and thick-layer. The former are used on smoothly plastered walls, while the latter can be used to glue tiles even on uneven surfaces.
Putty mass
Allows you to fill the damage and level the surface of the wall.
Grout for joints
Fills the joints between tiles, increasing the aesthetic and user qualities of the tile.
4 Foundation preparation
Tiles must always be laid on a dry, even, clean, grease-free, dust-free substrate.
| If the substrate is porous, it is necessary to use a primer emulsion that increases adhesion. | 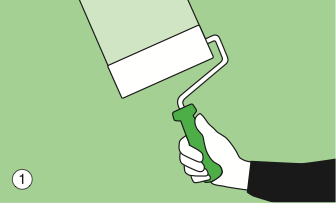
|
| To eliminate irregularities, it is necessary to use a putty mixture. | 
|
| Very smooth bases must be roughened by hitting in some places with a sharp tool or by walking along the surface with a grinder. Then apply a layer of primer emulsion. | 
|
5 Determining the position of tiles
| With the help of a measuring cord and level, mark a line parallel to the floor at a distance equal to the height of one tile and the seam. | 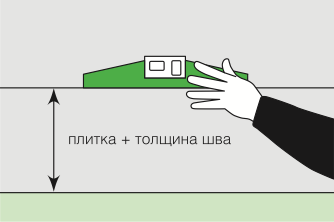
|
|
If you only intend to tile on the bottom of the wall, you should plan a row of whole tiles on top (remember to add the width of the joints). A test laying of tiles should be carried out, thanks to which you can avoid unnecessary cutting of tiles and choose the most aesthetic solution. If the floor is sloping, cut the bottom tiles to match the slope of the floor. At the same time mark a horizontal line on the wall. | 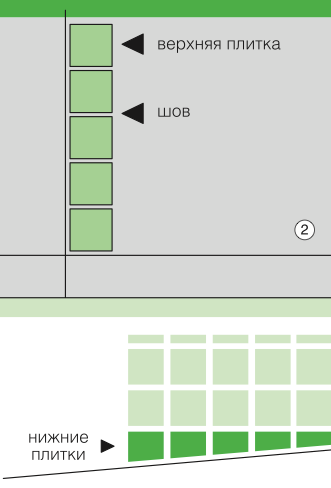
|
| Attach to the wall for a while the bar under the horizontal line. It will support the first row of tiles. | 
|
6 Laying tiles
|
Apply glue with a spatula on a surface of approximately 1m2. Then stretch along it with a notched trowel so that horizontal grooves remain. | 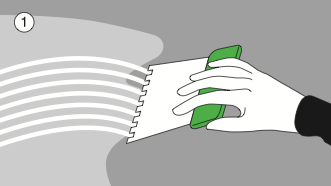
|
| Press the first tile in the corner whose sides are the plank and the vertical line. Then glue the next tile, turning it slightly until it lies in the desired position. In the same way, lay three or four rows of the remaining tiles until they cover the entire surface on which the adhesive is applied. | 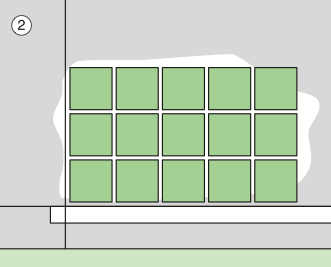
|
|
Install spacers between the tiles so that the seams separating them are of the same width. Remove excess adhesive between tiles as they are laid. | 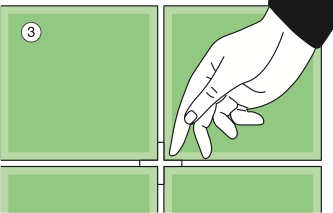
|
| Periodically check whether the tiles are evenly laid using a measuring stick and level. Press down protruding tiles by lightly hitting them with a rubber mallet or pressing them with a wooden lath (the lath should cover several tiles at once). | 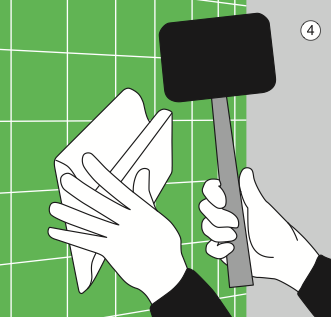
|
|
Apply another batch of glue and continue working. Finish the work by laying the bottom row of tiles, before that, first remove the horizontal bar. Spacer crosses must be removed before the glue dries. | 
|
7 Reveals / seams
Before the mortar hardens, it should be wiped off the surface of the tiles with a damp sponge. In order to fill the seams, it is enough to wipe them with a sponge.
ADVICE: If glazed tiles are laid in damp rooms, an improving additive should be added to the grouting solution. This will avoid cracks in the seams after the grout dries.
8 Cutting
|
SIMPLE CUTTING Simple cutting of tiles is carried out using a special device - a tile cutter. | 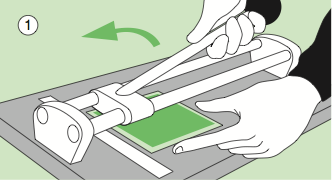
|
| It is necessary to cut those tiles that are laid near the floor or wall. The outer corner should always be covered with whole tiles, as this gives the best visual effect. | 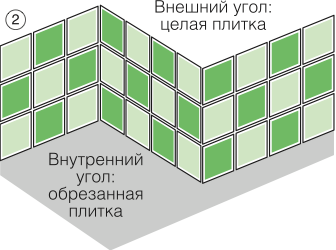
|
| To protect and decorate external corners, special corner tiles are used - corners, or PVC corner profiles, installed under the tile. | 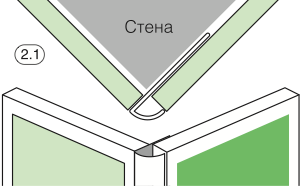
|
ROUND CUTTING:
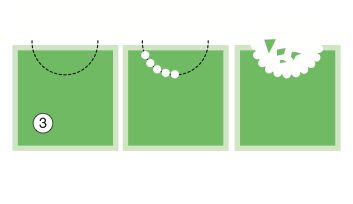
Stick adhesive tape on the place intended for cutting so as not to scratch the surface. Using an appropriate drill (pobedite or tungsten), drill holes in the tile at the  border of the indicated circle. Then, with ceramic tongs, carefully break out the unnecessary part of the tile.
Rough edges cut and sanded.
9 Additional Tips
When buying, you should make sure that all tiles are from the same batch, that is, they have the same caliber and color shade (identical to the code in accordance with the parameters indicated on the package).
When laying, tiles should be taken from different packages to avoid color differences.
The color of the fugue can match the color of the tile or be in contrast with it. You can also mix the grout mix with the right pigment before adding the water.
Tiles should be cleaned with water and a non-greasy chemical that does not cause abrasion of the surface. After treatment, the tiles should be washed with clean water.
When laying tiles, sanitary facilities should be protected from getting glue and mortar on them.
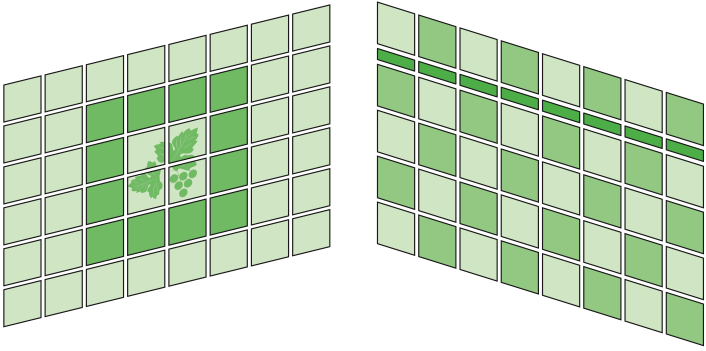
10 Tiles with a pattern, decorative elements
Patterned tiles and decorative elements make ceramic tiled walls more interesting and attractive. Decor tiles are often used as a separate insert. With proper placement, you can achieve a wonderful visual effect. Often, manufacturers create decors from several elements, from which you can lay out a whole panel or mosaic.
 Masonry mortars for brick kilns
 Why do the windows fog up in the apartment
 Construction and schemes of brick ovens
 How to lay paving slabs: tips and tricks
 How to drill bathroom tiles
 Monolithic slab on coarse soil
 Which electric heater is economical