Construction and schemes of brick ovens
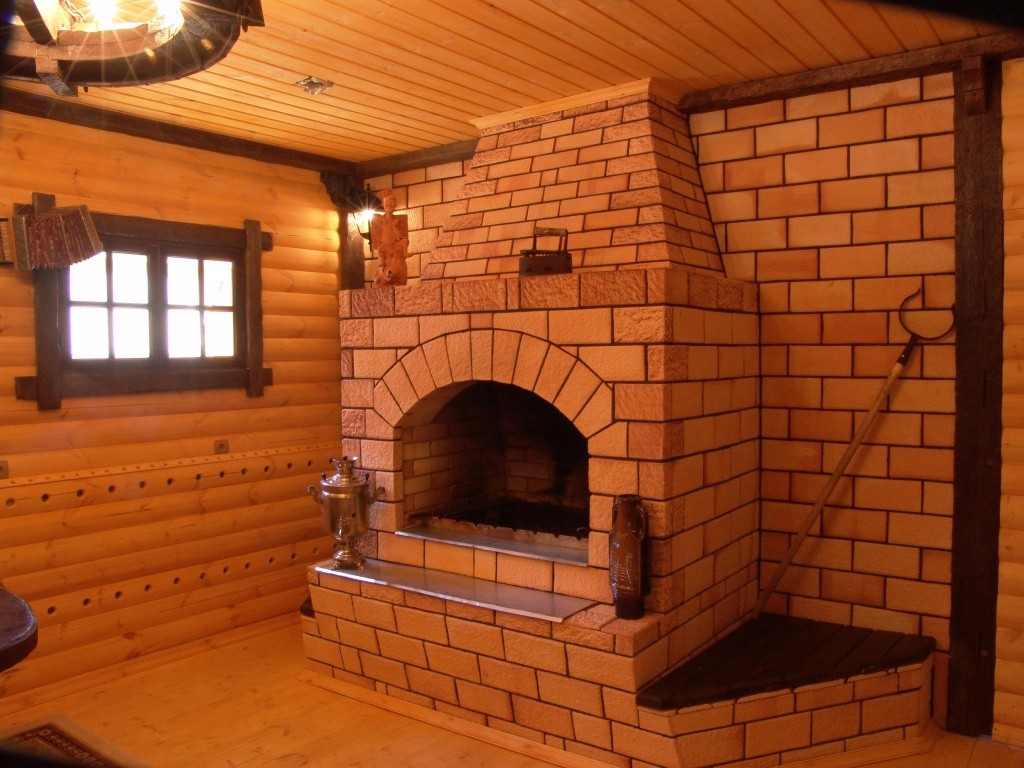
The choice of stove depends on the functional, aesthetic needs of the customer and the size of the house.
Furnace heating enjoys constant popularity. The most common are brick ovens. There are many types of them. The choice of the type of brick oven depends on many factors: its functions, the size of the house, and so on. Below is a diagram of the masonry of one of the simplest options for a heating device.
Materials for building a furnace
Sterzhnev from Shkolnik's book was taken as the basis for the construction.
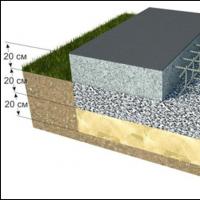
PTOU-2500 is quite simple to build. It is able to heat a small room or adjoining rooms well. The furnace is placed on the foundation. If the foundation in your house is a reinforced concrete monolith, then you will not need any additional actions. Otherwise, you will have to pour a separate concrete slab.
So, according to the scheme for building a furnace, you will need:
- ceramic brick (about 250 pieces);
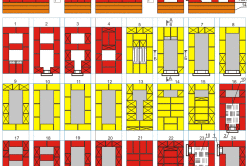
Scheme of assembling the PTOU-2500 furnace.
- refractory brick (110 pieces);
- ordinary clay (0.2 cubic meters);
- fireclay clay (12 kg);
- sand (0.2 cubic meters);
- grate (250x250 mm);
- furnace door (250x205 mm);
- blower door (130x140 mm);
- cleaning doors 2 pcs. (130x140 mm);
- smoke damper 130x130 mm;
- pre-furnace sheet (sheet steel 500x700 mm);
- roofing material for waterproofing (1.2 sq.m).
Before starting the construction of a brick oven, it is necessary to determine where the center of the future chimney will be located. It should be located at a sufficient distance from surfaces that ignite easily. In addition, the pipe should not intersect with rafters and lags so that they do not have to be cut. Even if you have a ready-made scheme for building a furnace, many stove masters advise redrawing it by hand. This will help you think through and understand the process of building a furnace. In addition, if there are any inaccuracies in the diagram, you can find and correct them.
Furnace device
The stove itself consists of four main parts, excluding the chimney pipe:pavement,
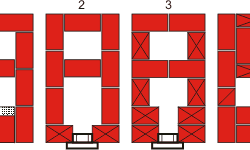
Ordering the ash pan. C 1 to 4 row.
ash pan, firebox and convector. The lining is two continuous rows. Any brick is suitable for her. The ashpit and the fire chamber have a laying in 4 rows. For it, only full-bodied bricks are used. The firebox is placed in 11 rows of fireclay bricks. The convector also consists of solid bricks. It has 17 rows. The connecting element of brickwork is clay. You can dig it up and mix it yourself, but it's much easier to buy a ready-made mixture in a store.
To get started you need. So, to build a furnace, you will need about 200 pcs. ordinary brick and 80 fireclay: 28 for lining (V.), 31 for an ash pan (Z.), 80 for a firebox (T.), about 141 for a convector (K.).
You need 2 whole bricks with a bevel on W. and 4 on T.
K-whose ¾ in length - 12 Z., 27 T., approximately 48 K.
K-whose ¾ in width - 2 Z. and 2 T.
K-whose ½ - 10 T., 23 K.
K-whose ¾ in length with a bevel - 2 T.
K-whose ½ in width - 2 T. and 4 K.
K-whose ¼ - 2 K.
It is cut with a grinder with a diamond blade. The thickness of the joints in brickwork should be 3-4 mm. It should be borne in mind that cheap brick can have different sizes, so be careful when laying it. In order to keep the rows horizontal, stretch several ropes from the ceiling to the floor. This can be done, for example, at the corners of the oven. You need to pull the ropes with a plumb line.
Building a brick oven
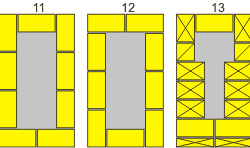
We can distinguish the following algorithm for the construction of brick heating furnaces. Before starting laying, a furnace scheme is taken. Bricks need to be laid out on it and write numbers on them. This will help you avoid mistakes when laying them. Then soak them in water. Ten minutes will be enough. The previous row should be wiped with a damp washcloth. Apply mortar and lay bricks from the edge where the furnace door will be. The outer ones are placed first, and then the inner ones. Check the levelness of the masonry with a level.
The lining is laid first, and the ash pan on it. Monitor the quality of the laying of the first row of bricks, as it is very important for the correct laying of the remaining rows. Two bricks in this row have cut corners. A blower door is inserted into the second row. It is fastened with a wire, which is threaded into special ears and embedded in the masonry. The third row consists of several bricks ¾ in length. The fourth blocks the camera. This is done using two ordinary bricks and two ¾ bricks; in width.
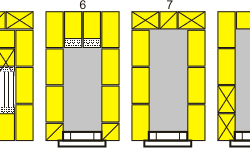
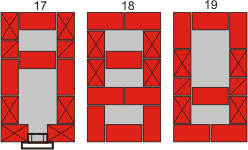
Next, proceed to laying the firebox. The firebox occupies from the fifth to the fifteenth rows. When laying it is worth using a special mixture for refractory bricks. In the fifth row, a grate is arranged. For him, a semblance of a ramp is created. In the sixth row, a furnace door is installed according to the same principle as the ash pan door. But it should be borne in mind that it is more difficult to install a furnace door due to its size and weight. The only feature of the seventh and eighth row is the same door. 9-12 p. are the walls of the combustion chamber. 13-14 p. make up the vault of the firebox, and the fifteenth completes it.
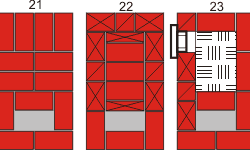
The convector consists of channels through which hot air passes. For its construction, ordinary ceramic bricks are used. In the 16th row, a cleaning door is installed, it is identical to the blower. 17-20 p. are a system of channels. Their inner surface must be smooth.
traditional chimney
Traditionally, such heating stoves have brick chimneys, but
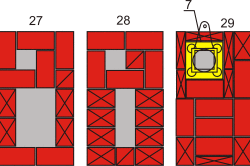
it is more expedient to make a chimney from a metal pipe, since its installation is much easier than laying a classic one. In addition, a metal chimney is much lighter, it is not covered with soot as much as a brick one. Taking into account the dimensions of the oven, the diameter of the pipe should be about 150 mm. For such furnaces, it is usually recommended to use two valves, but this scheme assumes one valve. Accordingly, the 26th row, described in the Shkolnik's book, is removed from the design. Subsequent numbering of rows is also shifted.
On the 21st and 22nd rows, a jumper is laid out. 23 row is placed in the same way as 16, but the second cleaning door is installed on the side of the furnace. Rows 24 and 25 correspond to rows 17 and 18. From 26 (according to the new numbering) to 28 rows, an outlet for the chimney is formed. It should measure approximately 130x130 mm. For 29-30 p. the oven is closed. The chimney pipe itself is installed with a valve.
The pipe and valve can be connected into one block using . As a rule, most of them can be used to create parts for furnaces. For convenience, make the first knee of the chimney about 0.5-1 m long. 31 row completes the stove. Coat the slots near the chimney with clay mortar, and the joints of the chimney segments with pipe sealant. The method of bringing the chimney to the roof depends on the material of the floors and the roof itself in the house. The oven should dry for about two weeks.
 Masonry mortars for brick kilns
 Why do the windows fog up in the apartment
 Construction and schemes of brick ovens
 How to lay paving slabs: tips and tricks
 How to drill bathroom tiles
 Monolithic slab on coarse soil
 Which electric heater is economical