DIY garden paths at low cost: interesting and easy-to-perform ideas for your site
Neat, gracefully winding between green spaces and landscape decor, they are an essential attribute of any garden. So, if you want your site to be truly well-groomed and complete, by no means neglect the paths. Fortunately, for their arrangement you do not need to spend fabulous sums and involve professional designers - you can make beautiful paths with your own hands, seriously saving both on materials and on work. How? There are many answers to this question, because there are a huge number of types of garden paths that can be laid at low cost. Next, we offer you instructions for the most popular options with accompanying photos and videos - after reading them, you will definitely be able to effectively ennoble your site.
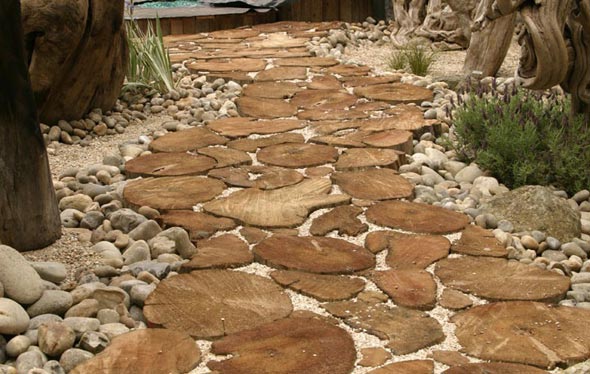
The original path from saw cuts of wood
Wooden round logs are a very simple, but original material for garden paths. Raw materials for them can be found at every site - for sure, there are old trees everywhere, which it would be time to replace with new seedlings. It is advisable to use larch or oak - they are the most resistant to external influences, which means they can boast a long service life. The path of saw cuts is made according to the following scheme:
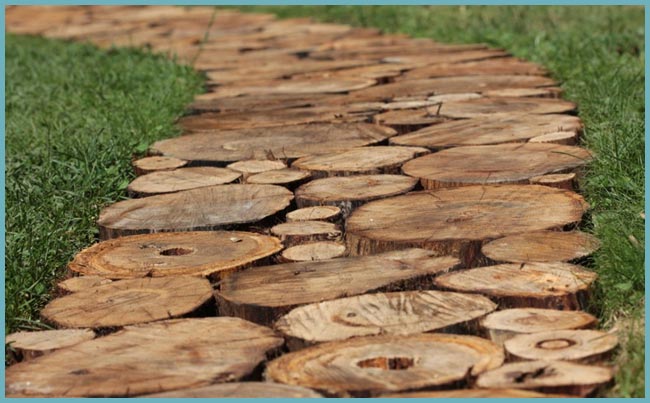
Advice. In order to protect the path from moisture and increase its durability, equip the simplest drainage - pour a layer of fine gravel between the sand cushion and the cuts.
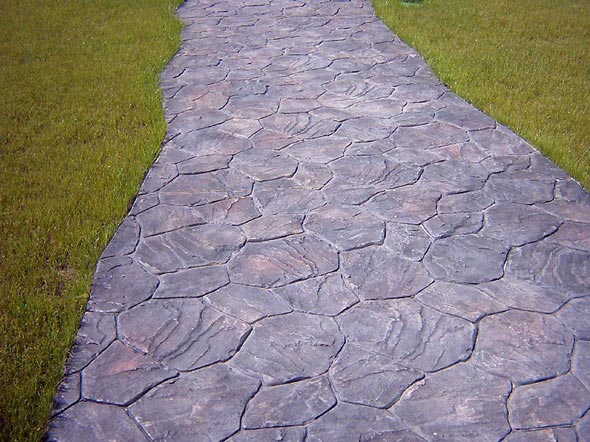
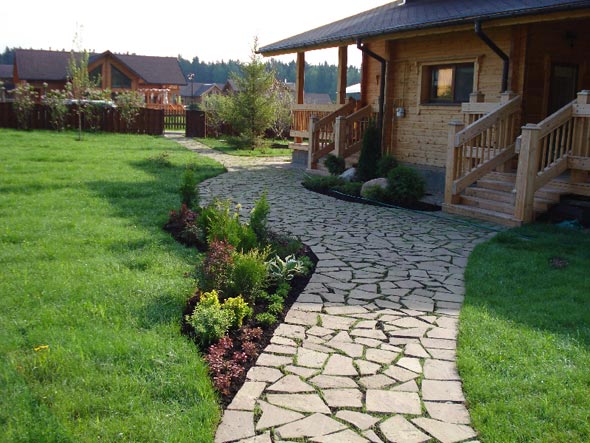
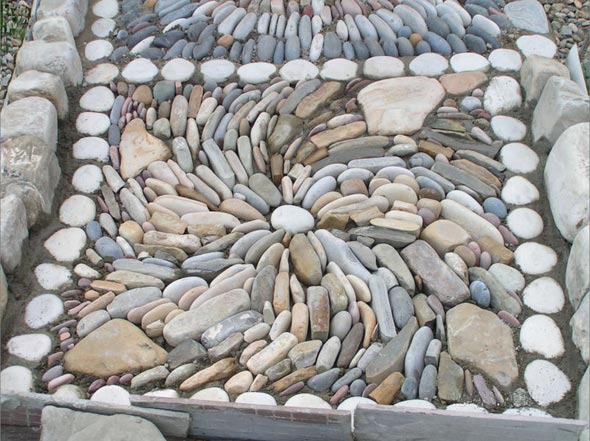
Durable stone paths
One of the most durable garden path options is natural stone. Here you can use cobblestone or but - they are equally durable. The path is laid out as follows:
- Mark out the garden path.
- From the area where the path is planned to be laid, remove the top layer of the drain. The depth of this layer should be 7-10 cm more than the height of the largest stone prepared for the path.
- Fill the resulting trench with a 10 cm layer of sand, carefully level it and compact it.
- Alternately lay the stones on the sand cushion, pressing them firmly into the base. The distance between small stones should be no more than 2-3 cm, and between large ones - up to 8-10 cm.
- Carefully fill the remaining gaps with cement mortar. When the track sets, fill the seams with earth or fine sand to make them look more natural.
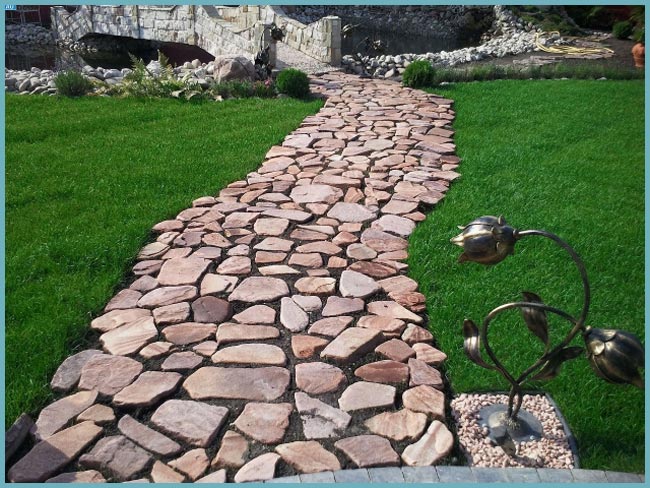
Stone garden path
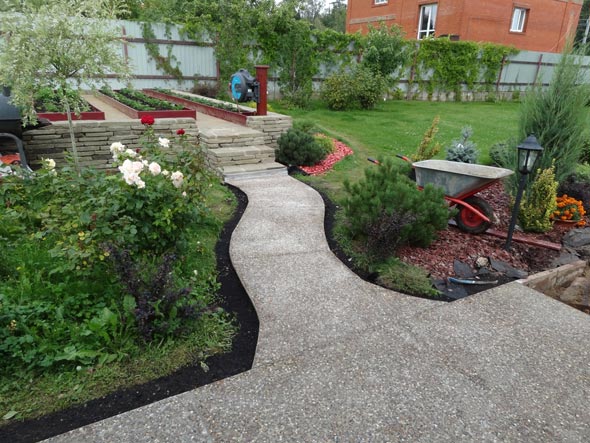
Classic concrete paths in the country
Concrete is a traditional material for laying paths, which is always popular due to its low cost and ease of use. Everyone can definitely make a cast track:
- Mark the boundaries of the path - drive in pegs along its contour and stretch the wire between them.
- Within the marked contours, dig a small trench - up to 30 cm deep.
- Lay on the bottom of the base a layer of gravel 5 cm and the same layer of sand. Seal the resulting pillow.
- Cover the base with a chain-link or any other thin metal mesh.
- Install lumber formwork along the perimeter of the future track.
- Prepare a cement mortar: 1 part dry cement, 1.5 parts sand, 2 parts gravel and 1 part water.
- Pour the cent and evenly, with vibrating movements, using a spatula, distribute the composition over the entire area of \u200b\u200bthe track. During installation, pierce the mixture with a rod to prevent the formation of voids.
- Using the rule, finish the alignment of the path and cover it with polyethylene.
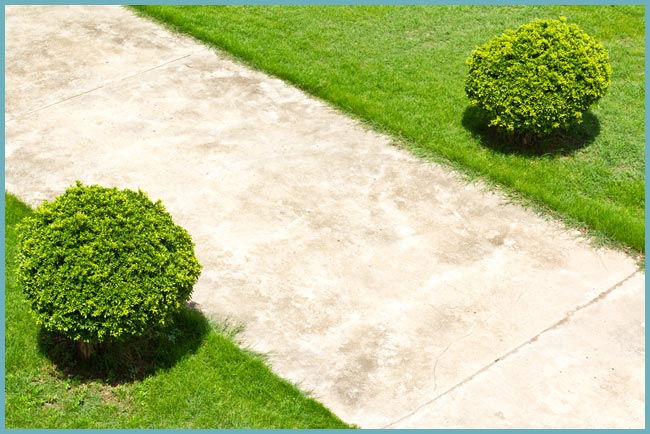
concrete walkway
In 3-4 days the track will be ready. During this time, remember to gently moisten it with water to protect the concrete from cracking and give it maximum strength.
Advice. To make the path more interesting, even before the concrete mixture finally sets, “drown” various decorative pebbles, glass or shells in it.
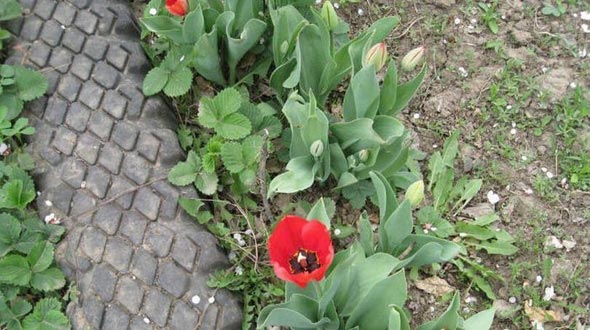
Budget garden paths made of tires
They have long been widely used in summer cottages: they make flower beds, and now also garden paths. This trend is not surprising, given the performance characteristics of the material: tires are resistant to moisture and temperature extremes, easy to care for, do not slip and are durable. You can equip a garden path from them like this:
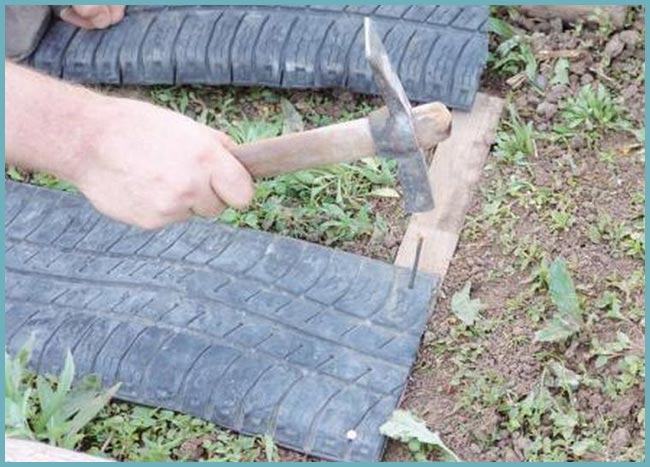
Tire garden path
- With a knife, divide the tires into two parts: rolling tracks and sidewalls. To make the knife easier to enter into the rubber, regularly lubricate it with oil or soap.
- Cut out the resulting rings of ribbon. Trim them to length and trim the edges.
- Take wide wooden boards and carefully fasten rubber bands on them with nails so that they completely cover the wood - there should be no empty gaps between the elements.
- Remove the top layer of soil with a depth of no more than 5 cm along the entire length of the future path and press wooden boards into the base. If desired, the rubber can be painted.
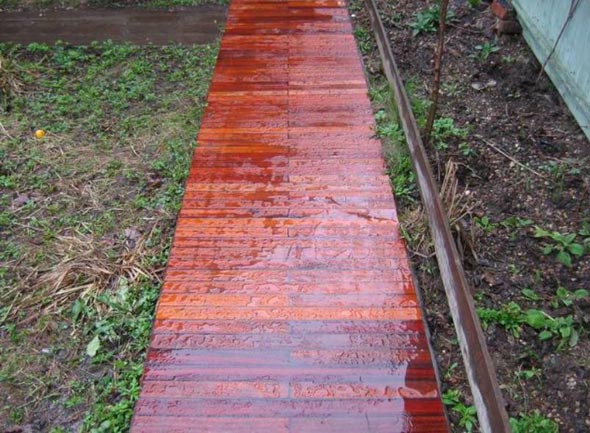
Country paths made of bricks
Another traditional material for garden paths is brick. It is recommended to use clinker products, as they are characterized by high resistance to various kinds of chemical and mechanical influences. It is important that the bricks are intact and without chips, otherwise the path will turn out not only unaesthetic, but also unsafe.
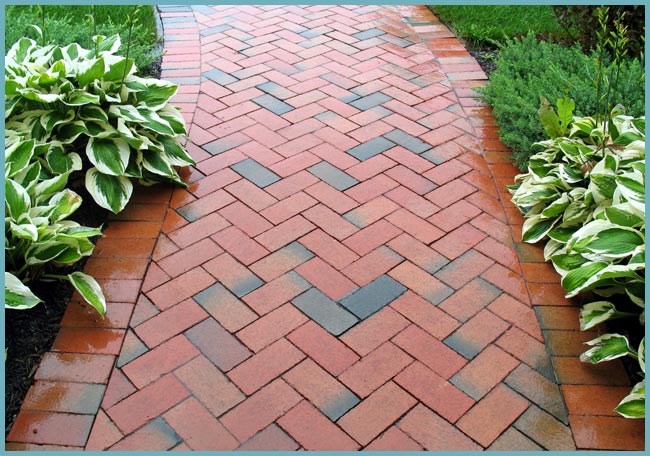
Brick garden path
The track is laid out like this:
- Mark the path: drive a peg around the perimeter and pull a rope between them.
- Dig a trench along the marked contour - up to 25-35 cm deep.
- Along the trench, lay the limiters from the bars or boards.
- The space between the limiters, that is, the "body" of the track, cover with a 10 cm layer of gravel and carefully compact it. Lay a layer of sand no more than 5 cm high on top.
- Remove the limiters and make curbs in their place: on both sides of the path, lay one row of bricks in the “on the ribs” position.
- Form the interior of the path with the bricks: lay them in their usual position, gently tapping with a wooden spatula or rubber mallet so that they sit.
Advice. Bricks do not have to be laid closely - to give the path a more original look, leave small gaps and fill them with pebbles. In addition, you can not even close the gaps - after a while, grass will sprout in them and decorate the path.
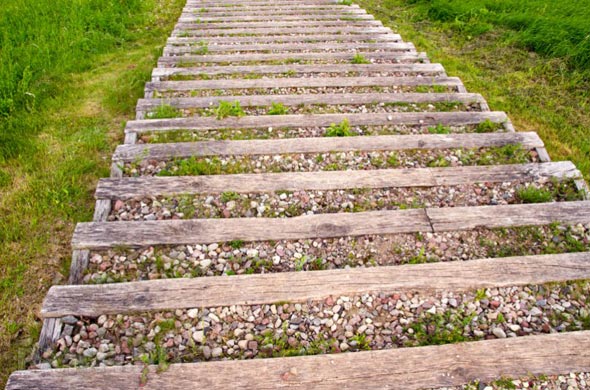
Variety of wooden walkways
Wood is one of the most fertile materials for making garden paths, as it can be used in completely different guises. Consider two common options: board paths and bark paths.
Site preparation in both cases looks the same:
- mark the path and remove the top soil - about 20 cm;
- lay geotextiles on the resulting trench;
- top with a 10 cm gravel layer.
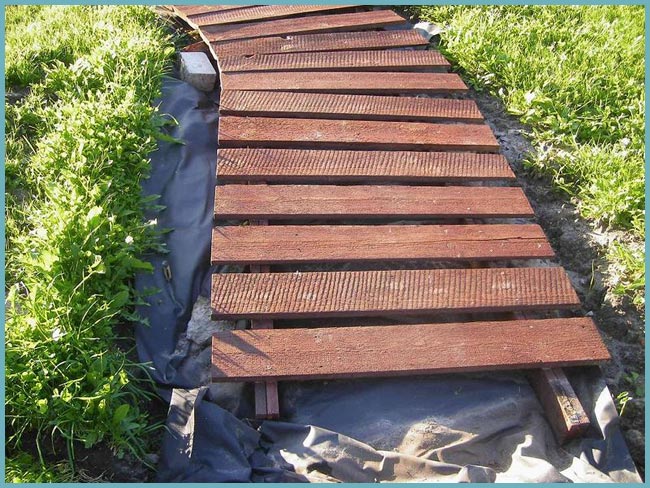
Boardwalk
Further technologies diverge. So, if you are making a path from boards, prepare the constituent elements: adjust them in length and width and treat with an antiseptic. If desired, you can give them a sinuous shape. Further along the edges and in the center of the trench along its entire length, install wooden supports and fix them with cement mortar. The final stage is to nail already prepared planks to the supports.
If you want to build a path from the bark, make sure that the material is durable - it should not crumble. Be sure to treat the bark with an antiseptic. Before fixing the material in the trench, lay a sand cushion on its base, and then drown the bark in it.
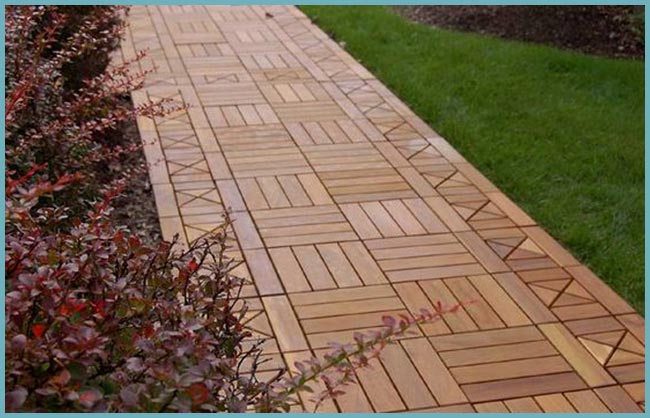
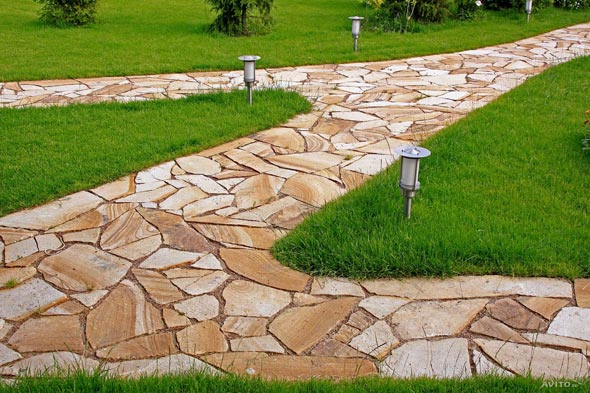
Tiled garden paths
Although tile cannot be called a very cheap material, it is still used very often for the manufacture of garden paths. There are several reasons for this: aesthetic appearance, good performance and ease of working with the material. The technology of laying a tile track will convince you of the latter:
Now you know many interesting ways to make a garden path with your own hands at low cost. Following simple instructions, you can implement any of the above options on your site, so feel free to get to work and discover new opportunities for ennobling the garden area.
Garden paths in the country: video
DIY garden paths: photo

(3
votes, average: 4,67
out of 5)
 Masonry mortars for brick kilns
 Why do the windows fog up in the apartment
 Construction and schemes of brick ovens
 How to lay paving slabs: tips and tricks
 How to drill bathroom tiles
 Monolithic slab on coarse soil
 Which electric heater is economical