DIY wooden gazebos: step by step instructions, drawings, photo options
– what else could be better? But what if it doesn't exist? How to create with your own hands? What amount to expect?
Part 1. Step by step instructions
How much to prepare? Approximate calculations
Depending on the area of the structure, an estimate is developed, the amount of costs is determined.
It is impossible to say clearly how much money you need, the price depends on the complexity of the product itself.
An example calculation might look like this:
| Material name | Volume | average cost |
| Bars measuring 10x10 | 1 m 3 | 6 000 |
| Board 20x10 | 1 m 3 | 5 500 |
| Board 10x5 | 1 m 3 | 5 000 |
| Board 15x2 | 1 m 3 | 5 700 |
| Nails | 1 kg | 110 |
| self-tapping screws | 1 kg | 115 |
| Cement | 100 kg | 2 000 |
There will be a lot of such a quantity of material, but using the table it is quite possible to find out the cost in advance.
Step-by-step sequence of actions
The first thing to do is to clear the place for construction from debris, cut down trees, and remove shrubs.
Upon completion of the preparatory work, the step-by-step algorithm of work looks like this:
- Compose a project. Determining the area of the gazebo, draw up a drawing or reduce time and use ready-made drawings and diagrams.
- Mark out area gazebos for the construction of their own hands. It is necessary to drive in pegs at the corners of the square and pull the rope, then check the diagonals (they should be equal).
- Make a foundation pit for the future foundation and install the formwork. You can use edged wood with a thickness of 2 cm.
- At the third stage foundation poured with concrete. With a large area of \u200b\u200bthe foundation, it is recommended to install beacons.
- On the finished foundation is laid ceramic plate(you can use another type of coating if desired). The main thing to remember here is that the coating is used all year round, it must be frost-resistant.
- There is no need to dig corner posts into the ground. For long-term operation of a gazebo in the country or elsewhere, it is enough install a support beam in the foundation. It is necessary to prepare U-shaped brackets with internal dimensions of 10 cm. Using dowels or anchors, the brackets are installed in the corners and in the middle of the structure.
- Produced installation of vertical supports using self-tapping screws to the U-shaped fasteners. 5 mm screws with a length of 3 cm are perfect. Particular attention is paid to the roof (will it be inclined or not).
- Installation of longitudinal bars carried out at a height of 10 cm and 90-1 meters from the floor. The size of the beam varies within 50x50 mm. Beams are used to install side components and must be reinforced with vertical or cross spacer bars.
- from within, at the top of the vertical racks, you need to make a gash 12 cm long and 3 cm deep. Rafters are mounted with M8x120 bolts. You can use a board with parameters 30x120 mm of the desired length.
- The next step will be carcass reinforcement. It is done with the help of transverse elements that are attached to the supporting pillars and rafters, then reinforced with corner bars.
- At the final stage crate boards are stuffed on the rafters.
It is worth remembering:
- at the end, you need to mount a wind board, otherwise the roof will look like it is not finished;
- the gazebo (namely wood) must be treated with protective equipment: varnish, paint. Provides a long service life.
Blueprints. Scheme
To understand how to create a future gazebo, you need a drawing. They look like this:
Drawing of a gazebo with a sloped roof.
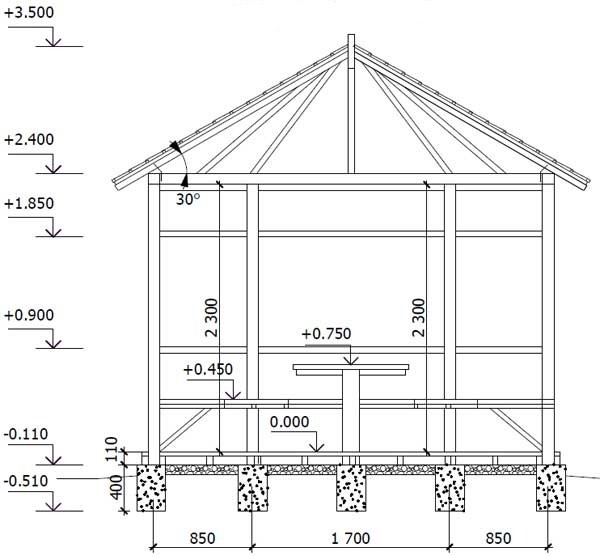
A drawing with a rounded and elevated roof.
One of them is used if desired.
Part 2. Do-it-yourself wooden lattice for a gazebo
To create a future wooden lattice, you need 4 bars with dimensions of 20x45 mm.
It is better to mount among themselves using a system of grooves and spikes. If there is no experience in carpentry, the bars are connected by the method: cut the ends at 45 degrees and connect with self-tapping screws or wood glue.
From the inside of the frame, you need to mount strips with a section of 10x20mm. You will need up to 8 planks per frame. They are able to visually close the ends of the wooden lattice.
Installation and assembly of a wooden lattice
At this stage, we proceed to the most basic - filling. Here it is necessary to prepare the slats. Placed arbitrarily, but at the same distance diagonally. It is necessary to maintain the exact distance between the existing rails. It's better to use a template.
Several manufactured rails are connected so that they intersect each other and fit snugly. The frames are connected to each other with nails or self-tapping screws.
If there is a desire to create a reinforced trellis for the future, then the frame is not required, since the lattice will be the frame, which gives strength and the necessary rigidity.
When choosing bars with large characteristics in size (20x40 mm or more), they are mounted immediately to the gazebo (frame).
After completing the assembly of the grille, it should be cleaned with sandpaper and treated with protective agents (paint, varnish) for long-term operation.
Part 3. Options in the photo
Depending on the experience in carpentry, you can build wooden gazebos in the country to your taste.
Consider the various options for gazebos in the photo.
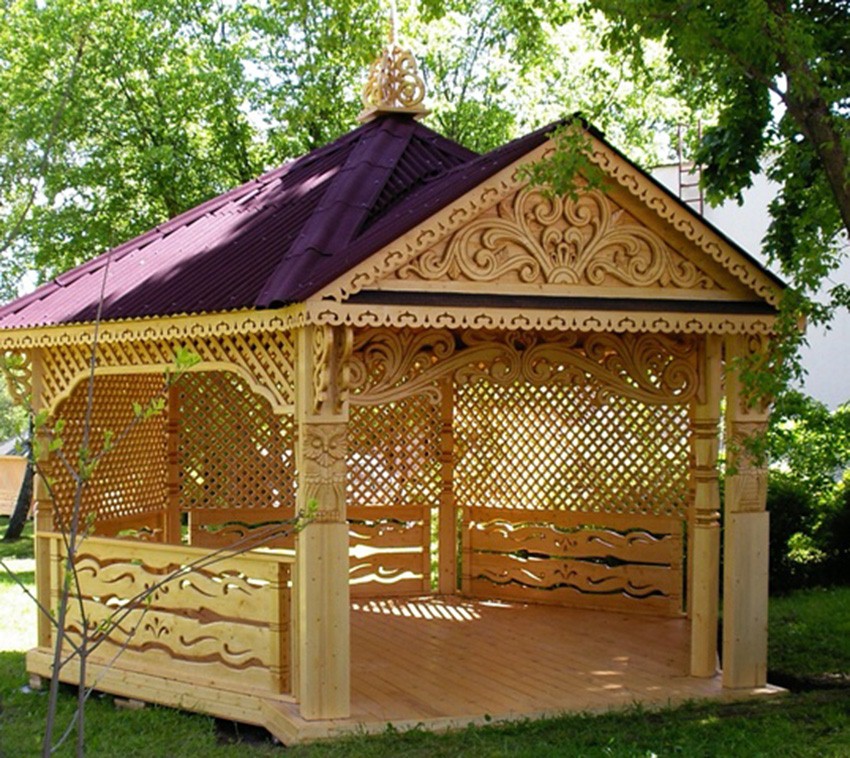
carved
Carved arbors are very rare, since the cost is the highest (an average of 200 thousand rubles). But if you have experience in wood carving, you can make such beauty:

The photo was taken on one of the forums on the Internet. It was posted by a user under the nickname arson. From his words it took 3 months to build the gazebo, 2.5 of them exclusively for woodcarving. Despite this, it turned out pretty well.
It is not easy to make such an option for a gazebo on your own. Here it is still unknown what will look more beautiful - the roof or the frame of the gazebo. In any case, it will be difficult to create it yourself, and if you make it to order, then you need to cook 400 thousand rubles.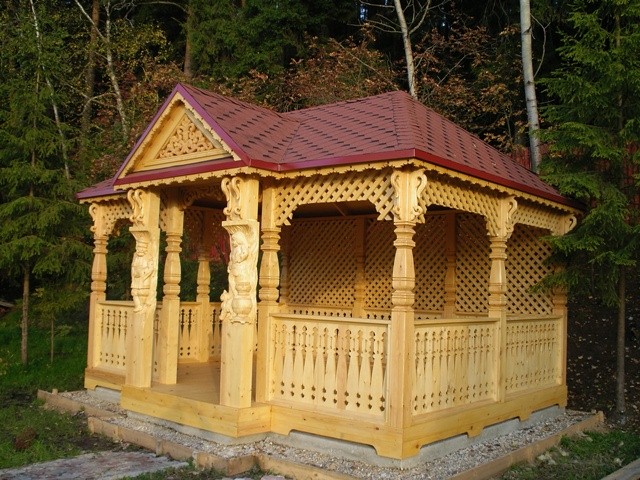
Such gazebos are popular with wealthy citizens, since the price can reach a million rubles. Every detail is thought out to the ground, there are no cons (except for the price). It is simply impossible to create such a creation on your own, without the necessary carpentry equipment and vast experience.
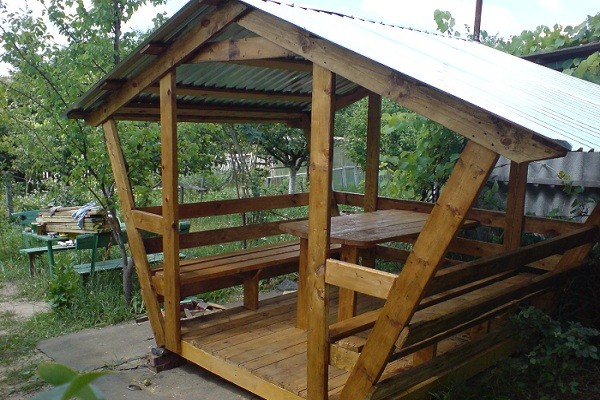
With barbecue
Arbor with barbecue - what could be better? Imagine it is raining outside, but inside there is fire and delicious aroma. What to do? The answer is simple when there is. How? Everything is not so difficult, the answer is in the photo: 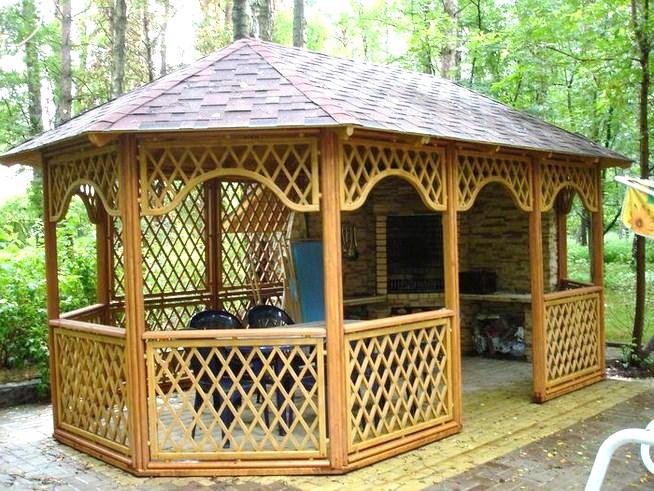
Creating this version of the gazebo, more attention is paid not to the frame itself, but to the barbecue, since the foundation is initially made, then the frame is mounted. Creating beauty on your own is quite simple. The main thing is the presence of desire. There is nothing supernatural in the design.
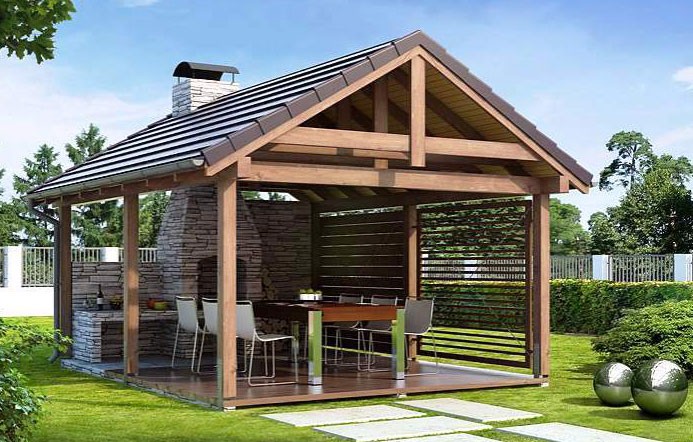
This version of the gazebo is suitable exclusively for summer use and in dry weather. It’s easy to build on your own, the main thing in the design is to form a foundation and build a brazier.
Above in the photo is an example of a standard garden gazebo made of wood by Russian summer residents or owners of private houses. It can be seen from the photo that the design creates a double impression. On the one hand, it has not been completed (it was possible to install more wooden gratings), and on the other hand, there is nothing superfluous, everything is simple and at the same time beautiful.
From stone and wood
Pavilions, which are created using stone and wood, fascinate with their beauty and have a spectacular appearance. 
When creating a country gazebo, you can initially lay out everything with ordinary bricks, and after cover with decorative stone and add a wooden structure. If you wish, you can make such designs of any shape and type, the main thing is to think through everything in advance.
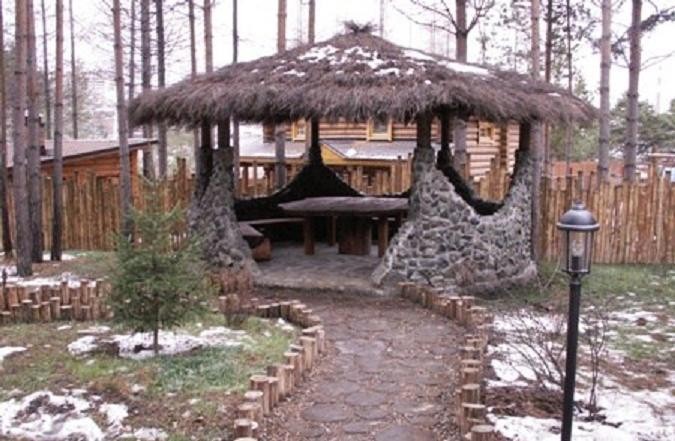
Such an option, as in the photo above, is very unusual. The main difficulty lies in the creation of window openings. The roof is made in this way: roofing material is initially laid, and on top dried reed. Antique effect on the face.
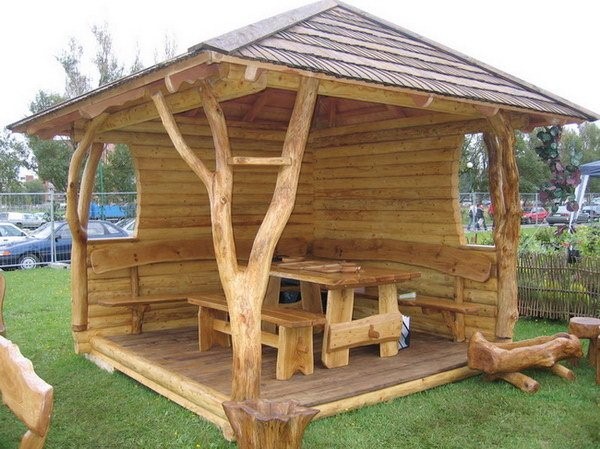
Beautiful and simple at the same time
Man-made buildings can look extraordinarily stylish, better than other polished custom-made products. And all thanks to the fact that there is individuality.
An ordinary board and tree branches peeled from the bark - what could be easier to create such a simple and at the same time beautiful gazebo? Such beauty is created in a maximum of 1 week, and immediately the structure will be spectacular.
To create such a gazebo, there is no need for a foundation, since the floor is located at a low height from the ground. Simple and unusual. When creating, standard boards were used, which were subsequently processed with paintwork material.
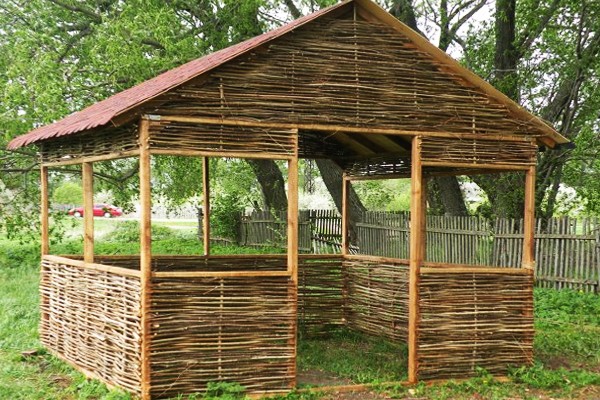
Unusual
Unusual gazebos can be created for 3 or more months. It depends how quickly you can find the necessary material. But nothing can stop such beauty as in the photo: 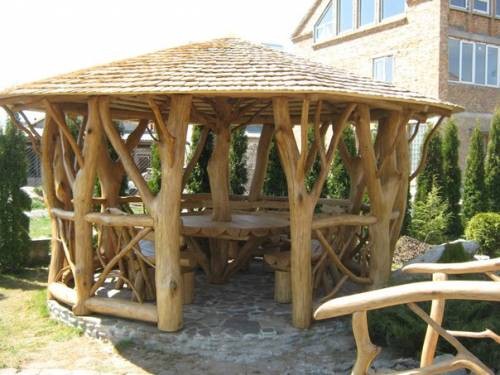
The difficulty lies in finding the necessary wood. Having found the right material, you can assemble the design within 1-2 days.
Original gazebo - do you agree? Creating such a design is difficult, but doable. The option was posted on one of the forums by a user with the nickname forymchanin. According to him, it took him 4 months but the view is breathtaking.
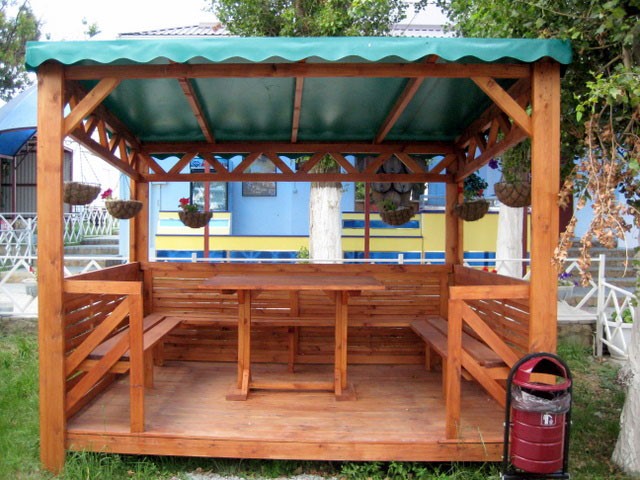
Homemade

Homemade designs are always in demand because they are simple and beautiful. To build such a gazebo for a summer residence, as in the previous photo, you will need a maximum of up to 8 thousand rubles. A little embellish the site with flowers and a beautiful view is provided.
The gable roof option is popular among summer residents. The design is not complicated, it will take up to 3 days to build it. The view itself is not bad, the gazebo is compact, while the spaciousness and convenience on the face.
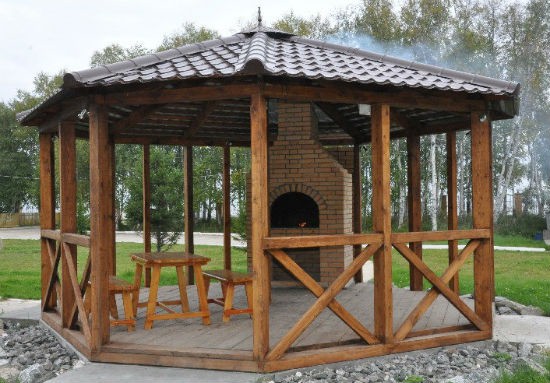
Hexagonal
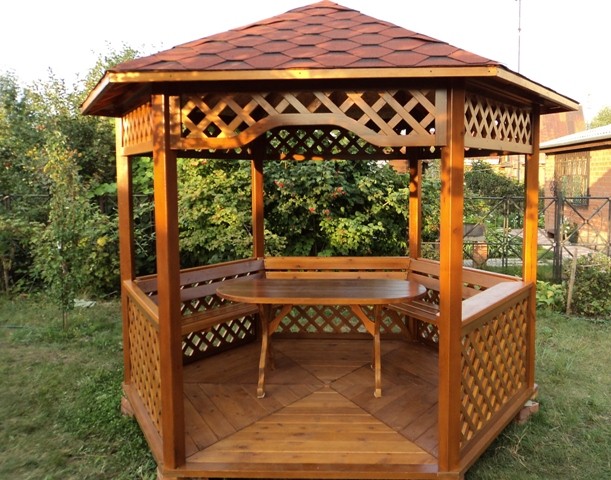
Hexagonal arbors have always been in fashion and are no less relevant now. A relatively simple and at the same time complex design makes the gazebo look original and emphasizes individuality. The wooden table emphasizes the decor of the structure. 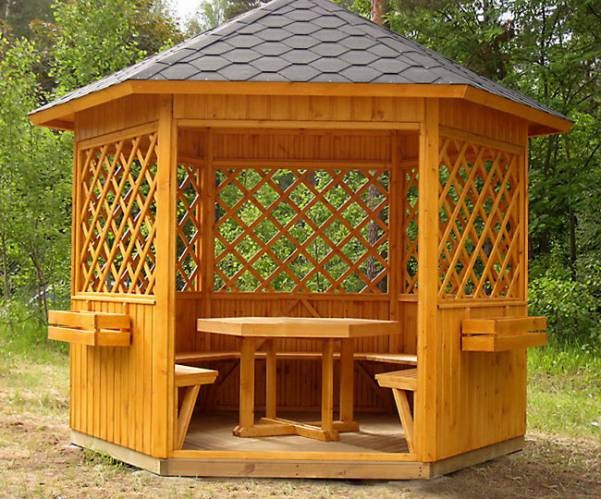
And what if you place the gazebo on the sides? Agree, the gazebo looks great. But it would be better if you add green spaces around.
A simple video tutorial
A clear step-by-step video instruction for making a simple wooden gazebo.
 Masonry mortars for brick kilns
 Why do the windows fog up in the apartment
 Construction and schemes of brick ovens
 How to lay paving slabs: tips and tricks
 How to drill bathroom tiles
 Monolithic slab on coarse soil
 Which electric heater is economical