How to make a wooden canopy to the house: photo
Sheds made of wood to the house can be made with your own hands from improvised materials. They come in several types of different shapes. A canopy is a kind of visor that serves to protect the house from adverse weather conditions. Peaks give an aesthetic appearance to the structure. According to the classification, they can be conditionally divided according to the following features: type of construction, location, type of material, purpose and size.
In addition, wooden canopies are determined by 3 types of structures: straight canopies, inclined (single or gable) and multifaceted. The first 2 types are easy to install, the 3rd is characterized by an extension made in the form of various geometric shapes, which only a master can do.
Canopy to the house, depending on the location, there are several types:
- Peaks that are built separately from the house. It can be an extension for a car or a gazebo. This type is determined by the beauty of the decor, that is, it is not technically required.
- An attached canopy is a canopy over the house or a veranda at the entrance. It serves to protect the building.
- The built-in type is an architectural work. Various combinations of materials of different levels of complexity are performed. Located on the site of an existing building.
- Decorative canopies - are considered an element of decoration of the garden or any other part of the house.
Making a visor for the house with your own hands: instructions and photos
In the photo - a wooden canopy near the house (Fig. 1)The visor can be made of the following materials:
- Wood
- Metal
- Stone
- Polycarbonate
- Combined type.
Of the above materials, wood occupies a special place in construction. It is preferable in almost all buildings: for finishing baths, houses, buildings. The advantage of wood is ease of installation, durability and economy. Wooden canopies need processing, but do not require constant care. In the photo, the wooden canopy looks presentable and advantageous (Fig. 1).
The visor itself should not be made of natural wood, but on the basis of synthetic substitutes (polycarbonate). A canopy made of wood should be regularly treated with varnish and antiseptics if necessary. Compared to metal, this material is not subject to corrosion and is not able to change. The work process consists of the following stages: drawing up a plan, installing racks, installing battens and rafters, laying slate.
Required tools and fixtures:
- Gutters for water drainage
- Sand
- A circular saw
- Cement
- Gravel
- Profile pipe
- Gutter connectors
- Gutter brackets
- Boards
- construction nails
- bolts
- Concrete mixing plant (optional)
- Roulette
- Building level
- Shovel.
Any construction work begins with a plan according to which you will do the installation. The more accurate and detailed the project is on paper, the easier it is to implement. The instruction should contain the parameters of the canopy, the material you are going to use, and other details.
About what canopies are described in the video:
Stage 1: work with racks
To install a canopy, you need to make racks. They are a support for future construction, so it is important to choose a reliable material. Experts recommend using pine, it is strong and durable, easy to lift and beautiful in appearance. During installation, work only with smooth bars, the surface must be flat. Do not take wood with bark, otherwise you will have to spend time processing.
Pine beams have section parameters of 75 × 75 mm. The location of the pillars should be done with an interval of 1 m. The part of the beam that will be in the ground should be treated with bitumen-based mastic. Thus, the timber will be resistant to moisture.
The visor should be positioned so that it hangs 20 cm in front and from the sides. To do this, you need to install poles. Their number does not exceed 6 pits, which are dug with a shovel 50 cm deep. When the pits are ready, insert bars into them, fill the free space with concrete (you can use crushed stone). Trim off the excess length.
Stage 2: installation of the truss system and installation of the crate
Rafters serve to support the structure. These are bars with section parameters 150 × 150 mm. When installing, consider the distance between the beams, it should be 1 m. One part of the rafters is fixed to the wall or board (which you made earlier), and the other is located on the racks. It should lie perpendicular to the line on which the canopy is planned. You can fix the bases of the rafters with wood screws or steel corners. The photo shows the fixing of the rafters (Fig. 2). If the wall is brick, use dowels or metal anchors.
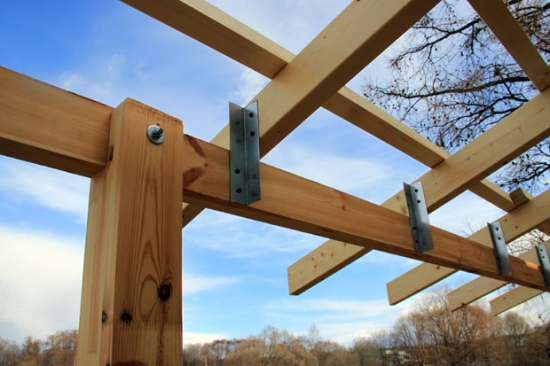 In the photo - the method of fastening the rafters (Fig. 2)
 The crate is laid on top of the finished rafters. Its dimensions are 160×30 mm. The distance between the edged boards is 90 cm. Their location should be between the slate sheets, each board should coincide with the joint. Work should begin and end at the edges of the slope. The crate is fixed with self-tapping screws.
Stage 3: covering the visor with slate (polycarbonate)
The final part of the do-it-yourself roofing flooring is included. The scheme of work is simple: the slate must be screwed with self-tapping screws (galvanized) along the upper side of the wave. Sheets of such material are stacked from the bottom up. The end of one row extends 10 cm beyond the beginning of the other.
A canopy made of wood looks very impressive and attractive. Another photo of the folding visor (Fig. 3).
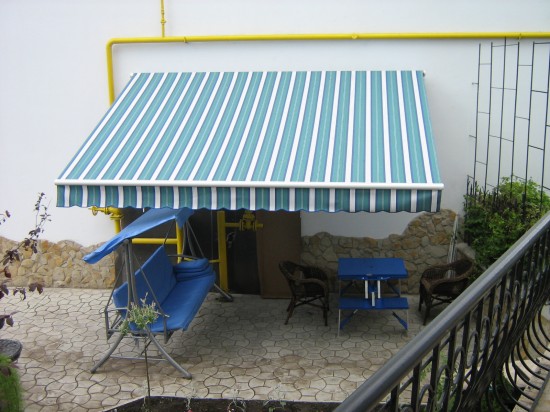 In the photo - a folding visor is installed above the entrance (Fig. 3).
 Some significant nuances of mounting a canopy
- Before work, be sure to treat the tree with a solution against fungus, mold and bacteria. The primer can be tinted, which gives shine to the visor.
- After installing the canopy, start laying the floor. You can use concrete, crushed stone or gravel, sand, flooring boards.
- The free space around the canopy should be filled with perennial plants (lianas) to protect the house from the wind. This will allow you not to spend finances on additional building materials. This building looks very nice.
- Under a wooden canopy, you can make several sockets and connect electricity. A great option for a visor in the gazebo or at the entrance to the house.
Any surface can be covered with wood. Properly planning everything and consulting in advance about the features of the work is the key to successful installation. On fig. 5 shows a photo of the finished visor. Now you know how to make a wooden canopy for the house. It remains to choose the time and purchase the necessary tools. You don't need any specialist skills. If you do the installation according to the above scheme, then the result of the work will please you. The visor will serve you for many years without losing its original appearance.
 Masonry mortars for brick kilns
 Why do the windows fog up in the apartment
 Construction and schemes of brick ovens
 How to lay paving slabs: tips and tricks
 How to drill bathroom tiles
 Monolithic slab on coarse soil
 Which electric heater is economical