Do-it-yourself frame shed - order on the site
In order not to litter the summer cottage or the premises of the house with garden tools, you can build a frame shed with your own hands. It will become a convenient place to store various household equipment. To build such a building is not very difficult, the main thing is to follow the technology.
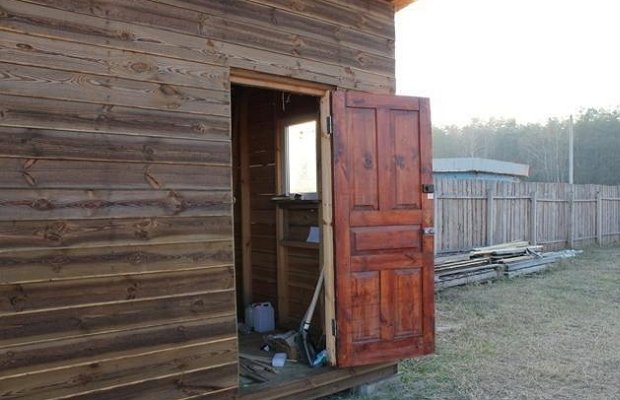
The construction of a barn begins with determining the location. The barn should not be conspicuous, it is better to place it in the backyard. The approach to this building must be made as free as possible in order to bring in or take out large-sized objects and materials: watering containers, gas tools, etc.
The width of the front door is calculated based on the size of the garden wheelbarrow, which may have to be rolled into the building. Better on a small hill, this will protect the building from melt water that can wash away the foundation and destroy the entire structure.
Barn on a small hill
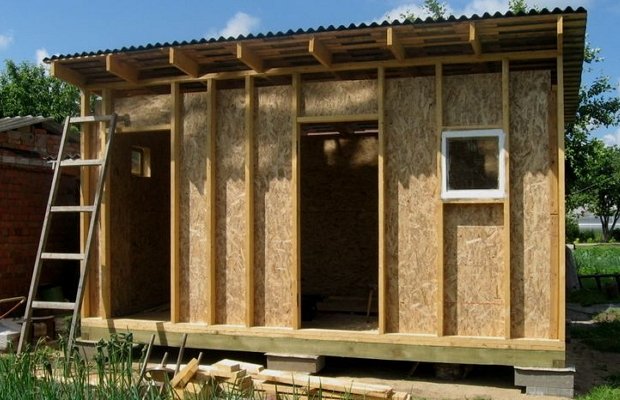
You can build an auxiliary structure from any lumber: boards, timber or OSB boards. The foundation is used of any type - columnar, tape, monolithic or prefabricated.
The shed can be of various shapes - square or rectangular, with a shed roof or a ridge type. There are also no particular problems with roofing; a profiled sheet, ordinary slate or roofing material will do if finances are limited. Colored roofing material will help to revive the structure. Now on sale you can find both profiled sheets and shades.
First you need to draw up a plan or scheme of construction, which will help to more accurately calculate the amount of material needed. A properly drawn up building plan will allow you to take into account all the nuances of construction, so that in the process of work you do not have to buy additional materials. When purchasing timber and boards, pay attention to their moisture content, which should not be more than 22%. Also, the wood cannot have large knots, blue, traces of the work of a wood-boring bug.
For the manufacture of a frame shed, you will need the device of the following structures:
- Strapping top and bottom. To do this, you need a bar with a section of 100 by 100 mm. Six pieces of 6-meter and eight bars of 3 m.
- The flooring is made from boards with a section of 40x150 mm, at least 20 pieces are required, if necessary, you can add. For finishing it is better to use OSB boards.
- Vertical supports - here you will need a beam with a section of 100x100 mm, in the amount of 11 pieces of 2.5 meters each, two of them for the doorway.

Vertical supports of the frame shed
To create a slope, one of two possible methods is used. If the vertical racks of the frame are made of the same length, then on one side of the perimeter of the building they are built up with bars with a section of 50x50 mm, which will require 4 pieces. According to another method, when installing vertical racks on one side of the building, either higher bars or slightly shorter than the rest should be installed. When using any option, the slope of the roof will be provided.
For the manufacture of rafters, you will need a board with a section of 50x100 mm in the amount of 4 pieces, each 4 meters long, taking into account roof overhangs. The crate is made of a board with a section of 22x100mm, which will require approximately half a cube. The draft ceiling is made from sheets of plywood, chipboard, fiberboard or OSB boards. it is arranged from edged lumber with a section of 25x100 mm. It will be enough 6 boards of 3 meters.
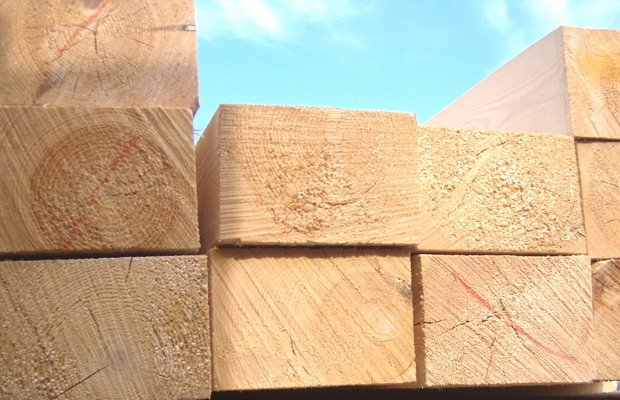
Boards with a section of 50x100 mm
The type of fastening depends on the thickness of the beam: the joint in the paw (in half a tree) can be fixed with nails. The butt-to-butt connection is made with steel corners and strips. Also, the work will require self-tapping screws, screws, L-shaped metal plates for fastening the beam in the corners. The main fastener will be nails of various sizes. They are selected so long that when driven into two connected boards from the outside, the point should go 1.5–2 cm from the back. Such a connection will be more reliable.
All wooden elements of the building are treated with an antiseptic that extends their service life. It is best to apply a protective composition in two layers.
Building a barn without a good foundation will not work. The strip foundation will reliably protect the structure from moisture and give it strength. In this case, the floor of the barn will rise relative to the ground level by 40–50 cm.
First, the foundation is marked on the ground, which will require pegs and a strong thin cord. Then a ditch is prepared with a depth of 40–50 cm and a width of about 30 cm. A sand cushion is poured onto the cleared and leveled bottom (it needs to be moistened and compacted a little), and polyethylene is laid on top so that the cement milk is not absorbed into the sand, while reducing the strength of the concrete .
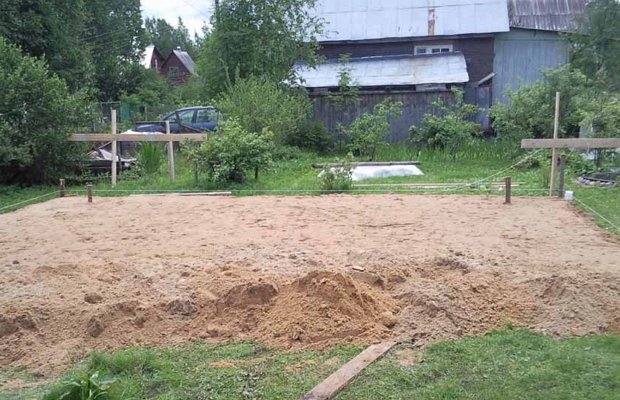
Marking the foundation of the barn on the ground
After that, formwork is installed along the edge of the trench, with a height in accordance with the size of the base. In the upper part of the formwork, spacers are installed between its walls so that the boards do not move apart under the weight of concrete. Further along the entire trench, a reinforcing cage is laid, where the bars are interconnected with steel wire.
For pouring, cement grade 200 or 250, crushed stone or pebbles, sand and water are used. Experts recommend pouring the foundation without long breaks in work so that air voids do not form. It is better not to start work during rain, as the concrete mixture will become liquid. Such concrete will dry much longer, and strength may decrease. After 3-4 weeks, you can begin work on the construction of a frame shed.
They proceed to the device of the basement, when the concrete poured into the formwork gains the necessary strength, after which the formwork is dismantled. First, a roofing material is spread on the concrete, which will play the role of waterproofing. Several rows of red bricks are laid on it. Do not forget to dress up the seams in the brickwork. In the upper row around the entire perimeter of the building, wooden blocks are laid in the brickwork every one and a half meters, on which the lower trim beam will subsequently be attached.
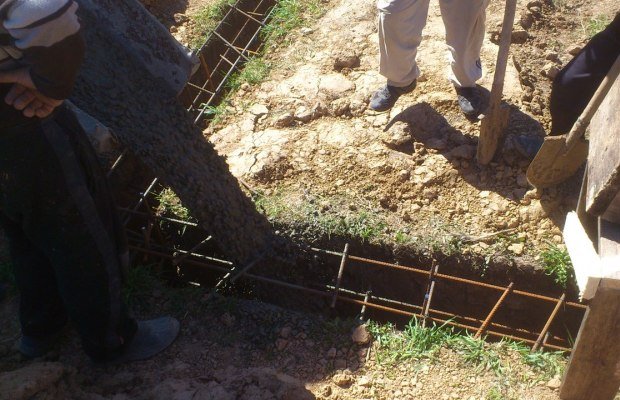
Shed foundation pouring
When constructing the basement, it is necessary to use the building level, observing the horizontal position of the masonry. If the horizontality of the basement part is violated, the barn frame will warp and it will not work to build a reliable structure. Having laid out the basement level and cleaned all the seams from the influx of mortar, leave the structure for a couple of days to solidify. After that, you can begin the installation of frame elements.
First, a roofing material is again laid on top of the base to protect the timber from moisture. It is better to put two layers of roofing material and only then proceed with the installation of the lower trim.
For this, a bar with a section of 100x100 is used. The joints at the corners must be made in the "paw". At each end of the beam, a recess is made in half its thickness. The length of the cut according to the cross section of the beam will be 100 mm. Thus, when connected, an even angle will be obtained. If necessary, the junction of the two bars can be worked out with a chisel. The strapping beam is attached to the embedded wooden parts in the base with nails. Be sure to drive them in obliquely and check the horizontal laying of the timber.
The next stage in the construction of the barn is the installation of the floor. Here we need boards with a section size of 50x100 mm, which will serve as lags. They are placed on edge, leaning on the beam of the lower trim, in increments of 60 cm. They are fixed with nails of a suitable size. To further make all the work more convenient to carry out, you can assemble a subfloor from plywood or any old boards. After them, if necessary, you can dismantle or stuff other material on top. When the base is ready and you can move along it without the risk of falling, the installation of the vertical elements of the barn frame begins.
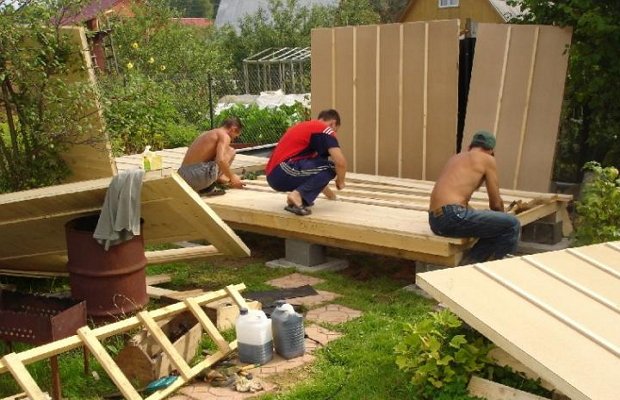
Frame shed flooring
For vertical racks, you also need a beam, the cross section of which will correspond to the dimensions of 100x100 mm. It is attached to the side of the lower harness, using L-shaped metal fasteners or 150 mm nails, using an oblique slaughter. The distance between the installed racks is at least 1.5 meters. For reliability, they are fixed diagonally with temporarily installed boards with a section of 40x100 mm.
Intermediate vertical racks are additionally fixed with jibs so that their verticality is not disturbed. After the device of the upper strapping, they can be removed.
The location of the vertical racks for mounting the door frame depends on where it will be located and on its type. If a single leaf door is selected, there are two ways to attach the supports:
- You can save a little on material by installing one rack. The second will serve as an angular vertical bar.
- If the entrance is in the middle, then two additional racks are installed.
Installation of the frame shed door frame
After measuring, the upper bar is nailed along the height of the opening so that it is at the level of the upper part of the window blocks, under which the seat is prepared in the same way.
To install a shed roof, one side of the shed must be increased to a slope not exceeding 25 °. Then the rafters are installed. The material is boards with a section of 50x100 mm, with their installation on the edge. In a shed roof construction, it is carried out with iron staples or nails, which are driven in using the "oblique slaughter" method.
Installation of a shed roof frame shed
Then the crate is mounted. It can be sparse or solid, it all depends on the type of roofing material chosen. For waterproofing, roofing material or other modern membrane materials are laid, and after that the roofing material is already mounted.
The frame is sheathed with any material, but a professional sheet or planed board is usually used. You can also use lining, but this option will be a little more expensive.
This is a new development in the field of construction for the rapid construction of utility blocks and ancillary facilities in summer cottages. All parts are packed in compact boxes, they are quickly and conveniently delivered to the place.
Advantages of prefabricated frame structures:
- terms
- Serviceability. The building does not need maintenance.
- You don't have to do things like sanitize purchased lumber or paint your barn every year. All you need to do with such a new design is periodically wash it with water from a hose.
- For assembly, it is not necessary to prepare a foundation, a rammed base is suitable, where a sand-gravel mixture or crushed stone can be used.
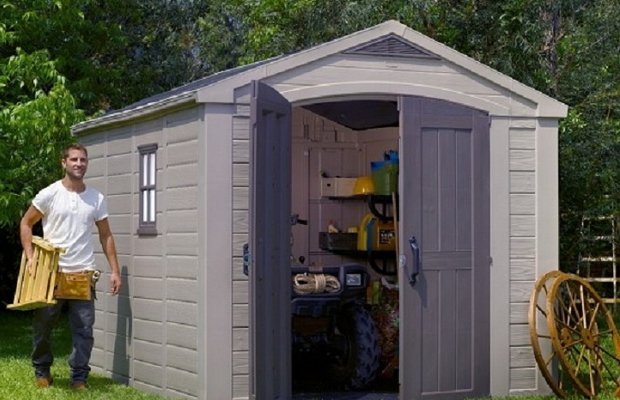
Finished frame construction of a plastic shed
In general, the construction of a frame hozblok is a simple procedure. It is important to calculate everything in advance and remember that, according to the existing law, it can be erected in a place that is at least 3 meters from the neighboring site and 5 meters from the extreme line of the road. Everything else is up to you.
 Masonry mortars for brick kilns
 Why do the windows fog up in the apartment
 Construction and schemes of brick ovens
 How to lay paving slabs: tips and tricks
 How to drill bathroom tiles
 Monolithic slab on coarse soil
 Which electric heater is economical