How to properly and quickly cover the roof with slate?
The construction market is flooded with roofing materials for every taste and budget, which we did not hear about a couple of decades ago. At a time when shops did not abound with such abundance, slate came to the aid of summer residents under construction. It is too early to “retire” this affordable, inexpensive material, since it is difficult to find an equivalent alternative among materials of the same price category. If you want to cut construction costs in half, read this article on how to properly slate a roof.
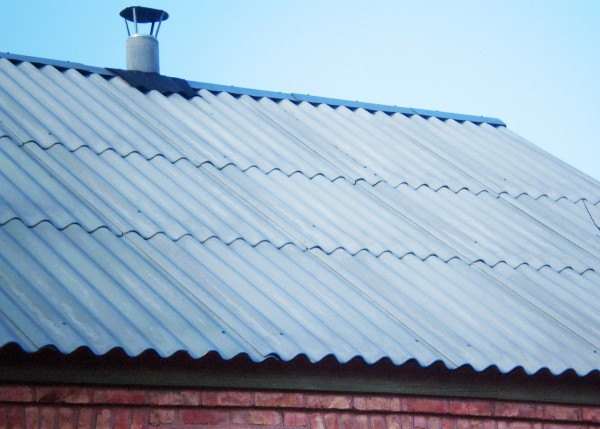
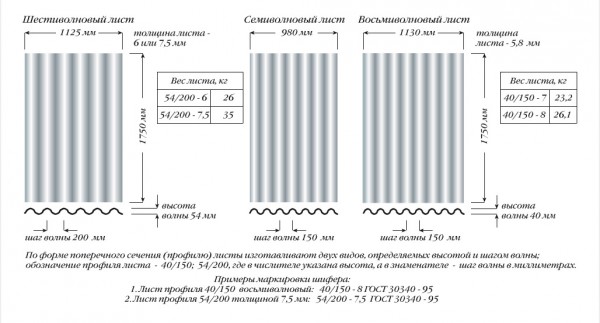
Slate is a sheet roofing material with a wavy or even surface, which is made from asbestos cement by molding. Unpainted slate is light gray, but manufacturers add pigments to it, painting it in various colors. In the assortment of building stores you will find slate sheets consisting of 6-8 waves, according to the standard, the length of which is 1.75 m. GOST for this type of construction product regulates the thickness of the material - it lies in the range of 5.8-7.5 mm for different types of sheets . Before you cover the roof with slate, get acquainted with its advantages:
- Convenience and ease of installation with your own hands. Even a person without building experience can lay slate. It does not require special skills or expensive tools. Sheets can be cut using an ordinary hacksaw for metal or a grinder, and fixed on slate nails or self-tapping screws.
- Reliability. Do-it-yourself slate roofing is a reliable way to protect the attic from the penetration of moisture, cold and wind. This material is not afraid of hail, falling branches from nearby trees, because they will not harm it.
- Fire resistance. The refractory qualities of asbestos cement are another reason to use its roof coverings, because chimneys of heating appliances, fireplaces and stoves are brought to it. Roofing with slate is especially relevant for baths, the chimneys of which are heated to a temperature of 750-850 degrees.
- Long service life. If, before covering the roof with slate, the rafter system is treated with a flame retardant and antiseptic, then the life of the structure will reach 40-50 years.
- Affordable price. The average cost of 1 square. m of roofing with slate, taking into account the price of fasteners and waterproofing, is 200-250 rubles, if you do the work yourself. If you involve a hired team of professional roofers in the process, the costs will increase by 50%. But even with the labor costs of workers, this is half the price of metal tiles or ondulin.
Important! Slate has two special features that need to be treated with attention: with a lot of weight, it is a rather fragile material. Therefore, at the time of purchase, be sure to check the integrity of the sheet, make sure that there is a paper gasket between them. For the convenience of working on a construction site, a flat place for unloading and storage is prepared in advance by spreading a film there.
Requirements for the truss system
Before you cover the roof with slate, you should properly prepare the roof truss system. The fact is that this roofing material has a solid weight compared to modern counterparts. The weight of one sheet can reach 30-35 kg, and this is a serious load for the elements of the supporting frame. When creating a roof project, observe the following rules:
- For the manufacture of rafter legs, use boards with a section of 60x150 mm or thicker. The best option is boards of the highest quality 100x150 mm, the humidity of which is not higher than 15-16%.
- For the manufacture of crates, coniferous wood bars 6X6 cm in size are used, which will not break under the sheets.
- If you are nailing the sheathing with your own hands, make sure that each layer of slate rests on two or more bars.
- The distance from the edge of the sheet to the nearest bar of the crate should not be less than 150 mm.
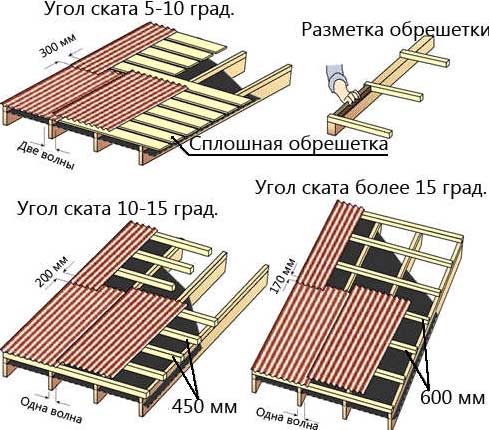
Note! Of great importance is the angle of inclination of the roof slopes. Manufacturers recommend laying slate on the roof, the slope of which is 22 degrees or more. For shed and gable roofs, slate is used, even if the angle is 5-15 degrees. However, the smaller the angle, the denser the crate should be. For the minimum permitted values, a solid base of moisture-resistant plywood is used.
Material Quantity Calculation
Before you cover the roof with slate, you should calculate how much material is needed. To estimate the required number of sheets, so as not to overpay for unnecessary balances, perform the calculations as follows:
- Take a tape measure and measure the length of the roof over the eaves. If the roof is still only in the project, then take this value from the drawing. Divide the length of the eaves by the width of the slate sheet you will be using. By increasing this figure by 10% and rounding up to the nearest integer, you will get the number of sheets in one layout tier.
- Measure or find out from the project documentation the length of the roof from the ridge to the edge of the eaves. To calculate the required number of rows, this value is divided by the length of the sheet and 13% is added. The surcharge compensates for the overlap between the sheets.
- By multiplying the number of sheets in one row by the number of tiers, determine how much material is required to cover the slope. If the roof has two symmetrical slopes, the result is doubled.
Note! In case of damage to the sheet during do-it-yourself cutting or transportation, it is better to have a supply of material, 10% is enough. The asbestos dust generated during this is dangerous for the lungs, so you should only work in a respirator moistened with water.
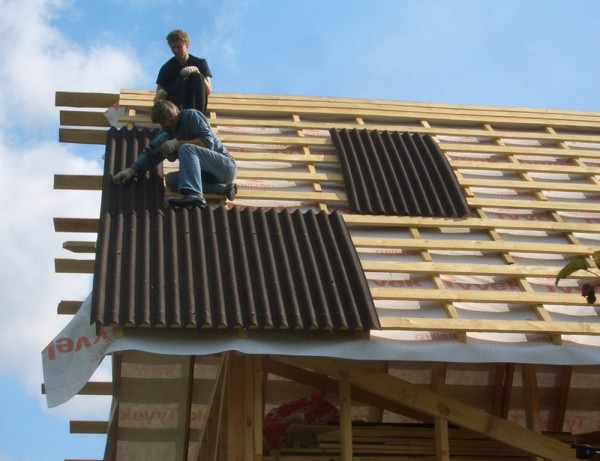
Mounting principles
The junction of four corners, which is formed as a result, is the main difficulty of installation. To avoid breaking off pieces of material, deformation and penetration of water or wind into this vulnerable spot, there are two proven methods:
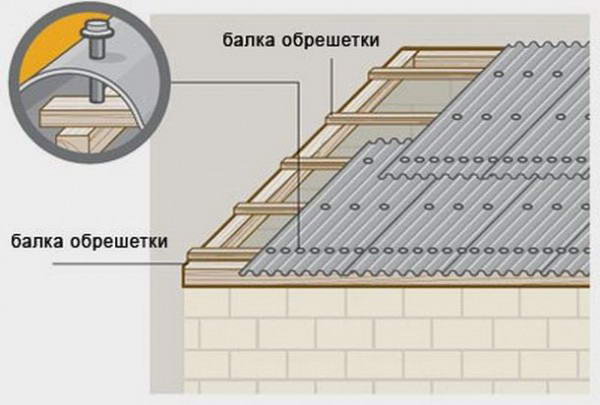
Important! Asbestos cement, from which most types of slate are produced, changes size with changes in humidity and temperature. Therefore, in order to prevent violation of the integrity of the sheet, holes of a larger diameter are drilled at the attachment points than the size of the self-tapping screw or nail. The fasteners are not screwed in until they stop, leaving a gap that compensates for fluctuations during heating.
 Masonry mortars for brick kilns
 Why do the windows fog up in the apartment
 Construction and schemes of brick ovens
 How to lay paving slabs: tips and tricks
 How to drill bathroom tiles
 Monolithic slab on coarse soil
 Which electric heater is economical