How to make a drain from the roof with your own hands
When you have built a house or a summer house for yourself, you have begun to equip it, then you will definitely need to drain drains from the roof. This problem will make itself felt immediately after the first rain, as all the water from the roof will pour onto the steps, the foundation and even the walls, which is not good at all. Your task is to build a system for the outflow of water from the roof, that is, a drain. There are two options: buy a ready-made design or design it yourself. The first method is much cheaper and will save money, however, some efforts will have to be made. It is necessary to choose what material the future drain will be made of, what shape it will be, and where all the water should drain. You can figure out all these nuances by reading our article. Moreover, we will consider why a drain is needed, in particular, what functions it performs, what are the requirements for these elements, what it consists of and, directly, how to make a drain from the roof with your own hands. Let's find out everything in detail.
And yet why
Drainage is an important part of the design of the whole house. Its presence is very important for several reasons. You can probably see a house in which there is no drainage system on the roof only at the construction stage, since this system is usually done first. And all because it performs important functions:
- protective function. Thanks to the drain, precipitation does not fall on the walls, foundation, steps and blind area. This is the main purpose of the drain. When it is absent, the basement of the house will simply collapse within 5-10 years. Water will fall on the foundation, leaving the ground, as a result of which the foundation will erode. Moreover, traces of water, smudges and stains can form on the walls, which will spoil the aesthetic appearance of the entire building. Yes, and the steps of the porch will collapse over time.
- Collecting rainwater from the roof. This is especially important for owners of a large garden or garden, because rainwater is very good for watering plants. If the drain pipe is taken to a special container, a barrel or a large tank, then after a good rain you will have an additional source of water. This is good not only for the soil, but also for your wallet. The presence of such technical water will not hurt anyone.
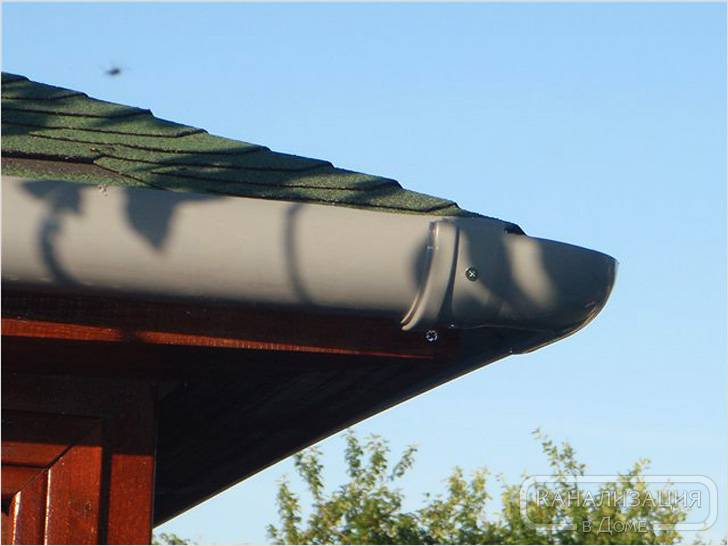
- Decor element for your home. If you make a beautiful ebb with your own hands, you can complement the overall picture of the house, giving it a complete look.
All this makes the drain system an important component of the entire building. Without it, of course, you can do in some cases, but this is fraught with undesirable consequences.
It is worth noting that it is also impossible to make a drain on a quick hand, so that it functions correctly and for a long time, you need to follow some requirements:
- The product must have high strength, resistance to various mechanical deformations and high loads. It must withstand strong gusts of wind, hail, the weight of snow in winter, etc.;
- Durability. The material must be resistant to various external factors, corrosion from water, withstand temperature extremes and precipitation.
- Last but not least, a good appearance, because no one wants one detail to spoil the entire facade.
It is important to comply with all these requirements, then your efforts will not be in vain. But what material can a drain be made of, and which one will be better? Let's find out.
Materials for manufacturing
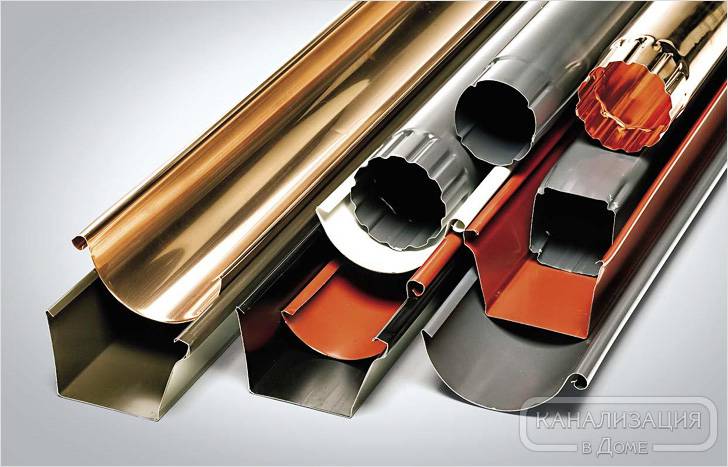
The water drainage system is made from various materials, which differ in their characteristics and price. There are two main materials for the manufacture of a drain:
- Metal.
- Polymers.
These are the most common materials from which you yourself can make water drainage. If we talk about metal, then it is more expensive than plastic due to its strength. In the manufacture of the drain, it is additionally coated with an anti-corrosion agent and a decorative coating, because, as you know, the disadvantage of metal is the tendency to corrosion. In addition, during operation, a metal drain from time to time must be additionally treated with the same means so that it does not rust from damage, dents and scratches that may occur during operation.
If you want to make a metal structure, it is better to choose these:
- galvanized steel;
- copper;
- aluminum.
To make a drain from galvanized steel, you need to purchase it in sheets, the thickness of which reaches 1 mm. For additional protection of the material against corrosion, a material coated with polymers is chosen: polyester, plastisol or pural.
The aluminum construction is quite light, which is its advantage. The thickness of the sheet can be from 0.8 mm to 1 mm. A special varnish is used to protect the material. It not only protects aluminum, but also improves its appearance. Such structures serve for a long time, and if aluminum does not come into contact with other metals, rust will not form on it.
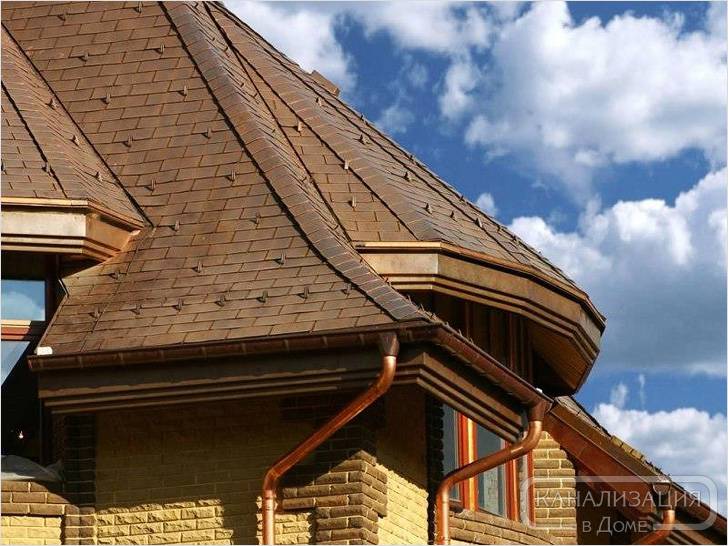
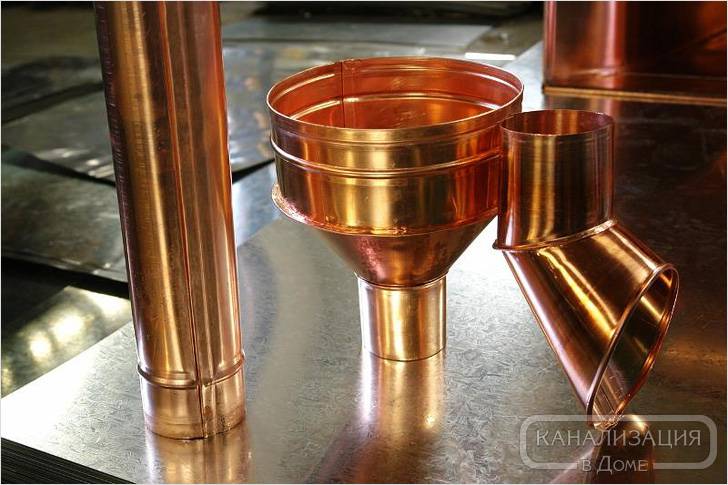
The advantage of copper products is that they do not need to be further processed. Such an outflow is considered more durable, beautiful and of high quality, it is ideal for making a water drainage system if your roof is not made of another metal. Copper, like aluminum, should not come into contact with other metals. The only negative is the high price of the material.
Note! During operation, copper is covered with a greenish coating - patina.
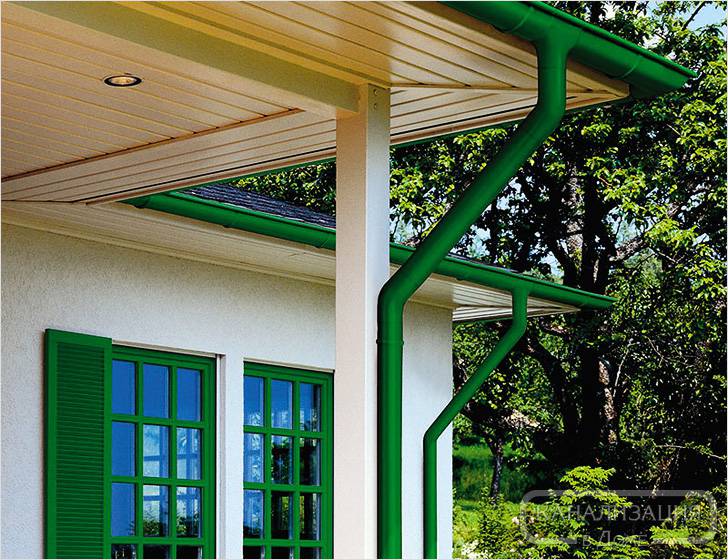
Another thing is plastic elements. They do not need additional processing, are more durable and do not corrode. Increased strength, durability, quietness and UV resistance - all these features have made plastisol and polyester the main materials that are ideal for the manufacture of ebb. Gutters made of plastic have another advantage - polymers can be of different colors, so you can choose one that matches the color scheme for your home.
Note! It is worth noting that the price of plastic is much lower than that of metal, so polymer plums will cost you less.
If we talk about the disadvantages of the material, then there is one significant one: at low temperatures, the plastic becomes brittle. And, despite various additives during production, in severe frosts, plastic can crack, which will break the tightness of the entire system. True, if you live in a region with a temperate climate, this drawback will not bother you.
Considering all of the above, you can decide which material to choose for the manufacture of water drainage from the roof of the house. Before proceeding with the manufacture of the ebb, let's find out what elements it consists of and how it works.
Components of the water drainage system
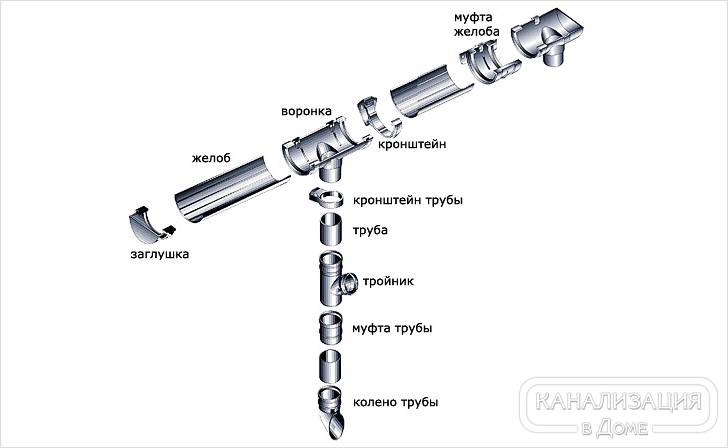
First you need to determine what exactly to produce, because the drainage system consists of various elements:
- Gutter. One of the main elements of the whole structure. It serves to collect water from the roof slopes. Can be round or square, mounted horizontally from the bottom of the roof overhang. The size of the gutter depends on the area of the slope that it will serve.
- Pipe. A vertical part of the structure that allows you to divert water to the place you need, whether it be a drainage system or a rainwater collection tank. Pipes are attached to the wall of the building.
- Stormwater or funnel. An element that connects the gutter to the pipe.
- Turns and angles. Structural elements that allow you to bypass the house, various protruding elements, etc. Thanks to them, it is also possible to mount the pipe at various distances from the wall of the house.
- Plugs. In those places where a funnel and a pipe are not provided, a plug is installed.
- Gutter connection. When the wall is long, the gutters are connected to each other by special connecting elements.
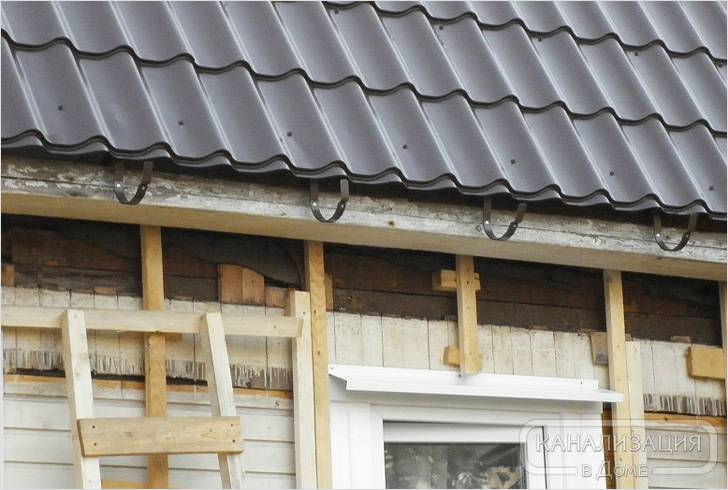
- Fasteners for pipes and gutters, allowing you to tightly fix these elements to the wall.
- Leaf trap. Sometimes a trap is mounted in the system that looks like a lattice. Thanks to her, the leaves do not penetrate the system and do not clog it. You just have to periodically remove the leaves from the trap.
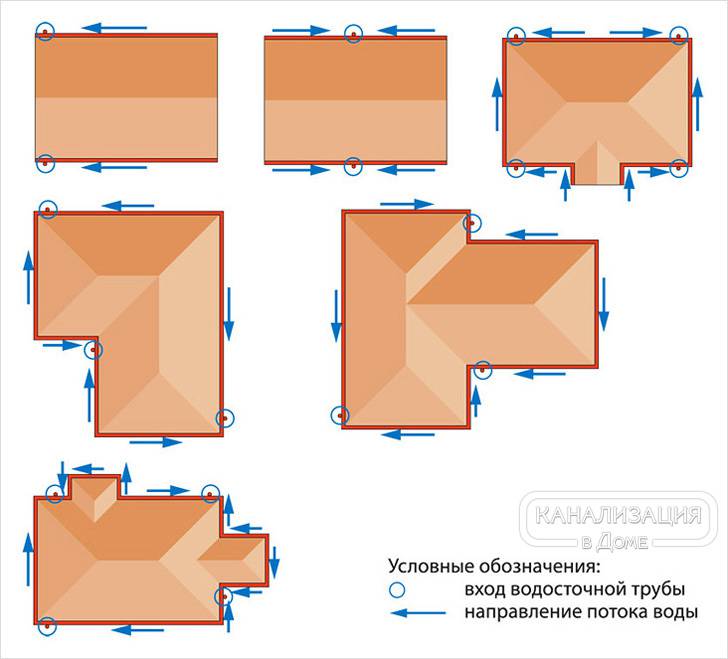
As they say, it is better to see once than hear a hundred times, so below is a diagram in which you can clearly see all the components of the system.
How to find out how much material is needed for a job
Before we get started, there is one more issue that needs to be addressed. You should decide how much material to buy for the construction of the drain, so that you do not have to spend money on shipping again. Yes, and excess material can lie dead weight for a long time, until you decide to use it in the construction of some outbuilding.
So, how to correctly calculate the amount of material needed to create a drain. In fact, everything is not as difficult as it seems. To work, you need to arm yourself with a tape measure larger than 5 m, a pencil or pen, as well as a notepad for notes. It all starts with the fact that with the help of a tape measure, the total footage of all the gutters around the perimeter is calculated. The resulting number will tell you how many meters of material are needed for the gutters. Write down all the data so as not to forget anything. And, of course, do not take the material to the nearest centimeter, a small margin is required.
Note! The cross section of the gutters can be of two types: round and square. Which type to choose depends on your own preferences. Only here it is worth noting that it is easier to care for round products, as they are easy to clean. The square shape does not allow you to thoroughly clean the dirt in the corners.
Now you need to figure out how many funnels will go to the system. Make it even easier. Usually one funnel is installed on the gutter every 10 m. If the house is small, then funnels are often placed simply on its corners. If the length of one of the walls of your home exceeds 10 m, professionals recommend making several drain points. The number of funnels should also be recorded.
You do not even need to calculate how many pipes are required, since this number will be equal to the number of funnels. All that needs to be done is to measure the distance from the roof to the ground or the place where you want to drain water to find out the required length of the pipe itself.
Turns and knees are calculated strictly individually according to the design features of the facade of the house. It all depends on the number of corners, obstacles and turns to go around. Consider the desired distance of the pipes from the walls.
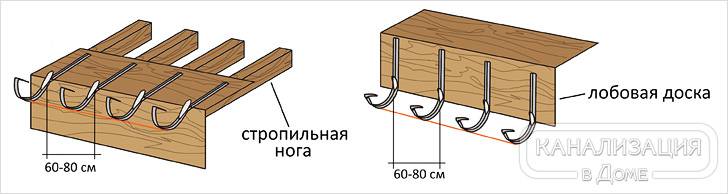
Upon completion of all calculations, you need to find out the required number of fasteners: brackets and clamps. The brackets will fix the outlet gutters in increments of 60-80 cm. It is necessary to divide the total length of the gutters by the distance between the brackets. This way you will know exactly how many pieces you need. As for the clamps with which the pipes will be attached to the walls, it is definitely difficult to say something. Basically, 2-3 clamps are enough for one pipe, it depends on the height of the wall. Look at the number of pipes in your drainage system and determine the number of clamps.
That's all, the calculation is over. This was the easiest stage in the construction of the drain, it will be much more difficult to mount it. Now all you have to do is take a look at your notes and take them to the store to buy all the stuff you need. When everything is ready, you can get to work.
How to make a gutter from the roof yourself
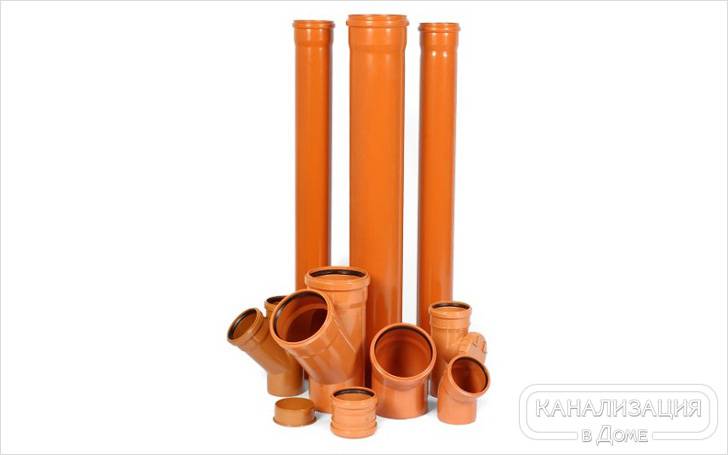
Consider how to make your own drain from plastic pipes, as this is the easiest and most effective option. As practice has shown, the best materials for this business are plastic sewer and ventilation pipes.
To work, you will need the following tools:
- Bulgarian.
- Screwdriver or screwdriver.
- Roulette.
- Cord or thread.
- Self-tapping screws.
- Sandpaper.
- Level and plumb.
- Marker.
- Silicone sealant.
- Scaffolding or stairs.
And as materials you need to purchase:
- Plastic pipes with a diameter of 80, 90 or 110 mm, from which the gutters will be made. They are cut in half.
- Plastic pipes with a diameter of 50 mm, which will act as vertical drain pipes.
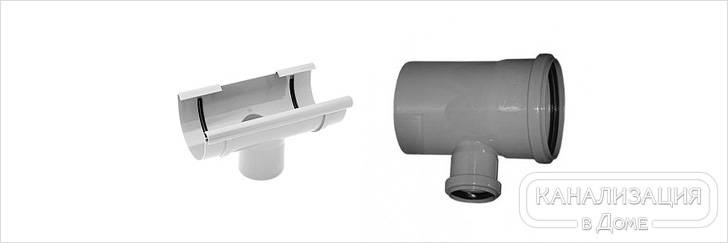
- Plastic fittings, which will be funnels, connecting the gutter and the vertical pipe.
- Corner outlets and elbows that allow the gutters to wrap around corners of the building, as well as redirect vertical drain pipes to the desired location.
- Plastic plugs for pipes, which will also have to be cut in half.
- Plastic brackets and metal clamps.
First of all, you need to decide on the cross section of the pipes, which depends on the area of \u200b\u200bthe roof itself. There is a special calculation formula by which you can find out the required diameter. If the area of the roof slope is 50 m 2 or less, then it is better to use pipes with a diameter of 80 mm. When the area of the roof slope is 125 m 2 or less, then pipes of 90 mm are selected. And when the area of the roof slope is more than 125 m 2, a pipe with a diameter of 110 mm is required.
Note! You will also need funnels, sockets and adapters, but their diameter is determined based on the diameter of the pipe that departs from the gutter.
Now let's make gutters - this is the hardest work that requires accuracy and correct calculation. Pipes will be used as gutters, which must be dissolved in half in length. It will be easy to cut them, but to do it evenly is difficult. From one pipe you will get two identical gutters. Here's what you need to do:
- Take a pipe of the desired diameter and place it on the boards. For ease of use, fix the pipe with a self-tapping screw to the board.
- At the very top, on the front side of the pipe, stepping back a few centimeters, screw a self-tapping screw into it exactly in the middle. Do the same on the other side. It is not necessary to tighten the screws to the end.
- Stretch a thread between them. Make sure everything is even.
- Now mark the cut line on the pipe with a marker.
- Remove the thread and, focusing on the markup, start sawing the pipe with a grinder. For safety reasons, wear protective goggles. Make sure to cut the pipe evenly, as the overall appearance of the gutters will depend on this.
- It remains to do exactly the same on the opposite side of the pipe. Only now the pipe is fixed to the board in two places, since by sawing the pipe, you have made two separate parts of it.
- Depending on the number of gutters required, cut all the pipes intended for this purpose.
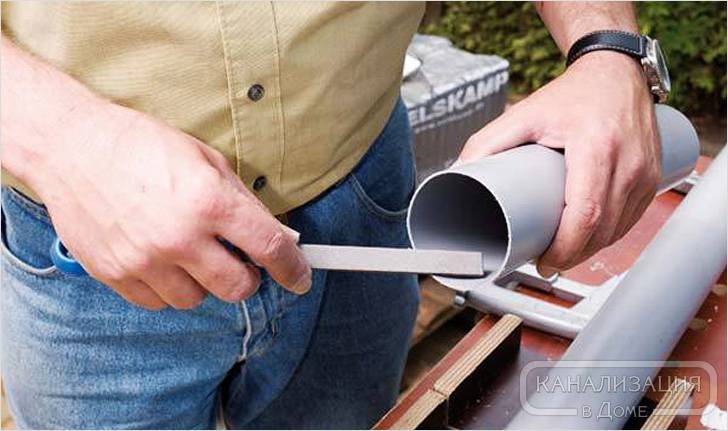
- Using sandpaper, smooth out the cuts on the pipes.
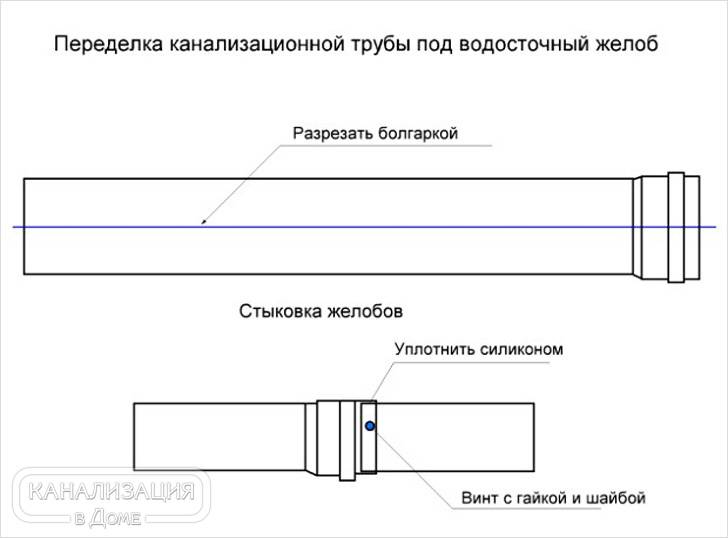
This is how you can independently make gutters, which will become the basis for the drainage system. Now you just need to connect the elements of the gutters together, taking into account the required length on each wall. Ready-made gutters will be connected to one another using self-tapping screws. Since these are sewer pipes, one end of which is wider, they can be connected very simply;
- One gutter is inserted into the other with an overlap of 5–10 cm.
- Using a screwdriver or self-tapping screw, fix them to each other in three places: on the sides and below.
- The finished mount can be lubricated with silicone sealant to prevent water from leaking.
- To make corner gutters, you need to take a knee, and using the method you already know, cut it in half.
- At this stage, in the places where the vertical pipes will be located, it is already necessary to insert a plastic fitting and fix it with self-tapping screws. Again, you need to cover the junction with sealant.
Note! When connecting the elements to each other, do not screw in the screws too tight so that the joints are slightly mobile. Thanks to this, the structure will walk under the influence of wind and various temperatures without collapsing.
We can say that your roof drainage system is ready, it remains only to put everything together and install it in the intended place.
All steps are shown in detail in the video:
Rules for installing a drainage system
Before installing your homemade structure, it is important to familiarize yourself with some rules for installing water drainage elements. They concern not only plastic products, but also any others. Compliance with these rules is very important, because thanks to them the structure will fold for a long time and perform its functions correctly.
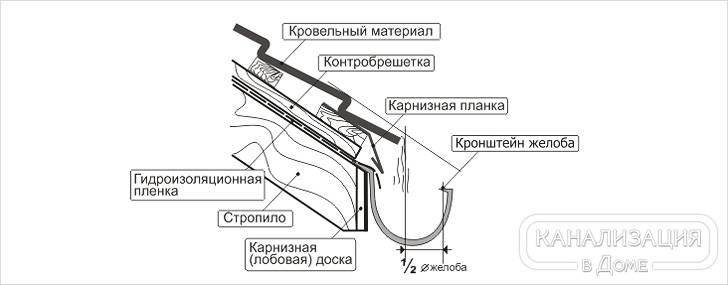
- Installation of gutters around the perimeter of the house should be carried out on the frontal bar of the eaves, the edge of the truss system, directly on the roof. It is better to choose the first two methods. But, it is worth noting that it will be easy to implement them when the drainage system is installed at the stage of building a house, before the roofing material is laid. If you have already completely built your house or cottage, you can attach gutters to the edge of the roof.
- When metal pipes are used as gutters, the brackets must be spaced at a distance of 80 cm to 1.5 m. If the gutters are made of plastic, the minimum distance is from 60–80 cm.
- Gutters must be fixed so that they can easily catch the flow of running water. To do this, you need to step back from the edge of the roof by a third of the pipe section, so that two-thirds of the gutters protrude, and water gets clearly into them.
- To prevent water from accumulating in the gutters, they must be installed with a slope towards the funnel. For every 1 m of length, the slope should be 3–5 mm. This will be enough for the water to flow down into the funnel unhindered.
- The distance of the upper edge of the gutter from the edge of the roof must not be less than 30 mm. If this requirement is not met, the entire structure may be torn off by a mass of snow or ice that comes off the roof.
- It is important to ensure that the joints are well sealed so that water does not seep through them. To do this, you can use either a sealant or a pipe seal - a rubber band. It must be cut into two parts and put at the junction, where it is screwed with screws. It will also serve as a thermal gap, which is required for the structure to be movable.
These are all the rules that you need to follow when installing a water drainage system. Now it remains only to put everything into practice!
Installation of a system of sewer pipes
First you need to choose a starting point, that is, a place from where you will start work. Since the work will be carried out at height, take a ladder and check if it is reliable. You should be especially careful, because gravity can play a cruel joke. The installation process itself is not entirely complicated, following the instructions, it can be performed by any amateur builder. So, let's look at everything in stages:
That's all, now all the same needs to be done around the entire perimeter.
The roof drainage system is ready. Most importantly, you spent a minimum of money on its purchase, since you made it yourself.
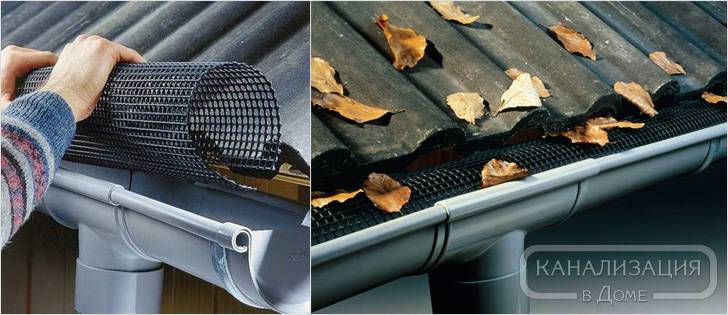
You can make a homemade grid from building mesh to protect the system from foliage. It will take a number of meters of mesh, which must be cut into strips of such a width that, by rolling it into a cylinder, you can get a diameter slightly smaller than the diameter of the gutter pipe itself. Make such cylinders and place them in the gutters, fixing them securely there. This will protect the structure from all kinds of debris.
Advantages of a drain from sewer pipes

Why did we consider a design that is made of plastic pipes? There are several reasons for this. One of them is that it is easiest to do it yourself. As you yourself noticed, there are no special difficulties during assembly, and the process itself is quite simple. The plastic system has several advantages:
- Low price. If your funds are limited, this is the perfect option for you. Since the material and all additional elements cost a little, and no one will have to pay for the work, you can afford it.
- Large range of goods. In hardware stores you can buy pipes of different diameters and colors, fittings, elbows and fasteners.
- Light weight. Thanks to this, you can easily transport pipes, and, more importantly, install them in their places. You can do all the work yourself, without the help of friends or relatives (this will allow you to do without the magician).
- Plastic is easy to work with. Pipes are easy to cut with a grinder or a hand saw. Everything cuts like butter. Therefore, special efforts to cut the pipe in half will not have to be applied.
- Sewer pipes do not corrode, are resistant to temperature fluctuations and ultraviolet rays.
If you have any additional questions, ask them below in the comments to the article. If you have already made such a drain system, share your experience: how long has it served you, were there any problems during installation or during operation, what can you advise inexperienced craftsmen.
 Masonry mortars for brick kilns
 Why do the windows fog up in the apartment
 Construction and schemes of brick ovens
 How to lay paving slabs: tips and tricks
 How to drill bathroom tiles
 Monolithic slab on coarse soil
 Which electric heater is economical