Draining rainwater from the roof
Rainwater flowing from the roof has tremendous destructive power. Firstly, the walls and foundation of the house get wet, which leads to their rapid wear. Secondly, water falling from a height onto the blind area knocks out and washes out the hollows on it in a short time. Concrete blind area can collapse quite quickly, as well as paving slabs. Thirdly, all the water flowing from the roof is absorbed into the ground right next to the house, which leads to flooding of basements and basement floors. You can list the consequences for a long time, but it’s already clear that it is necessary to drain water from the roof. To do this, a gutter system must be installed under the roof overhang, which collects water flowing down from the roof and directs it to the place intended for this on the site. To do everything right, you should familiarize yourself with what elements of the drainage system will be needed, what materials they can be made of, as well as with the technology for their installation.
Roof drainage system - elements
There are two types of drainage systems - external and internal.
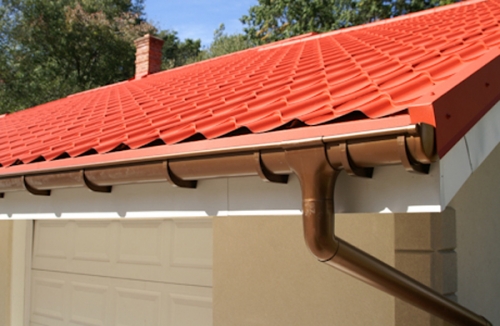
External drainage system installed on roof overhangs if the roof is pitched (single-pitched, double-pitched, hip, etc.). This type of system is used in most country houses, so we will consider it in more detail.
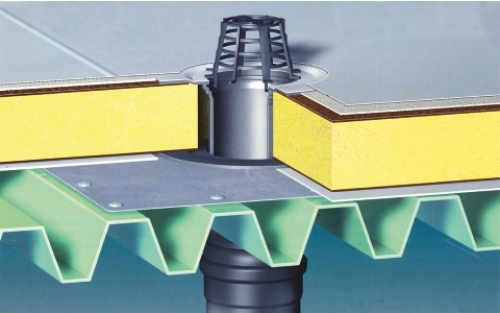
Settled on flat roofs, where the roofing material has a special slope leading to a funnel - a receiver of rainwater, which then enters the downpipe inside the building or in technical cavities.
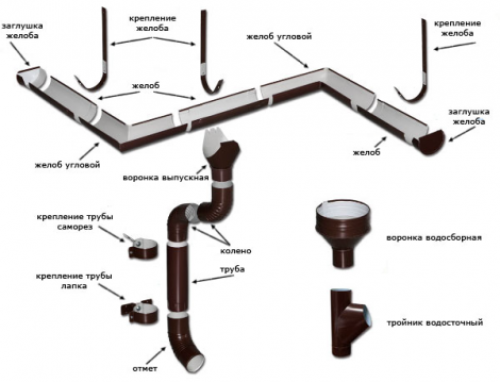
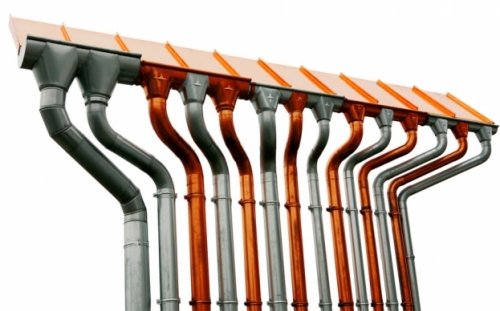
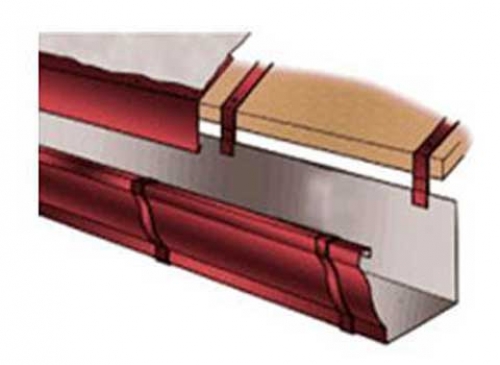
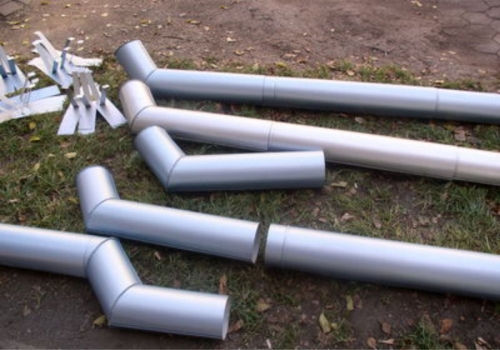
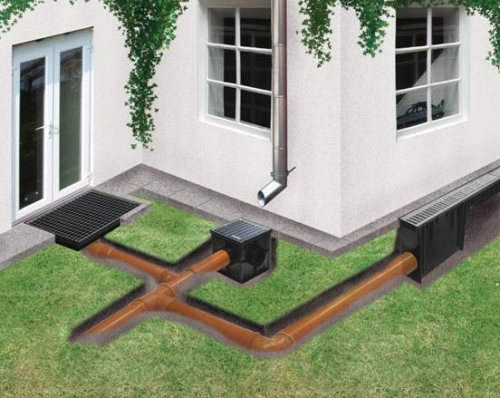
- gutter. Serves to collect water flowing from the roof of the house. It can have a different shape and size, it is made of various materials. Further down the gutter, the water is directed to a downpipe, which directs the water to a water drain from the roof.
- Usually the gutters of the gutter system are not longer than 2.5 m, therefore, to install the gutter on the roof, the length of which is longer, it is necessary to connect the gutters to each other. The connectors are equipped with rubber seals, which ensure the tightness of the connection, and also serve to compensate for the thermal expansion of the gutter material.
- Gutter Angle. Various corner elements to outline the interior corners of the house. Provides excellent hydrodynamics.
- brackets. Various kinds of elements that are necessary to fix the gutters to the roof. It can be a long hook for hanging gutters, a short hook, a compact hook. All of them have a different design and are used in different situations.
- Funnel gutter. With the help of it, water from the gutters is collected into the downpipe. A mandatory element for the installation of a drain, with proper installation, additional sealing is not required.
- Gutter plugs are installed along the edges of the gutter so that water does not drain.
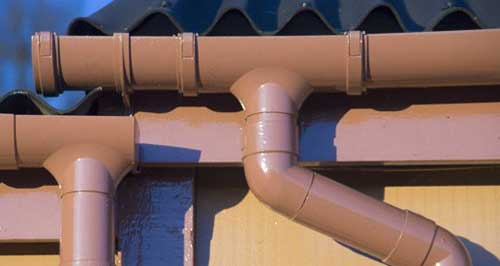
- Pipe. It drains water from the gutters. Further along the pipe, the water is drained to the place intended for this. Installed under the funnel and securely fixed to it.
- pipe elbow and drain elbow used to drain water away from the basement and blind areas of the building. The pipe elbow is used to change the direction of the downpipe. The drain elbow is installed at the bottom so that the water goes straight into the storm sewer.
- Brackets for fixing the pipe. They serve to fix the downpipe to the wall of the house, so that its position could not be disturbed by gusts of wind.
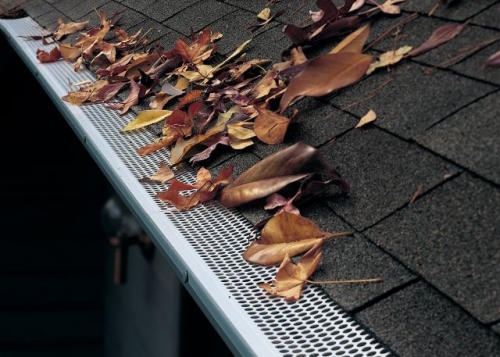
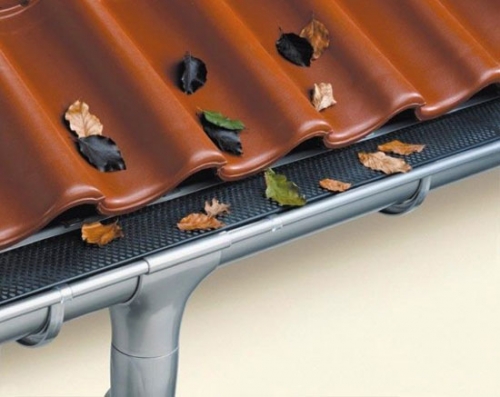
In addition to the above elements, a protective cap-mesh on the gutter so that debris, such as leaves, does not get into it. After all, a clogged drain begins to perform its functions poorly. Also, instead of a drain pipe, decorative drain chains can be used, through which water flows into a container or a flower bed located immediately below the funnel. Such a chain can be a real decoration of the house, if it is correctly beaten with other exterior items and you choose gutters that are organically combined with the chain.
Types of gutters and downpipes
Gutters and pipes are the main elements of the system that ensures the drainage of rainwater from the roof. On the market, you can purchase ready-made sets of drainage systems, consisting of various elements, after connecting and installing which you can be sure that the collection and runoff of rainwater is ensured. The main thing is to choose the right size. Typically, the gutter diameter ranges from 90 mm to 150 mm, and the downpipe diameter ranges from 75 mm to 120 mm.
What diameter gutter and downpipe to choose depends on the size of the roof of the house. For roofs with a small slope from 10 to 70 m2, gutters with a diameter of 90 mm are suitable, and pipes - 75 mm. For roofs with a slope area of more than 100 m2, gutters with a diameter of 100, 120, 130 and 150 mm are used, and pipes - 90 mm, 100 and 120 mm.
In addition to size, the elements of the drainage system differ in the material of manufacture and even in shape.
Gutter material
Gutter systems, including gutters, can be either metal, or plastic. Metal gutters include galvanized steel, aluminum, copper, titanium-zinc and pural gutters (galvanized steel coated on both sides with a polymer).
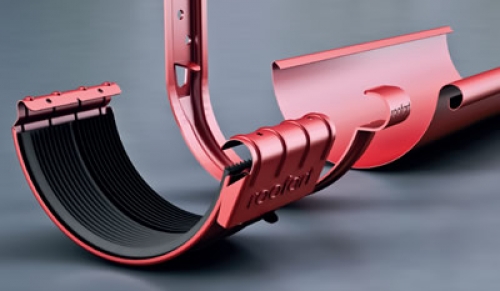
Although more resistant to water than the tin gutters that have been used in the past, however, they quickly fail under the influence of acid rain. Therefore, recently they are used less and less, and then only because they are the cheapest. But products coated with polymers, for example, pural, are resistant to corrosion, fading of the material, as well as mechanical stress. These gutters are available in a wide range of colors, so you can choose the product that best matches the facade of the building. The connection of gutters made of galvanized steel coated with a polymer is carried out using special connecting elements with sealing rubber bands, locks and brackets. And the brackets have a snap-on design. The disadvantage of such products is the fragility of the coating, which can be damaged during transportation or installation, and then rust will form at the site of the chipped polymer coating.
varnished or painted in various colors, so they serve for a long time. Products are bought ready-made and connected with rivets and glue for aluminum; special paste or silicone can also be used for sealing. In addition to finished products, it is possible to manufacture a roof water drain from sheet aluminum directly on the construction site by cutting the sheet and bending it in a certain way.

They are considered the most durable. They are made of pure copper without additional coatings. They are connected to each other with a seam or soldering. Most often they are mounted on seam copper roofs. Over time, copper oxidizes, acquiring a greenish tint, and later - almost malachite. This is the so-called patina - copper oxide. It gives the whole roof a certain sophistication. Against the general background of such a roof, the gutters and drains will not stand out at all, as if they are one with the roof.
When installing copper drains, it must be remembered that they should not come into contact with other metals - aluminum or steel, and the roof of the house should also not be made of these materials, otherwise the water flowing from them will corrode the copper.
Trough made of titanium-zinc may have a natural silver color, or may be specially coated with a patina. By the way, titanium-zinc is a material that is 99.5% zinc, and the rest is copper, aluminum and titanium additives. Titanium in this case gives a certain strength to the product, since zinc itself is very fragile. The zinc-titanium gutters are connected by soldering, during which special pastes are used. This type of gutters is the most expensive of the currently existing ones, therefore it is used extremely rarely. But it can last up to 150 years.
The most common. The plastic from which they are made is stained in its mass, so the color of the product is uniform and even if the surface is damaged, this will not be noticeable, as if the material was painted only on the outside. To make PVC more resistant to UV rays and chemical aggression, the surface of the gutters is coated with acrylic or titanium dioxide. PVC gutters are interconnected by means of couplings with rubber seals, latches and adhesive joints. The service life of a PVC drain can reach 50 years, and all due to the fact that PVC is not afraid of corrosion, withstands temperature extremes (-50 ° C - +70 ° C), as well as large snow and wind loads. In the process of snow falling from the PVC roof, the gutters are not damaged due to the fact that they do not have a vulnerable coating. For example, if the ice from the roof scratches the pural, such a gutter will not last long.
Gutter shape
In addition to the fact that gutters are made of various materials, they can also have a different shape. The sections of the gutters are as follows: semicircular, trapezoidal, semi-elliptical, square and rectangular, as well as imitating the shape of the cornice.
Semi-circular gutters are the most common and fit any roof structure. Their edges turned inward and outward are stiffening ribs, which increase the resistance of the gutters to mechanical stress. Semi-elliptical gutters are able to contain and move a larger volume of water, therefore they are used to drain water from the roof of a house with a large slope area. Square and rectangular gutters are selected for a specific design, so they are not used everywhere. In addition, such a design can be easily damaged during snow melting from the roof, therefore it is mounted in a special way, and snow retainers are installed on the roof.
Whatever shape of the gutters are chosen, the pipes for them must correspond: for semicircular and semi-elliptical gutters - round pipes, and for box (square, rectangular and trapezoidal) - square.
Brackets - hooks for attaching gutters differ in size and shape, as well as in the place of fasteners. It is from the place of fastening that the shape depends:
- Brackets attached to a windboard that is nailed along the roof slope. Such hooks are called front brackets, they are screwed to the wind board and have an adjustment mechanism.
- Flat curved brackets are fixed to the rafter leg, if the step between the rafters does not exceed the allowable distance between the brackets for the gutter, and can also be fixed to the extreme lath of the crate or to a solid boardwalk.
- Flat curved brackets can be attached to the side of the rafters, only they must first be bent.
- Universal brackets can be attached anywhere: to the windboard, to the last batten, to the rafters in the front or side, as well as to solid boarding.
Usually the brackets come with the gutters and the entire gutter system, so they match the shape and color of the gutter exactly. For example, for trapezoidal gutters, brackets of a special trapezoidal shape are used. The same applies to other types.
The material of the brackets depends on the material of the gutters. For copper products, copper or steel brackets are used. For titanium-zinc gutters, only titanium-zinc fasteners. But for gutters made of PVC or galvanized steel coated with a polymer, metal brackets are used, which are covered with a composite sheath or painted to match the color of the drain.
The dimensions of the holders and brackets must match the dimensions of the gutters. Although there are universal models that can be adjusted, so they are suitable for gutters and pipes of any diameter.
Installation of a rainwater drainage system from the roof
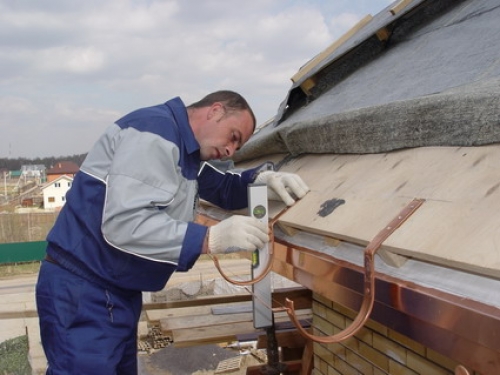
Installing a gutter system on a pitched roof is easy enough to be done by one person with a partner. Although in the installation technology itself there are some important nuances and little things that determine the reliability of the entire system. If you doubt your abilities, then it is better to entrust the installation to specialists. The fact is that manufacturers of drainage systems for the most part give a guarantee for the product. If the elements of the system are damaged during transportation or installation, the warranty will be void. If you turn to professionals for help, you will have a guarantee not only for products, but also for the work performed.
If you decide to install a drain for water from the roof yourself, then the instructions below will come in handy.
First of all, you need to decide what material you need the drain from, what shape and color. Then it calculates how many elements are required. After buying everything you need, you can proceed to the work itself.
Fixing brackets
It is extremely important to correctly determine what it is better to attach the brackets to specifically in your case. Remember, the distance from the gutter to the wall should not be less than 6 - 8 cm. Otherwise, the wall will get wet, if not from sewage, then from condensate.
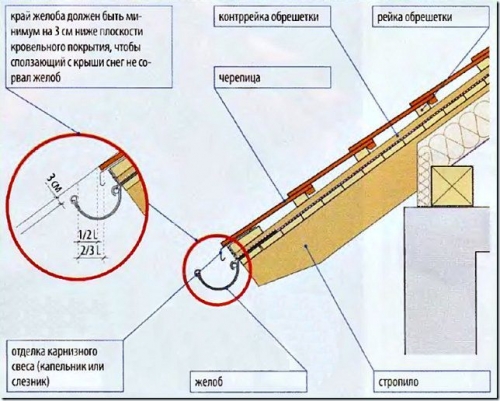
The next rule is that the gutter should be located with a slope of 5 - 20 mm per 1 m running, so that water does not accumulate in it, but rushes by gravity into the funnel and pipe. Therefore, the brackets must be mounted not on the same horizontal line, but with an offset. Before you start installing the brackets, you need to verify the required slope and outline it. Only then can installation begin.
How to collect water from the roof and correctly calculate the slope? We take the length of the ramp, for example, 8 m. The slope should be 10 mm per 1 m. It turns out that the difference in height between the upper and lower brackets should be 80 mm. If the length of the slope is more than 12 m, then it is necessary to equip two drain pipes, and make the gutter with a slope in two directions. Starting from the middle of the slope, the left side of the gutter should slope to the left and down, and the right side should slope to the right and down.
The topmost bracket is attached first.. It should be located on the opposite side of the drain pipe. It must be installed in such a way that the water flowing from the roof gets into it, but it is not in the way of the descending avalanche-like snow, otherwise the system will not withstand. The distance from the edge of the roof to the first upper bracket should be 10 - 15 cm. It is fixed with self-tapping screws.
The second is attached to the last lowest bracket. It must be fixed on the screws, without twisting to the end. Then a building thread is stretched between the brackets and places for attaching intermediate brackets are marked along it. The distance between the brackets should be 40 - 70 cm depending on the system, the most common spacing is 50 cm. All intermediate brackets are fixed.
Important! When installing brackets, it is important to remember that the gutters will be connected to each other and the bracket must not fall into place under the connecting element. Also, it should not be under the receiving funnel, but at a distance of 10 - 20 cm from it.
By the way, the receiving funnel is not installed in the corner of the slope, but 40 - 70 cm closer to the middle, at the level of the walls of the house.
Therefore, the last lower bracket must be rearranged slightly higher than the position on which it was first attached so that water can drain into the funnel.
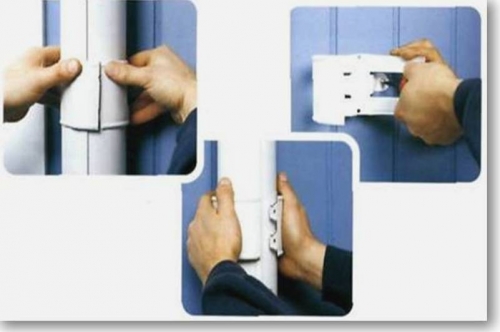
Installation of gutters
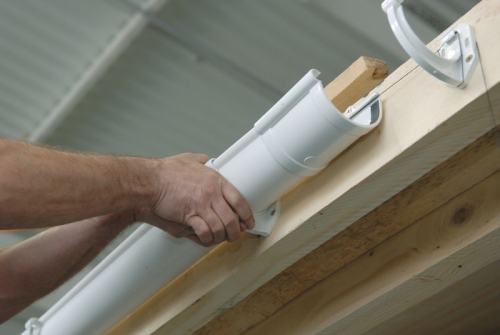
Next, the gutter is assembled and installed on the brackets. Gutters are usually produced in lengths of 1 m, 2 m and 2.5 m. Therefore, the elements must first be connected. To do this, use elements with sealing rubber.
![]()
Plugs are installed along the edges of the gutter, and a receiving funnel / storm inlet is installed in the right place. The axis of the funnel watering must coincide with the axis of the hole cut in the gutter.
The gutter should have a slope not only towards the receiving pipe, but also away from the house. This will ensure safety and reduce the possibility of damage to the gutter during an avalanche.
The drainpipes are installed last. The drain pipe must be exactly under the funnel/drainpipe. The pipe is fixed to the walls with special holders or clamps. The fastening of the clamps depends on the material of the walls, it can be screws, nails, self-tapping screws or dowels.
Pipe holders must be placed at the pipe junctions - under each socket. The maximum distance between the holders is 1.8 - 2 m. The last element of the pipe - the drain elbow - must be positioned so as to drain water to the place intended for this.
Where to divert water from the roof
Well, the drainage system is installed on the roof, it remains to decide where all the collected water will be discharged. And there are several options:
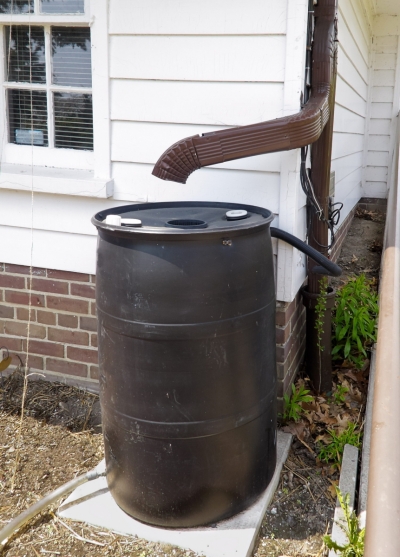
- . A barrel or tank for rainwater can be placed at a distance from the house (about 0.5 - 5 m) from above, or it can be buried in the ground. Water flowing from the roof will accumulate in the tank, and then it can be used to water the garden or garden.
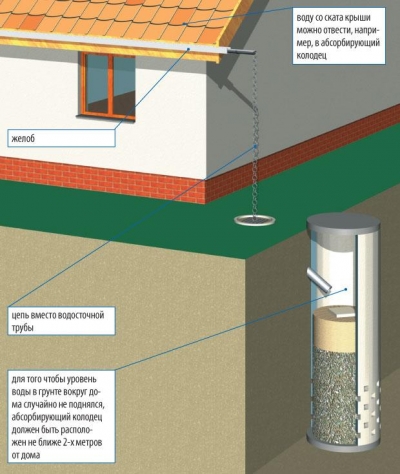
- If rainwater is not needed, and you are not going to water anything, then it can be diverted to a collection filtration well. A pit is dug in the ground, on the bottom of which a layer of rubble is poured. Then a concrete well is built on top, which is also half filled with crushed stone mixed with sand, and sand on top. This bedding serves as an absorbent element. Seeping through the sand and gravel, the water is purified. Such a well should be located at least 2 m away from the house, otherwise the groundwater level around the house may rise.
- . If a private house is connected to a central sewer, then rainwater can be diverted into it, but only by agreement and for a fee.
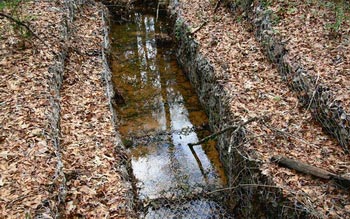
- Draining rainwater into a drainage ditch or pond. Rainwater is clean enough not to harm the ecosystem if poured into a drainage ditch or water body (lake, river, artificial kopanka). The main thing is to calculate that the water level in the drainage ditch does not rise too high in case of heavy rains.

The removal of water from the roof of the house is mandatory so that it does not undermine the foundation and does not destroy it. Therefore, if possible, it is necessary to equip a complete drainage system. If this is not possible, for example, this happens if the roof is sloping and made of natural materials - reeds or straw, then its overhangs should protrude at least 50 cm outside the house. At the bottom, it is desirable that water flow directly to the ground.
 Masonry mortars for brick kilns
 Why do the windows fog up in the apartment
 Construction and schemes of brick ovens
 How to lay paving slabs: tips and tricks
 How to drill bathroom tiles
 Monolithic slab on coarse soil
 Which electric heater is economical