Making slopes from drywall with your own hands
Making drywall slopes with your own hands is quite easy. This is one of the most popular types of finishing of openings, which does not cause difficulties during installation, and also makes it possible to obtain a beautiful and reliable surface. Of course, there are other options, but the use of GKL plates is more justified when work is to be done with door and balcony openings. This method is also excellent in the case when a large assembly seam is obtained on window openings.
The installation of drywall slopes begins with the fact that you need to choose the right material. The most common mistake is that many people buy the cheapest and thinnest type of GKL boards. But you should not do this. For work, it is advisable to use moisture-resistant sheets with a thickness of 12.5 mm. Especially when the openings (door and window) that are located on the "street" wall are affected.
Of the tools and materials you will need a minimum set, which consists of the following:
- Construction or good clerical knife.
- Putty knife.
- Ruler.
- Hammer and chisel.
- Container for putty.
- Perforated corners.
- Mounting foam.
- Sealant.
- Hacksaw or electric jigsaw.
- Dry putty.
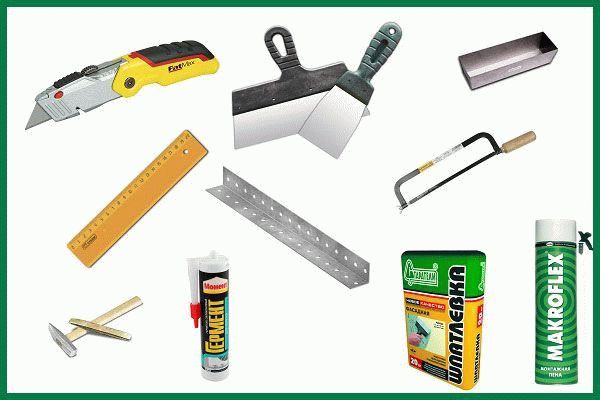 Tools and materials for the manufacture of plasterboard slopes
 On a note! Using ready-made putty options is an unjustified expense. Indeed, it can be used for finishing work, but for preparatory and starting events it will be completely inappropriate.
Preparatory activities
Installation of slopes from drywall is impossible without prior preparation. For window and door openings, the process is almost identical. But in the latter case, it is necessary to pay attention to the following nuances:
- Availability of various communications. It can be a twisted pair for the Internet, an electricity cable, a bell wire. Therefore, it is advisable to take care of their installation in advance.
- Possibility to install a second entrance door. Such a need arises when the first door is not insulated and does not have sound insulation.
The general preparation technology is as follows:
- All excess mounting foam that appears after foaming the seams is cut off.
- With the help of a hammer and a chisel, all unreliable and protruding sections are knocked down.
On a note! It often happens that iron pins are found under a layer of plaster, which are left over from old door frames. They need to be cut or completely removed.
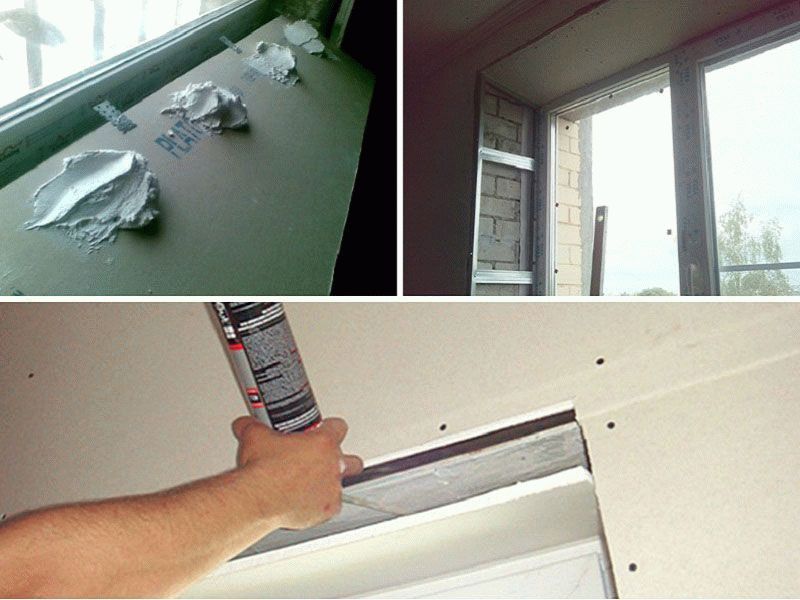
- Cracks and potholes are covered with prepared putty. The joints that have formed between the frame and the wall are additionally coated with sealant.
- After the putty has dried, two coats of primer are required. It is better to choose solutions that have antiseptics in their composition.
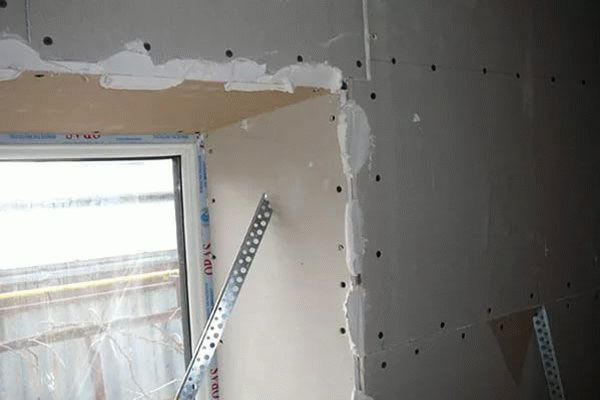
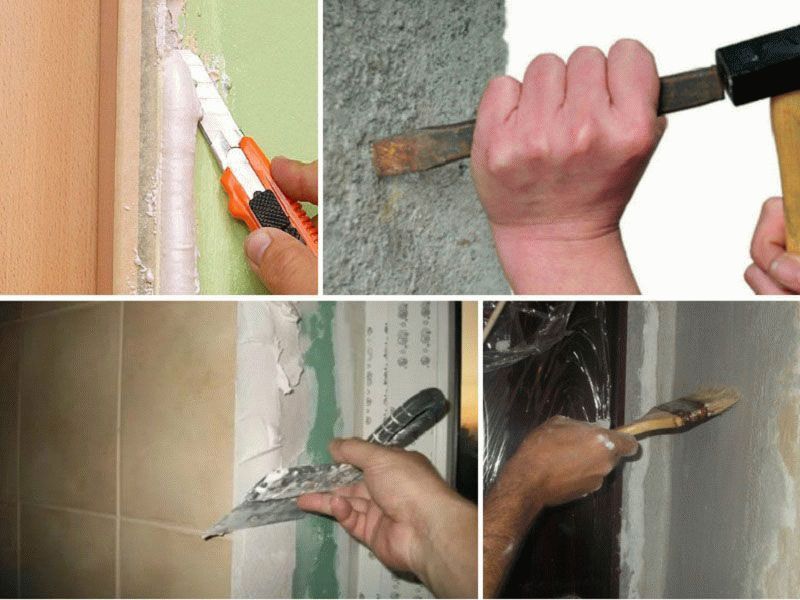 Preparation of the surface for the installation of plasterboard slopes
 The final stage of preparation is the cleaning of the work site from dust and dirt. Everything should be well swept and wiped. To prevent damage to the installed structures, they are glued with polyethylene and covered with cardboard.
Working with drywall
To get the perfect slopes of drywall with your own hands, you need to correctly measure all areas. The procedure needs special care. If errors are made during measurements, then it will no longer be possible to correct the damaged parts.
Measurement
The order of work is as follows:
- The distance from the door jamb or window frame to the corner is measured. This must be done in at least three places.
- The height of each of the vertical posts and the length of the horizontal fragment are determined. Each surface area is checked separately.
- All calculations are transferred to a piece of paper. A diagram of all elements is drawn. The received data is checked.
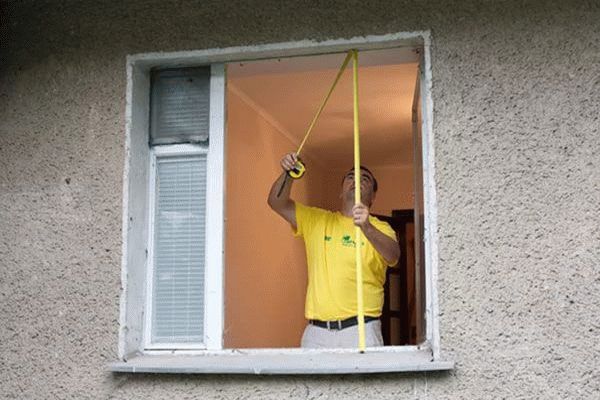 When working with drywall, it is important to make all measurements correctly.
 It is important to bear in mind that finishing the slopes of windows with drywall can be done using various methods, but initially it is necessary to cut the material.
cutting
GCR boards are quite easy to cut, the procedure is as follows:
- The required dimensions are transferred to the sheet.
- An iron ruler is applied to the drawn line. It will serve as a stiffener along which a knife is drawn. It is necessary to ensure that the cardboard and part of the gypsum should be cut through.
- Under the place where the trimming was performed, a bar is placed. A few blows on the edge, and the plate breaks along the cut. Cut off the bottom of the cardboard.
- Curvilinear sections are cut with a hacksaw for metal and an electric jigsaw.
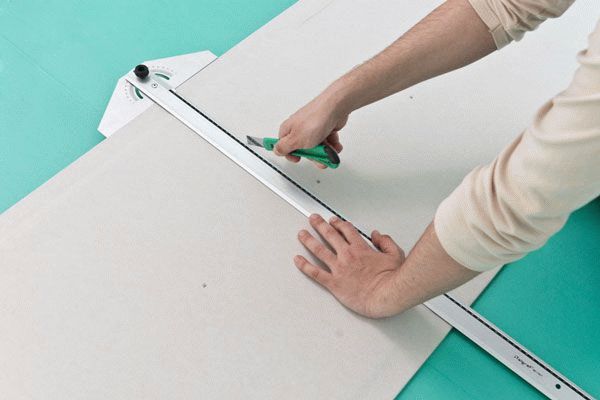 Drywall sheet cutting procedure
 On a note! For the installation of drywall window slopes and finishing of doorways, the general rules for measuring and cutting are used.
Various installation options
Finishing slopes with drywall is carried out in three main options:
- Installation with mounting foam.
- Putty adhesive.
- Frame mounting.
 Various installation options for drywall slopes
 Each of these methods is suitable for independent use and gives a complete picture of how to make slopes in different situations. These methods are used for finishing all types of surfaces.
Using mounting foam
It is believed that the use of mounting foam is one of the fastest and easiest slope installation procedures. Indeed, this option is quite convenient. But it must be borne in mind that an error with the amount of material is a guarantee that the coating will be deformed.
 Application of mounting foam on a slope of drywall
 Window and door slopes made of plasterboard on foam are laid in the following order:
- All preparations are being made.
- The foam bottle shakes well. Of course, it is much more efficient to work with professional materials that are applied with a special gun. But with small amounts of work - it makes no sense to purchase them.
- The substance is applied in a thin layer (snake) on the wrong side of the cut parts.
- The element is applied to the desired area. But it is not left in place, but immediately torn off.
- The fragment is left for ten minutes. After that, it is finally installed on the selected area. First, the first vertical part is placed, then the horizontal and again the vertical.
- After 24 hours, start finishing work.
This method will be the ideal solution if you need to ennoble interior openings or make plasterboard window slopes in a short period of time.
Landing on putty
But how to make drywall slopes more reliable so that there are no problems. For this, the option with putty is excellent.
The procedure is as follows:
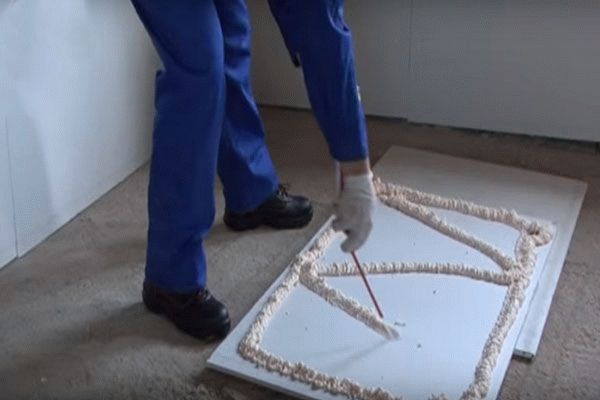
- Thorough preparations are being made. The dry mixture is diluted.
- A solution is applied to the wrong sides of the parts. It is placed around the entire perimeter of the panel, and dotted areas are also made in the center.
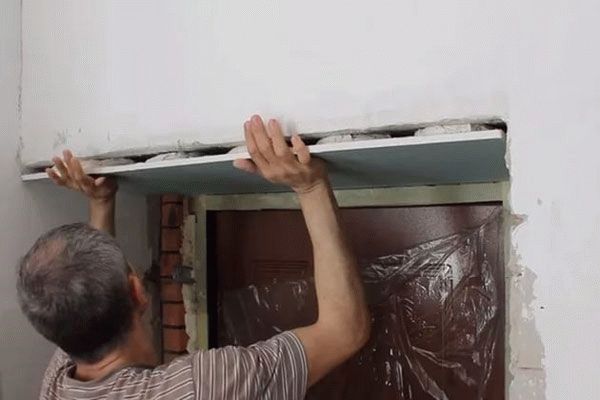
- The workpiece is installed in the selected place and pressed. It is necessary to ensure that the fragment sticks well.
On a note! To achieve better adhesion, the surface is sprayed with water. Needs some hydration. To increase the fixation force and its reliability, spacers are placed.
- Each element falls into place and is left for two days. Some craftsmen advise continuing work after 10-12 hours, but it is better to give more time for the solution to fully set.
- Now you can do the final finishing.
Thus, a reliable surface is obtained. This option is great for making slopes on the front door of drywall.
Facing on the crate
This solution allows you to get a practical coating. But it is important to consider that the material will be fastened with self-tapping screws. Therefore, it is necessary to follow the fixing rules, which consist in the fact that the screws are twisted flush with the surface, without excessive deepening.
The crate is created quite simply:
- For installation, wooden bars or metal profiles are used.
- The guides are cut into segments, which are determined by measurements. It is important to install elements around the entire perimeter along the inner and outer corners. We must not forget about the crossbars.
- If required, the frame made can be insulated. For this, mineral wool is used, which is hammered into the resulting cells.
- Next, the details of the GKL are installed. But it must be borne in mind that they are measured and cut only after the creation of the crate.
- All fragments are fixed on self-tapping screws.
This option is most often used when finishing the slopes of windows with drywall is carried out together with the lining of adjacent walls. Working with a doorway can be difficult because its size will be reduced.
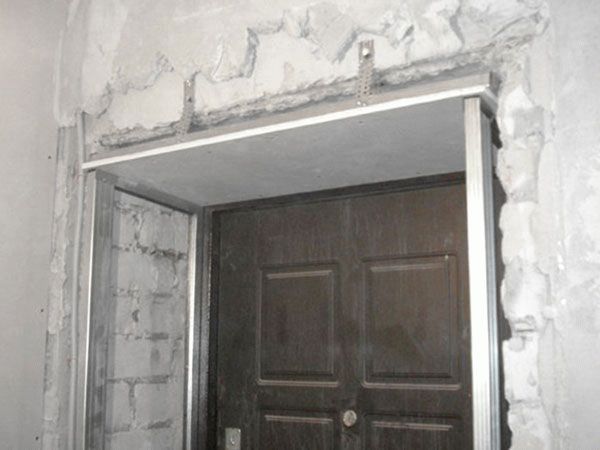
 The installation of slopes on the frame is most often done when finishing adjacent walls with drywall
 Finishing work
After completion of all work on the installation of gypsum boards, surface finishing can begin. To do this, a number of simple procedures are followed:
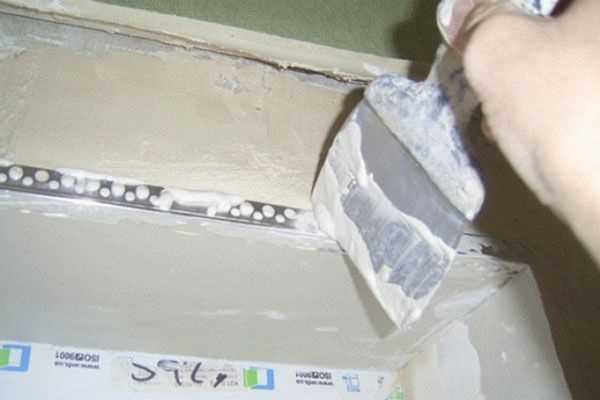
- A thin layer of putty is applied to the areas to be treated.
- A perforated corner is installed on the outer corner. It is covered with a layer of solution.
- The finishing layer is laid, which evens out the remaining irregularities.
- The final version of the decorative finish is selected.
 Finishing plasterboard slopes
 Summarizing the above, we can conclude that there are a sufficient number of ways that give a complete picture of how to make slopes on plasterboard windows and ennoble sections of doorways. You just need to choose one of the options and follow the simple installation rules.
 Masonry mortars for brick kilns
 Why do the windows fog up in the apartment
 Construction and schemes of brick ovens
 How to lay paving slabs: tips and tricks
 How to drill bathroom tiles
 Monolithic slab on coarse soil
 Which electric heater is economical