How to upholster a door with dermantine with your own hands? Upholster the door with leather with your own hands: we make doors upholstered in leather with different materials How to properly upholster the door with dermantine
How do we nail rollers?
The roller is nailed to the door frame and serves as a stop for door leaf.
With proper upholstery, the tightness of the door is taken into account. When closing, the roller should not create significant resistance, but there should not be any free space. Roller upholstery is a complex and time-consuming job that requires a lot of experience. The installation of rollers is carried out only on wooden doors, since the fastening is carried out with special nails that are not hammered into the metal.
Design metal doors initially assumes the presence of stops, seals and porches, which act as rollers. Installing a roller on a metal door is possible only if it was originally installed on the door. In the process of manufacturing a metal door wooden blocks hammered into the frame, for fastening wallpaper nails. In the presence of such a design, upholstery with rollers is possible without additional refinement.
When is it impossible to upholster the front door?
After removing the upholstery, you have to deal with unpleasant surprises. Unfortunately, door manufacturers, in the fight to reduce the final cost of the product, go to all sorts of tricks to save on materials used in the production of doors. Therefore, you should not be surprised if, under the upholstery of the door, it suddenly turns out that the door is not made of a whole sheet of steel, but of strips of metal, between which a gap of a centimeter is left, or hardboard, that is, pressed paper, is used instead of metal.
Of course, such surprises will not please not only the owner of the door, but also the master who came to order, since they greatly complicate his work. Also, the inner sheet can be made of plywood. When using plywood instead of metal, the thickness of the plywood is critical. When using a thin sheet of plywood, there is simply nowhere to hammer nails. In this case, the master has to resort to pasting the door with leatherette.
Doors equipped with crossbar mechanisms may have non-separable handles for driving the crossbars. In such a situation, upholstery without dismantling and replacing the handles is impossible. Replacing handles increases the cost of the work. And in some cases, the production of work in general becomes impossible.
How to upholster a door
Despite the fact that stores delight consumers with the widest range of entrance and interior doors, the front design of which is carried out according to the most modern technologies, not every owner of an apartment or house is in a hurry to make such a purchase. The high price of many models is not so bad.
The problem is that replacing the box requires at least repairing the slopes, and / or wallpaper on the wall - and this is a completely different expense. Besides, old door It may still be quite strong, and therefore it is a pity to change it. In such a situation, upholstery with leatherette doors is one of the best ways updates, which is quite possible to do it yourself.
Before talking about how to sheathe doors with dermantin, let's bring some clarity to one question. Since dermantin has been used as an upholstery material in our country for almost 90 years. We used to call soft door upholstery that way, without going into too much detail.
However, there are also fundamentally different materials, which in everyday life are still habitually called dermantine.
In fairness, let's clarify what is the difference between them:
| Upholstery type | Brief information about the material |
|
Leatherette (nitro-leather), how to upholster |
This material is a kind of artificial leather. It is based on cotton fabric or knitwear with a nitrocellulose coating, which is why it received its second name: nitroleather. The coating may be applied on one or both sides. This is the cheapest finishing material, the price of which starts from 200 rubles / m.p. Thus, the entire door upholstery with leatherette, together with fasteners and insulation, will amount to no more than 1,500 rubles. |
|
|
Since nitro-leather does not have high aesthetic qualities, and wears out rather quickly, more resistant polymers such as PVC and polyacetate began to be used as a coating for the knitted base. Viniliskin practically does not have the shortcomings of its predecessor, and outwardly often imitates natural leather. So, the leatherette for door upholstery that you looked at in the store is most often not nitro-leather. Be guided by the price tag: even if “dermantin” is written on it, keep in mind that when the price per meter is 600-800 rubles. and more, then it is vinyl leather. |
|
|
This option is not artificial leather. It is closer to genuine leather, as it is a composite of leather and latex. This material is made from scraps of leather, crushed into a powder bound by a polymer. In terms of strength, elasticity and appearance, it is very similar to natural leather. A beautiful texture or embossing can be made on the surface of the composite leather. Shoes are even made from this material. And upholstery with dermantine of internal doors, as well as wall panels or upholstered furniture, using recycled leather, which will look simply chic. |
|
|
This photo shows a variety of artificial leather on a non-woven basis. Eco-leather has the highest characteristics regarding strength, wear resistance, thermal conductivity, and even frost resistance. So it can be safely used for upholstery of a street door. |


Tools and Consumables
Besides decorative material, which will go to the upholstery, you will also need a foam pad with a thickness of 10-15 mm. It will help to solve two problems at once: to insulate the door and create a beautiful relief on the upholstery.
- You can, of course, use other leatherette door heaters: batting, felt, synthetic winterizer, but it is foam rubber that allows you to make the upholstery really soft.
- When sheathing is done on both sides- especially if this is the entrance to an apartment or house, rollers are usually made around the perimeter, which decorate the ends of the canvas, and at the same time prevent cold air from penetrating through the cracks. For this, foam rubber is also used, only round - in the form of a bundle with a diameter of 2-3 cm.
- From fasteners you will need furniture nails with a wide hat. Imi along the perimeter of the canvas, rollers and upholstery, and decorative nails are attached. They can have a figured metal or plastic cap.
Note! The best way to cover the door with dermantine looks when nails with caps are used. They can be selected in color, or in contrast. And even more convenient is to purchase a ready-made upholstery kit, in which everything that was mentioned above is there. It costs at least 850 rubles. on one side, but it depends on the quality and design of the attached material.

Of the tools, for work you will need a tape measure with a pencil, a hammer, pliers, a chisel, a knife. In the case when fastening along the perimeter is not done with nails, but with staples, a stapler is also needed.
In principle, do-it-yourself door upholstery with dermantine is a simple matter. Not only men, but also housewives can cope with it, since this does not even require removing the canvas from the hinges. Although, it is, of course, more convenient to work on the removed canvas. Next, we will introduce you to the process, and offer as visual aid video in this article.
Important Points
The maximum width of the door leaf is 100 cm, and upholstery materials are at least 140 cm. So, the necessary margin is obtained in width on both sides, and there are still strips from which rollers can be formed. Strips 13-15 cm wide are enough for rollers.
So:
- According to the height of the door, leatherette is also cut with a margin of 10-15 cm on each side. The amount of overlap depends mainly on the thickness of the insulation, but do not forget that it is better to cut off the excess than not enough.
- As for the insulation, it is cut exactly to the size of the canvas, and nailed to it with small carnations or planted on glue.
- Given the fact that the door is decorated with an old one, before starting work, it is necessary to eliminate all malfunctions that prevent it from closing normally; if necessary, strengthen the box; sand and paint the hinges.
On request: “upholstery of the door with leatherette video”, you can find many videos that show not only the process of sheathing, but also talk about how to make repairs and other preparatory work. For example, it is very important to beautifully decorate the end of the door, which does not close with a sheathing, and will spoil the whole picture.
And in general: if you do not stint on the purchase of material with an interesting texture and original fasteners, as well as do everything right, your door will look no worse than in the examples presented above as a sample.
As already mentioned, door trim with dermantin can be performed without removing them from the hinges. But if you want to create a beautiful geometric pattern, it is still better if the canvas is conveniently located in a horizontal position.
Drawings can be used as traditional ones, most of which are presented below, or you can come up with something of your own. Just do not improvise in the course of work - it is unlikely that something good will come of it. It is better to think over well and draw a diagram, and already produce skin according to it.
Before trying on the leatherette, all accessories must be dismantled from the canvas: handles, lock. If there is a closer on the door at the top, you can not touch its body, but carefully bypass it by making a corresponding recess in the sheathing material.
Do-it-yourself sheathing, instructions
Sheathing with roller
To form rollers, either flat insulation, rolled into a tube, or a round foam rubber tourniquet. To wrap it, you need strips of upholstery material. As a rule, these are trimmings of the dermantine canvas - it is with them that the work begins.
The strips are applied to the canvas with the front side, and fixed to one side with simple nails or staples like this. Next, cut off the foam rubber band of the desired length, and wrap it in a strip, attaching its second end to the canvas.

Depending on the volume of round foam rubber and the elasticity of the upholstery, rollers with a diameter of 5-6 cm are obtained. However, the procedure for their formation may be different.
If you do this before the main door trim is made with leatherette, the roller fasteners will be hidden under it. What happens as a result, we see in the picture above.

The following example shows a variant in which the bead is formed after the fabric has been sheathed. Then the width of the strip should be such that you can make a hem. In this case, the front fastening is done with decorative nails.
Note that the roller can only be made from the outside of the door - and even then, provided that it opens onto the street or landing. Otherwise, the roller will interfere. On the inner doors, there is no need for it at all, because it is not made for beauty, but to eliminate drafts.
Main cladding
Without a roller, everything is much simpler, and it looks neater. First, the insulation is attached. On the removed door, glue can also be used to fix the foam rubber. When the door leaf is in a vertical position, it is much more convenient to use a stapler for this purpose.
So:
- Fastenings are made in such a way that the foam rubber is freely bent along the edges - the size of the indentation is 5-6 cm. It is needed so that the ends of the sheathing material can be filled under the insulation before you begin to fasten it with decorative nails.
- In general, there are different ways fix the soft lining on the door leaf. If it is not removed from the hinges, then it is better to first fill the dermantin under the foam rubber, and fix the middle with a decorative nail.
- After that, the sheathing material is well stretched, and is fixed first in the corners and in the area of \u200b\u200bthe castle, and then around the entire perimeter. At the same time, in addition to nails, you can also use moldings matched to them in appearance, imitating a solid mount. This simplifies the work, and gives the skin some originality.

- This is the simplest version of the skin, which absolutely anyone can do. Complex patterns are performed on the removed canvas, and the procedure largely depends on the pattern. And, by the way, it may not exist at all.
- When is upholstery done? outer door, many masters begin to fasten leatherette from the loop side. The material is first laid face down and baited along the edge with a stapler, then the insulation is laid, the upholstery is wrapped in the desired position.
- When one long side is ready, the material is well stretched, and, bending along the edges, the end ones are attached. With this upholstery scheme, the cushion is also formed, but only from the side of the castle. Therefore, a strip of fabric is nailed here in advance, and then, when the main upholstery is already completed, a roller is formed. Its purpose is to hide the edge of the skin, and decorate it beautifully.

When ready-made kits are used, which have decorative nails covered with vinyl leather, which involve making a beautiful pattern, the order of work is somewhat different.
Note! Such nails are not quite common - they are not hammered. They are detachable and consist of two elements: a flat base with a threaded pin, and a decorative cap screwed onto it. Such a fastener design allows you to veneer with leatherette not only a wooden, but also a metal door.
- To complete the drawing, appropriate markings are applied to the door leaf. For this purpose, it is better to make a pattern from the same leatherette. Holes will be made on it, corresponding in diameter to the size of the nail head. The contours of these holes are also applied to the door.
- In those places where there should be decorative fasteners, an element with a pin is planted on glue, which is also often present in the kit. Also, in some kits, a special profile is provided, which is glued around the perimeter. In the grooves of which the canvas should be refueled. They cost more, but the upholstery is much more accurate.
- When the nail pins and profiles are glued, the insulation is spread and cut to size, and upholstery is laid on top of it. The cladding, together with the foam rubber, is placed on the pins of the nails, and then the hats are screwed onto them. Start from the center, and in accordance with the pattern move to the edges.

Lastly, the edges of the upholstery are tucked into the profile. Do this with a round spatula, which is usually used for installation fabric ceilings. Excess material is cut off after it is tucked into a baguette around the entire perimeter - and the skin is ready.
Finally, we note that when do-it-yourself upholstery of doors with dermantine is done, the video watched before starting work will allow you to better navigate and master the technology.
The final part of the installation
The last step is the installation of accessories. In the new upholstery, it is necessary to make cuts of the hole slightly smaller than the size of the holes in the canvas, this is very simple, since they are well felt through the leatherette and the substrate. Reinstall the handle and lock, peephole, hinges. Then you can proceed with the installation of the canvas in the opening, put it on the hinges and you can enjoy the work done.
Design options
In order to make the final result look a little more interesting, you can not only sheathe the front door from the inside, but add a few curly elements to its surface. To do this, you can use the remaining furniture nails. Carefully mark the places for their installation on the surface of the dermantine, after you hammer in the nails, you can tuck a decorative lace under them. Leatherette and soft lining will change: the contours will be pressed through and a peculiar pattern will appear on the surface of the door. Usually rhombuses are made in this way, but other schemes can be used.

Schemes of decorative upholstery of the door
The easiest way to work with a wooden door, but with a sufficiently thick and dense layer of the substrate, you can make such a decor on iron door. To do this, you need to fasten the nails or buttons with a strong thread on the reverse side before sheathing the fabric, connecting the foam rubber and dermantin.
Do-it-yourself door trimming with dermantine is quite simple and interesting, besides, it allows you not only to save on purchase new door, but also gives a unique opportunity to create your own author's version of the finish. When done correctly, it will look no worse than the industrial version.
;
Of course, today, if the front door has lost its former attractiveness, the issue can be solved radically - just replace it. Fortunately, those times have passed when this procedure was really a problem due to the total shortage of absolutely everything. But… First of all, not everyone wants to part with their good, albeit already dried up and let in all sounds and smells door. Secondly, not everyone can afford the installation of a new one. What to do in this case? Breathe a second life into it - upholster the door with dermantine! With your own hands or invite a specialist. True, the first option is preferable, if only because it will allow you to save a fairly significant amount. And this, you see, is a strong argument. Therefore, arm yourself with materials, tools and knowledge on how to upholster a door with dermantine. And don't be scared. Even if you have held a hammer in your hands only a couple of times in your entire life, everything will work out! The process is very simple, you will not have any difficulties.
So let's start. We offer you a master class on the topic: "How to upholster a door with dermantine." Study, and then, with full confidence in your abilities, proceed to work.
All about dermantin
But first you need to say a few words about the upholstery material itself, which, by the way, has been updating doors for a very long time. It is considered a type of artificial leather, but it is a more budgetary version of it. The wrong side of it is and the front side is a layer of nitrocellulose.
If we talk about its performance characteristics, it should be noted that leatherette is distinguished by strength, durability, ease of maintenance, more than affordable cost. In addition, there is such a variety of colors and textures on sale that if you decide to upholster the door with dermantine with your own hands, you will not have any problems with the choice. On the contrary, one can choose interesting option of this material, your front door will look as good, if not better, than your neighbor's expensive, custom-made door.

What you need
Agreed with the upholstery. But since it is necessary to upholster the door with dermantine using a heater - a special lining material, then you need to stock up on them. Usually, either foam rubber or special batting is used for these purposes. As for the amount of material needed, both insulation and leatherette should be purchased according to the size of your door (including allowances for seams - ten to twelve centimeters on each side).
You will also need furniture nails. They are usually produced with metal hats, which can be made in various colors and stylized as silver, gold or bronze. If desired, you can also find carnations, in which the hats are upholstered with dermantine. You also need to purchase metal corners (four pieces), PVA glue.
How to upholster a door with dermantine without a tool? No way! Therefore, stock up on a screwdriver, screwdriver, hammer, stapler and scissors. You can start.
Preparatory stage
The door, of course, will have to be removed from its hinges. Then remove from it - if any - all the old upholstery. Along the way, get rid of everything that can interfere with the update process: remove the lock, remove the peephole, hinges. If there are any defects on the door leaf - eliminate them. When the surface is fully prepared, you can proceed to the main stage.

How to upholster a door with dermantine
Free up space in a room or hallway, put two stools, put a door on them. Screw on the corners. They will make your structure stronger. Cut the insulation in accordance with glue and glue the foam rubber or batting. In order not to wait until the glue dries, grab the material in several places with a stapler. Then lay out a piece of leatherette on the insulation, and so that there are identical seam allowances on each side. And then tuck the edges inward, under the insulation, forming, as it were, a small roller and at the same time nailing them. Algorithm of actions: we start from the top edge, then we fix the left and right sides, the bottom - at the very end. When fixing the roller, be sure to ensure that its thickness is uniform. And be sure to drive in the carnations at the same distance from each other, otherwise your door is unlikely to look neat.
That, perhaps, is all. On this master class "How to upholster a wooden door with dermantin" can be considered finished. But still, it is necessary to mention one small detail, thanks to which the front door to your apartment will become truly exclusive.

decorative trim
To decorate the surface of the updated door, you can use special braid or cords. Of these, a drawing is laid out in the center or over the entire surface, and then fixed in the right places with carnations. And you can “depict” whatever your heart desires: a grid, vignettes, rhombuses. It's like fantasy tells you.
Now that's really all. It is possible not only with a clear conscience to teach everyone how to upholster the door with dermantine, but also to demonstrate the result.
Leatherette- a substitute for leather, is one of the most sought-after materials. The material is most widely used in construction and decoration.
The high demand for leatherette is justified by the following characteristics:
- Frost resistance. The material performs its functions well even at sub-zero temperatures. It also helps keep the heat in the house, so it can be used on front doors;
- Durability. The material retains properties from 7 to 10 years;
- Water resistance. The material has moisture-resistant properties, which eliminates damage to the product or insulation;
- Soundproofing. The material can be used for front door, since noise will not penetrate the room through the canvas;
- Ease of maintenance. To keep the look of leatherette, wiping with a damp cloth is enough. You can use a special cream that will give the leatherette a shine;
- Antiseptic properties. Resistant to bacterial decay, mold and other pests;
- Resistance to aggressive chemical environment. The material can be washed with any household chemical;
- Low cost. Sheathe leatherette affordable for the average family;
- Wide range of textures and colors.
Instruction - we sheathe with dermantine
In the process of upholstery of the product, you must adhere to a certain technology. It will allow you to make the most of useful properties material and ensure a long service life. The procedure includes the following steps:
- surface preparation;
- upholstery with insulation;
- leatherette upholstery;
- decor accessories.
Each stage has its own nuances, so you need to carefully familiarize yourself with the features of the implementation of the listed points.
Training
If the skin is being replaced, it is necessary to stock up on a knife, pliers and, if necessary, a screwdriver. The procedure is as follows:
- Removing from the loops.
- Dismantling of accessories.
- With the help of pliers, all decorative nails are removed.
- Leatherette and insulation are removed. Getting rid of the insulation can take some time if it was attached to a metal door with glue.
- The surface is being prepared for cladding.
If the door was not upholstered before, then all the fittings are simply removed. It is necessary to remove all elements that stick out on the surface. A flat surface should go under the leatherette, so you can level the relief with a plywood plate. You can fasten it with ordinary nails. It is important not to forget to treat the wood with special means.
insulation
First you need to decide on the material of the insulation. The most suitable for dermatin are:
- Foam rubber. Low price, wide range of density and thickness. It has a service life equal to dermatin. Possesses average insulating properties;
- Batting. Inexpensive material, with a service life of up to 30 years. However, it will shrink over time and may absorb moisture. It is toxic when burned;
- Izolon (a subspecies of polyethylene foam). Most modern version. It has good insulating properties. The most expensive of all materials, but the final cost will not be too high.
On a wooden surface, the insulation is fixed with a stapler. On the outside, up to 8 cm must be retreated from the edges. Insulation is applied to the entire area, without indentation. Marking is applied for working with a stapler or driving nails. The step between staples or nails should be 10–15 cm. Processing is carried out around the entire perimeter.
For a metal surface, glue is needed, which is also applied around the perimeter, stepping back up to 8 cm from the edges. We must not forget to cut the insulation on the handle, lock and eye.
Preparation of tools, accessories
To rationally use time, before upholstery, you need to acquire a set of necessary tools. The set includes:
- hammer;
- stationery knife and, if necessary, scissors;
- stapler (if not, a hammer is used);
- roulette;
- marker;
- brushes (for metal surfaces).
The list of tools and materials for wooden and metal doors is slightly different. Therefore, the plating technology for each material has its own. It is also important to acquire all the materials at once:
- leatherette;
- insulation;
- staples for a stapler or nails (wooden surface);
- glue (metal);
- decorative nails;
- braid (in case you need to additionally fix leatherette, and decorate the door).
Reference! It is not difficult to choose decorative nails by design, as the market is overflowing with products. different shapes, sizes and colors.
upholstery technology
Working together will go much faster. The second person will help stretch the fabric for comfort and evenness of the relief. The edges of the canvas are always bent inward, which will make the upholstery field durable and aesthetic. Gates should be a few centimeters. The wooden door is upholstered with carnations with a decorative cap. Step from 10 to 15 cm.
Important! It is necessary to ensure that the insulating rollers do not look out of the gates.
Leatherette should not cover the door to the very edges. A few millimeters need to retreat, which will ensure free movement.
Figured design is often used with decorative nails. Soft insulation allows you to create a relief on the surface, which will completely transform the door. Be sure to mark the places for installing accessories with a marker. Next, carnations are hammered into the intended places, which usually have a removable decorative cap so as not to damage it during installation.
Exists a large number of patterns that can be created on the surface: from simple dots to geometric shapes such as rhombuses, squares. On the Internet, you can find many schemes for decorating with furniture nails. Between the nails, you can stretch a decorative thread that will change the pattern and relief.
For a metal door, you need to come up with a drawing at the preparation stage in order to fix the bases of the screw buttons on the glue. In the insulation and leatherette, small holes are made in advance for screw buttons.
Upholstery of a wooden door: video
Upholstery has its own nuances. Wood needs care and protection. Therefore, often wooden doors have an unpresentable appearance. good option restoration is upholstered with leatherette.
The tree must be treated with an antiseptic. When working with a wooden canvas, the lining must be fixed with a stapler. Since glue is required for the iron surface, it is much easier to staple the wooden canvas.
Furniture studs are used on the edges.
In order to be able to decorate the doors correctly, you must follow the instructions given in the video.
How to sheathe a metal door with leatherette?
A metal door is usually placed at the entrance, so it is extremely it is important to use a quality insulation. Often only the inner side is insulated, however, a range of decorative accessories allows you to decorate the outer side using insulation.
A metal door does not require insulating rollers from the outside. The size of the insulation should be 1–2 cm smaller at the edges of the surface area. Leatherette you need to take a piece 5–6 cm larger at the edges than the door area. This is necessary for the bend. The upholstery process consists of the following steps:
- Glue is applied around the perimeter, stepping back up to 2 cm, and in thin strips over the area.
- A heater is applied, and pressed for a while. The drying time of the glue is indicated on the package.
- Starting from the top, glue is applied to the back of the product at a distance of 5 cm from the edge. Press leatherette for the glue to set.
- Similarly, the procedure is carried out on the lateral edges. It is important to stretch the canvas to a uniform relief. Sometimes you have to cut off extra pieces that will prevent you from closing the door.
Lining on the inside
The inside of the front door can be insulated with polystyrene foam. Thus, it will also be possible to simplify the procedure for upholstery with leatherette. The warming process is as follows:
- A frame under the foam plastic is fixed along the area of \u200b\u200bthe door. For this, strips having the thickness of expanded polystyrene plates are used. The rails are fixed with the help of metal screws, which are fixed in pre-drilled holes.
- All large seams and joints are sealed with mounting foam.
- Styrofoam plates are installed in the frame, which are fixed with a special glue. The gaps between the plates and slats are also sealed with mounting foam.
- A sheet of plywood, even with the area of the door, is nailed to the rails.
- Further, the procedure is similar to the upholstery of wooden products. It is only important to ensure that decorative nails are nailed to the location of the rails.
From the inside, the insulating rollers are attached to the door frame. They should be placed flush with leatherette from the side of the loops. On the reverse side and on top, the protrusion should be up to 5 mm. From below, the roller is located at a height of 1.5–2 cm from the floor.
When choosing a material for upholstery, it is important to remember the disadvantages of leatherette:
- Low fire safety. A highly flammable material that emits acrid smoke when burned;
- Not the strongest material, which is easily scratched and cut;
- In case of mechanical damage, it will not be possible to return the previous appearance.
Also have important points, which must be considered when choosing dermatin:
- The material must be elastic. The hardness of leatherette indicates a fake;
- Choose a coarser canvas;
- A pungent odor indicates a low quality canvas.
When upholstering with leatherette, it is important to maintain the sequence of the process, and take into account the characteristics of the materials used. If the technology is not violated, then such upholstery will last up to 10 years.
Source: https://tkaner.com/materialy/dermantin/kak-obshit-dver/
Step-by-step guide to upholstery of doors with dermantine
Door upholstery with dermantine - light and inexpensive way decorating and warming the home, which begins with the entrance to the house or apartment.
To perform this work, you will need to know some of the features of the door trim.
Namely: the properties and characteristics of leatherette, the lining material used, tools when working with wood or metal, decorative, fasteners and more.
Dermantine (from ancient Greek leather) is a type of artificial leather made from cotton fabric and a layer of nitrocellulose covering the fabric on one or both sides.
Leatherette for upholstery of doors is positioned on the market as a substitute for expensive genuine leather, not inferior to it in terms of individual characteristics. It is also used for furniture upholstery, book pieces, bags, wallets and car interiors.
Dermantin is a finishing material that has the following advantages:
- Not subject to rotting and decomposition, resistant to various microorganisms;
- Moisture resistant, does not allow moisture to penetrate into the layer of lining material, protecting it from the appearance of mold and unpleasant odors;
- Relatively durable material that can last ten years with proper care;
- Resistant to abrasion and chemical reagents (acids and alkalis);
- Easy to wash and clean with ordinary detergents: soap and powder;
- Frost-resistant, able to withstand temperatures up to minus 35 degrees (depending on the type of leatherette).
Despite all the positive properties of leatherette, many are not satisfied with its shortcomings, namely: with the slightest damage (cut or tear), the leather substitute cannot be repaired and replaced separate part thus requires a full upholstery of the doors with leatherette.
When burning, the leather substitute emits harmful substances that are unsafe for human health and contributes to the rapid spread of fire, as it is combustible and fire hazardous.
These disadvantages are not so important, given that dermantin has a lot of useful consumer qualities, some of which are described above.
TO distinctive properties dermantina include the fact that leatherette can be easily and simply cut, it does not crumple, does not wrinkle and does not shrink. In addition, there are enough on the market wide choose material color types from gray to red. So you can choose what will most harmoniously fit into the interior of the apartment.
What characteristics should be considered when buying leatherette? When buying leatherette for upholstery, you should pay attention to how the material stretches, whether it forms cracks when stretched. Also look at such a parameter as wear resistance, it should be at least 30,000, and preferably all 50,000 cycles. The greater the number of cycles, the stronger the fabric is to abrasion.
Leatherette should be resistant to kinks from bending the material and scratches. Also consider leatherette's UV resistance characteristics if your door is exposed to direct sunlight most of the time.
The surface of the leatherette can be smooth or matte, imitate aged leather, etc. Pay attention to color scheme artificial turf, which color and texture will best harmonize with the design of handles and hinges, a peephole and other fittings.
Regular and decorative upholstery
When choosing material for upholstery in a store, take into account the type of door constriction. There are two types of screed: regular and decorative.
Conventional upholstery includes a simple trim of the door leaf with a smooth sheet of leatherette, which is attached to the base only at the edges. A decorative tape is also attached around the perimeter, fixed to the door every 10 cm.
Decorative or carriage upholstery of doors with dermantine is a kind of decoration performed on a base of wood or MDF - panels nailed to the door leaf.
First, the fabric is stretched over the entire door leaf, and then in some places it is fixed with buttons or nails with leather caps.
In this case, the pattern on the canvas from the buttons can be diamond-shaped or square, depending on the preferences of the owner of the premises.
Schemes and drawings of decorative upholstery.
Sheathing elements for a wooden door: rollers, lining material, nails
When preparing for a hauling, it is important to know about the basic materials and elements due to which the door sheathing process takes place.
rollers
When upholstering doors with dermantine, rollers are used. A roller is a special element that serves to protect the house from drafts and cold. It forms a tube of lining and leatherette, nailed around the entire perimeter of the entrance to the door leaf or to the door frame.
The method of placement depends on the type of door opening. If it opens into the room, then the roller is placed on the back side of the entrance to the house. The roller should extend beyond the box by a few millimeters. In this case, the distance between the canvas and the roller should be such that the roller "slows down" the opening of the door and it slams shut with little effort.
With the method of opening the structure outwards, the roller is nailed to the door leaf itself. At the same time, it is fixed first, and then the lining is added.
Upholstery of doors with dermantine is carried out without a roller in only one case: if metal structure installed without special bars that allow you to attach rollers to them.
backing material
Upholstery lining is most often used foam rubber or isolon with the addition of batting. It is not excluded the use of one batting or synthetic winterizer. When using the latter, a more rigid and ribbed structure is obtained.
Foam rubber allows you to achieve softer and smoother surface drops. It has better sound insulation properties than batting and synthetic winterizer, and isolon boasts the most outstanding thermal insulation.
Isolon is a new lining material made of polyethylene, more expensive, but also more perfect. It does not let in cold air and absorbs noise, being an environmentally friendly material.
Nails
Upholstery of doors with dermantine is carried out using special nails with wide hats. Sheathing nails can be either metal or leather (leatherette). Steel nails come in silver and gold.
Leather nails are made by hand, so their cost may be slightly higher than usual. In addition, there are special decorative nails that serve as door decoration.
To betray the door leaf beautiful and modern look It is not at all necessary to spend huge sums to pay for the hauling masters. Do-it-yourself door upholstery with dermantine is easy and simple, you only need proper preparation doors to the hauling and tools with materials.
Preparing the door for reupholstering
How to determine the dimensions of the material required for upholstery of doors with dermantine, given the dimensions of the door leaf?
The leatherette must be equal to area doors plus 15 cm on each side. For rollers, one cut 14-15 cm wide and equal to the height of the door and two cuts cut along the width of the door leaf are required.
The number of rollers is increased if the door opens outwards (all four sides are upholstered). Foam rubber or isolon is cut out the size of a door leaf, the thickness of the insulation should be no more than 2 cm.
Let's count the number of nails. It depends on the pattern and the distance between the nails. For standard door you may need somewhere around 50-60 pieces without taking into account the pattern.
Tools for work: hammer, stapler, knife, pliers, scissors, nails. For metal doors, upholstery is carried out without nails, on an adhesive basis. Glue will need at least 100 ml.
door technology
We free the door from everything superfluous: from handles, hinges, old upholstery, etc. At the first stage, they will only interfere. The methods of fastening the leatherette to the door leaf differ depending on the material of the door.
Tree
We make rollers: right on the door we fix strips of leatherette face down with a stapler. We lay the tubes of insulation and tuck, closing the foam rubber. We clog with a stapler or nails. At the bottom of the door leaf, the material must be hammered so that the distance between the roller and the floor is 1-2 cm, otherwise the roller will simply rub off at the points of contact with the floor.
We strengthen the lining: we fix the foam rubber with a stapler starting from the middle of the door leaf (so the likelihood that the material will warp will be reduced to zero). We fix the lining so that the distance to the edge of the door is 1-2 cm. We fix the batting on the foam rubber layer (it protects the foam rubber from damage).
We fasten the dermantin: first, we turn it 6-8 cm from above and fix it with nails, making sure that there are no folds and creases. Then, straightening, we stretch on the sides and hammer with nails around the perimeter of the door. Properly stretched material does not wrinkle or form folds. The distance between the nails is a maximum of 10 cm, a minimum of 5 cm.
For a metal door, the process is a little faster and easier, the fastening is done with glue.
Metal
The door is removed and placed on a flat base, for example, on four stools. Lubricate with glue around the perimeter of the canvas and in the center, fix the insulation. Press the foam rubber to the surface and leave to dry a little.
Then the main cut of the leatherette is glued starting from the top, in the same way as with wooden structure, moving to the sides and ending at the bottom.
We hope that our article will help you to easily and without errors complete all stages of work.
Source: http://o-dveryah.ru/remont/obivka-dermantinom/
How to upholster a door
Accepting orders daily from 9:00 to 21:00
(detailed video instruction for self-upholstery of the door, see the bottom of the page)
In this instruction, we will tell you about how to sheathe the front door yourself. To do this, you will need: 1. Viniliskin (dermantin, artificial leather, leatherette, PVC film, vinyl artificial leather, leatherette). Viniliskin is sold by cut, the width, as a rule, is in the range from 110 centimeters to 140 centimeters.
If you have a standard metal door, then for its upholstery a piece of cloth will be enough, the dimensions of which are 10-15 centimeters larger. If your door is wooden, then you need to take into account that in addition to sheathing the main door leaf, it will be necessary to make rollers, for which strips of leatherette 12-15 centimeters wide are used.
In total, we need three strips with a length equal to the height of the door.
2. Lining material. For these purposes, you can use foam rubber with a thickness of 10-20 mm. If you need enhanced thermal insulation and sound insulation, then turn your attention to such material as isolon.
Foam rubber is sold in sheets measuring two meters, which is just right for high-quality door upholstery.
3. Upholstery decorative nails. Usually, special furniture nails with a wide head are used. The color scheme consists of shades of gold, silver, bronze and copper. We recommend that you choose the color of the nails that matches the color of the locks and handles. Thus, your door will look quite harmonious. Also in the construction markets you can find nails, the caps of which are tied with vinyl leather. You can choose for yourself nails that match in texture and color with the selected material, or vice versa - play in contrast.
4. Glue. It will be needed if you have an iron door that does not have holes for nails. For our purposes, the “Universal Moment” is well suited. For pasting one side of the upholstery, a tube with a capacity of 100 ml is enough.5. Tools.1) Construction stapler and staples with a leg length of 8-10 mm.2) Hammer.3) Scissors.4) Knife (you can use a regular stationery knife with interchangeable blades).5) Screwdrivers.6) Pliers.7) Brush ( for metal door cladding).
After you have made sure that all of the above items are available, we proceed directly to the process of upholstery of the front door. First of all, it is necessary to dismantle all the locks, the peephole and get rid of the old trim (if you need to reupholster the door). Here we will not describe this action, but immediately begin the story of the main thing.
It is not at all necessary to remove the door from the hinges, as advised in many similar instructions. So, we will divide our guide into three parts: upholstery of the inside, upholstery of the outside, and pasting of a metal door. But remember: the door upholstery instructions give only general recommendations and do not take into account the features of a particular door.
At some points, you may have to turn on your ingenuity.
How to upholster a wooden door with your own hands
Consider the situation when the door opens into the apartment. In order to beautifully upholster a wooden door yourself, it is advisable to start work by making a roller that will visually close the gap between door frame and the door itself, and in some cases - and fit snugly against the frame itself (this depends on the design and profile of the platbands).
First, we take one strip of leatherette and use a stapler to nail it with the front side to the door surface so that it goes onto the door by about 3-4 cm. If a padlock is installed on your door, it is better to start nailing the roller from it. If all the locks are mortise, then start upholstering the door from the upper corner of the hinge side.
Having thus upholstered the entire perimeter of the door with strips of leatherette, we proceed to laying the foam rubber. First, it must be cut into strips 8-10 cm wide. We fix them with a stapler on the door leaf, turn and nail the material so that the resulting roller protrudes 1-3 cm, depending on the relative location of the door and trim.
The roller is ready.
Next, we measure the resulting distance between the inner edges of the roller and cut out the foam rubber, subtracting one centimeter from each side from these dimensions. We fix it with a stapler on the door leaf. The final part remains - to upholster the main surface wooden door.
We take a piece of leatherette around the corner, tuck the edges by 5-6 cm, lay it in the corner of the door so that the material goes slightly onto the roller and nail a decorative nail with a hammer, stepping back from the edges about 5-7 mm. Then we take the second upper corner of the material, also tuck it in and, pulling it a little, hammer in the second nail.
Next, you need to check whether the piece of leatherette lay flat relative to the surface of the door leaf. To do this, in the middle of the door, slightly pressing, we draw our hand from the top to the very bottom and, holding it with one hand, with the other we apply the lower corners of the matter to the edges of the door, smoothing them from the center.
Accordingly, both on the left and on the right, the distance to the edges of the leatherette should be the same. After making sure that the start is right, we continue the upholstery of the door. We nail the upper edge, making the distance between the nails 10-12 cm.
Then we begin to do the same with any side, tucking the artificial leather at an equal distance along the entire length and slightly, but not much, pulling it. It is important here not to overtighten the leatherette, otherwise you will end up with something like a pleated skirt.
Fixing this won't be easy, as you'll have to rip out the already hammered nails, and there's a good chance you'll accidentally damage the upholstery, and in any case, it will leave nail marks. Having reached the bottom, proceed to the second side.
Lastly, we fix the lower edge of the upholstery material, having previously calculated the future distance between the nails so that it is the same along the entire underside of the door. Everything! The door is upholstered. It remains to install locks and a peephole. Upholstering a wooden door with your own hands is quite difficult for an unprepared person, so many companies offer their door upholstery services.
How to sheathe the outside of a wooden door yourself
The outer side of the wooden door should be upholstered with leatherette in a slightly different way. The first step is to close the door tightly and draw a projection of the door frame on the door leaf itself with a pencil. In other words, draw lines around the entire perimeter with a pencil.
The outline of the future door skin will be obtained, and the remaining indentation is needed for the so-called “quarter” of the door. If the door is installed professionally and the locks are correctly adjusted, then the door leaf should fit snugly against the frame, and if we put leatherette behind the line during upholstery, then in the end the door simply will not close.
Now we nail the bottom of the insulating roller. We fix it on the door so that in its closed position it fits snugly against the threshold. To do this, we already have a delineated border at the bottom. If the lower roller is nailed to the very threshold, then over time it will rub off from constant touching with your feet. Next, we fix the lining material with an indent from the line of 1 cm.
and similarly to the previous paragraph, we nail the main piece of vinyl leather. Now you need to make a heat-insulating roller on the right, on the left and at the top. In this case, it will be mounted on the door frame. It is made almost similarly to the inner roller, only it is desirable to fill it with a large amount of foam rubber.
On the hinge side, we place it flush with the jamb, and on the upper and lock sides, we extend it by about 3-5 mm, depending on the size of the gaps between the door leaf and the frame. If the roller is made too large, the door will close hard, with effort.
If the roller turns out to be small, it will not perform its main function - sealing the opening. Therefore, it is important to catch the "golden mean" here. In conclusion, we nail the remaining lower edge of the skin and install the peephole, handle and locks. Don't rush at this stage. As the saying goes, measure twice, cut once.
Make cuts in the upholstery for locks and handles with care, do not cut off the excess. It will be a shame at the very end of the process to screw up all the work done. Now you know how to sheathe the outside of a wooden door yourself. This will significantly increase its insulating properties, as well as increase the sound insulation of the front door.
How to upholster a metal door with dermantine yourself
We take a tube of glue and a brush and coat the entire perimeter of the metal door. Then we apply a sheet of foam rubber and, lightly pressing on it, glue it. Next, with a clerical knife, we cut the foam rubber exactly along the profile of the metal sheet. If the blade is sharp - this procedure it will be quite easy and pleasant.
Now we apply glue to the upper end of the door (if it is the inside) or on the back of the upper flashing (if it is the outside). When using glue, be sure to follow the instructions for use! Then we glue dermantin and, similarly to the method above, we check the uniformity of its distribution.
Then we glue the leatherette from the side of the loops. And then - and from the lock side, pulling right hand with a slight effort, and with the left - driving off excess dermantin. So, the bottom edge remains. Applying glue on this side of the metal door is the most difficult.
There are situations when the gap between the lower edge of the iron door and the floor is only two or three millimeters. If you are unable to glue the leatherette underneath, you will have to remove the door from its hinges. In this way, you can make your task much easier.
When the fabric is glued on all four sides, with a clerical knife, carefully cut off the excess at the corner at the junction of the end and the flashing (porch), put a peephole, doorknobs and castles. As you can see, it is quite possible to upholster a metal door yourself. Try it - and sooner or later you will succeed!
Source: http://profobivka.ru/obitdver.html
How to sheathe a door made of wood, metal
The easiest and most popular way to give the door an attractive appearance- upholster it with some material. This can be done both from the premises and from the outside, you just have to use different materials and different technologies. But in any case, the process is called "door upholstery." About all the subtleties and nuances - below.
How can you beat the door
There are two types of door upholstery - soft and hard. Soft is made of two materials - leatherette (leatherette) and vinyl leather. Leatherette is a woven cotton base coated with a film of nitrocellulose. This material was popular in the 40-60s of the last century, as it was practical and inexpensive.
A little later, vinyl artificial leather appeared. This material is made different grounds- woven and non-woven, stretching and not. Accordingly, artificial leather has different properties. A layer of polyvinyl chloride (PVC or PVC) is applied to the base. It is more durable, chemically neutral.
It has only one significant drawback - it reacts poorly to ultraviolet rays - it loses elasticity, changes color, and may crack. Therefore, the upholstery of doors that go directly to the street is undesirable with vinyl leather.
There is, however, a material with increased resistance to UV rays, but this is a special material and you should pay attention to this when buying.
Leatherette door upholstery: several options
Now about a little confusion in terminology. Dermantine in pure form, such as it was in the last century, has not been produced for quite some time. Instead, there is different types vinyl faux leather.
There are also materials coated with other polymers, but not so many. Here they are, according to old memory, and are called dermantin or leatherette (although it is correct, by the way, to say “dermatin” without “n”).
So seeing this name, it is necessary to clarify what kind of material is meant, since the properties and prices differ significantly.
Despite the fact that the material is essentially the same, it has different characteristics and appearance. There are elastic types that stretch well, there are hard ones that are difficult to stretch. In addition, modern artificial leather has many colors and shades, it can have a different surface structure:
- smooth - shiny and matte, there is even a metallic effect;
- porous;
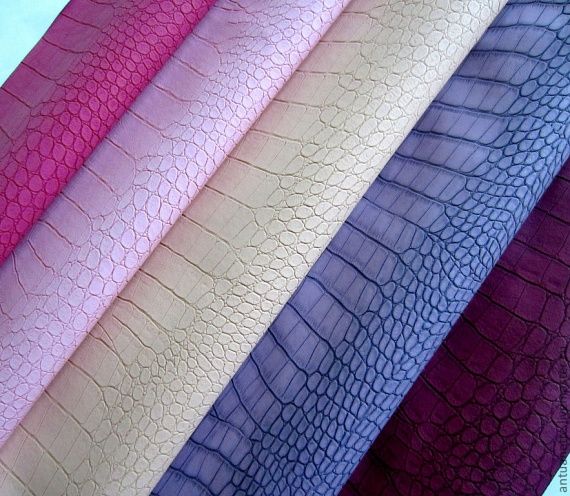
- structured, imitating different types skin (snake, crocodile, etc.).
under crocodile skin
So the choice of soft upholstery materials for the door is extensive. Apparently, this is the determining factor in the popularity of this type of door upholstery.
There are more hard upholstery materials for doors, although they are used less often:
- MDF panels with a thickness of 8 mm to 18 mm;
- natural wood - fragments, array;
- veneer;
- laminate;
- plastic;
- postforming.
From this list, most often the doors are trimmed with MDF overlays / panels. Such upholstery is especially popular for decorating metal doors, including home-made ones. The panels are made according to the dimensions of a particular door leaf, after which they are installed on glue or mounting foam into fixed starting bars. In this case, it makes sense to make slopes from MDF.
From the catalog - options for MDF overlays, and all this is still in different colors ...
In practice, the door trim is also covered with other materials - laminate, plastic, postforming. Starting profiles are installed along the perimeter of the door, into which fragments of trim trimmed “to size” are inserted. Everything is simple, if you have basic skills in working with a drill, saw and hammer, you can do it yourself in a few hours.
Door upholstery with dermantine
The most popular way to trim a door is with artificial leather. Such a department allows, simultaneously with improving the appearance, to increase the indicators of heat and sound insulation. But this type of door upholstery also has disadvantages - this is the most difficult technological process, requiring at least a general idea of the procedure.
Upholstery methods
We will talk about the technology of upholstery of doors with dermantine. You can attach it in two ways: with a roller around the perimeter of the door leaf and without it. Depending on this, the order of actions changes (more on that later).
Upholstery of doors with dermantine - with and without a roller
Examples of patterns for door upholstery with dermantine
For banners, you can use the same material that upholstered the doors. It is cut into strips 2.5-3 cm wide, attached to the upper nails, and then pulled and fixed by the next nails, a pattern is formed.
To secure the strip, it can be wrapped around a nail that is not completely driven in, which is then hammered. But this option is suitable if the decorative nails have large hats.
If the hats are small, the strips are nailed.
Also, a pattern can be formed using a thin metal flexible cable, but it is more difficult to fix it - it bends worse.
How and how to attach leatherette to the door leaf
If upholstery of a wooden door is necessary, there are usually no questions - they are fastened with staples from a stapler, then nailed along the contour with decorative nails. Only here there are nuances: the staples should be with a wide back (at least 1 mm), and the nails should be wallpaper, with a wide hat. Fastener installation step - from 2.5 to 7 cm, as desired.
The most commonly used wallpaper nails
More questions arise when it is necessary to cover an iron door with leatherette. There is only one way out - to put on glue. Glue is usually used "Moment", but you can use any other universal glue that can be used to glue both metal and leatherette.
They lubricate the flashing from the inside (a bar that goes along the perimeter of the door and closes the junction of the canvas with the door frame). When fixing vinyl artificial leather, it is cut out with a margin of 15 cm, just for the hem from both sides to the wrong side.
Materials for heat and noise insulation
Most often, foam rubber is used to insulate the door. It is inexpensive, if desired, allows you to form a three-dimensional convex pattern. The most common case is two layers of foam rubber 1 cm each.
This option is not the best - foam rubber has almost no effect on the soundproof properties of the door, and this is sometimes very important.
In addition, after 3-4 years, it loses elasticity, begins to stick together, you have to re-upholster the door, although the appearance of the leatherette is still quite decent.
All this is true, but there are no worthy competitors for foam rubber yet. There are materials with certain properties that can be laid instead of one of the layers, and the second one will still be foam rubber. For example, to improve the soundproofing properties, you can use "Isoton".
It is used for heat and sound insulation of cars. Sold in small sheets, the back side is coated with an adhesive, protected by a plastic film. So there will be no problems with installation. Of the minuses - the price and the rather large weight of the material.
To avoid problems, it is worth replacing the loops with more powerful ones.
Materials for sound-heat-insulation of the door
There are two other materials used in the automotive industry with similar properties. These are "Splen" and "Vibrofilter". All of them are made on an adhesive basis, can be used to improve the characteristics of the door.
How to beat a wooden door
It is more convenient to work on the removed door, but if this is a problem, you can upholster it right on the spot. First you need to remove all fittings from the door leaf - locks, latches, door peephole.
If there is old upholstery, it is carefully removed. If a part of the door needs repair, the damaged fragments are removed and replaced with cut-to-size wooden ones.
Slots can be covered with putty or foamed with mounting foam with a low coefficient of expansion.
Options
If there was a pattern on the upholstery, and in principle it suits you, we drive ordinary nails into the places where the nails forming the pattern were driven in. We do not hammer them to the end, the hats should stick out by 1-1.5 cm.
With their help, then we will break through the foam rubber and upholstery in the right places (just press with your fingers, all layers will push through). We will pull out ordinary nails, install decorative ones in their place, and with the help of tape we will form a pattern.
The procedure is simple.
To make the end of the door look no worse than the rest of the plane, we start with it. If you are not going to finish one of the sides, skip this step, just paint the end with paint to match the finish on one or the other side.
If we upholster the doors on both sides, we cut out a strip of material about 10 cm wide. More precisely, look at your door, since the thickness of the canvas is different. The strip should cover the end and go to one and the other side by 3-4 cm.
Lay the strip, fasten along the edge with staples from a stapler (faster and easier) or nails with a large flat head.
We fasten the strip to the butt
To form a roller, a strip of material is also needed. Width - 10-15 cm depending on how wide you want the roller. Next, there are two options:
- Immediately form a roller. To do this, a tourniquet of foam rubber or batting is laid in the middle of the strip, crimped in the middle. In this form, it is fixed around the perimeter of the door. After, from above, foam rubber and material are laid. To form a neat edge, the material is tucked inward.
The roller is formed immediately, in ready-made attached around the perimeter of the canvas
- The roller is formed later, after the vinyl is laid on the canvas. Here the technology is different - the strip is attached around the perimeter, face down. Then foam rubber and upholstery are attached. The edges are not tucked, just cut to size. After the end, the strip is wrapped on the front side (you can put a strip of foam rubber into it), folded over and fastened with wallpaper nails.
The strip for the roller is fixed in advance, it itself is formed after the upholstery is fixed
The difference between these two methods is only in appearance: in the first case, the nails are nailed along the edge of the upholstery (in the photo on the right), in the second - along the edge of the roller (in the photo on the left). Choose whichever you like best. For example, it seems to me that the first option (on the right) looks better - more neat. But this is just a personal opinion.
Two options for forming a roller
What is this roller for? In order to cover possible gaps between the canvas and the jamb. Thus, we avoid the appearance of drafts and reduce heat loss.
But you can make a roller only if the doors are upholstered from the opening side (the doors open into the apartment, so we upholster them from the inside). If, on the other hand, this focus does not pass, it will not close.
Then you have to do without a roller.
without roller
In this case, everything is simple: the canvas is evenly tucked up, fixed with nails or staples - as it suits you best.
without roller
Door upholstery process in photo format
To reduce the noise level, the doors are upholstered with one layer of sound insulation and one layer of foam rubber. The option with preliminary production of the roller is chosen. First, they removed the old fittings, cut in a new lock. The lining and handle were removed, the internal parts remained in place. Let's move on to the door trim.
We immediately form a roller - we put narrow foam rubber in a strip of dermantine, fasten it along the perimeter of the door. It is more convenient to do this with staples from a stapler.
We nail the roller around the perimeter
The next step is to fix the soundproofing. It is on an adhesive basis, so there are no problems - they cut it to size, carefully removing the film and glued it. When gluing, we try to squeeze out all the air, for this we tear off the film gradually, ironing the material from edge to edge.
We glue soundproofing
Now we fix foam rubber 1 cm thick. In this embodiment, the most convenient way is staples from a construction stapler. First, we fasten along the perimeter, then often - along the surface of the door, so that the foam rubber fits snugly.
We lay and fix the foam rubber
The foam rubber is cut out with a small margin, after installation, the excess is cut off.
We tuck the upper edge by 2-3 cm, we begin to fasten from the upper left corner. There we hammer in the first nail, then we straighten the material and nail the second one at the top right. Then, in increments of 3-4 cm, we nail the upholstery from one edge to the other with finishing nails.
Tucking the top edge, fasten it
We fasten from the side of the loops, tucking the edge inward. Straighten evenly so that there are no creases at the top.
We nail from the side of the loops
After the same operation is repeated from the side of the castle, then below. Actually, the upholstery of the doors is almost finished, it is only necessary to install the fittings in place.
Install locks and hardware
- related lessons
Vinyl leather for door upholstery is sold both by the meter and in sets. In some sets, the mounting method may be different: they have plastic profiles that are attached around the perimeter of the door leaf. These profiles have a locking system similar to the one used in stretch ceilings. How to beat the door in this case, see the video.
The following video captures the process using roll material.
How to insulate and upholster the front door. The technique of forming a roller of the second type - it is nailed last.
How to upholster metal doors
The front part of metal doors is rarely upholstered - it already has a very attractive appearance. The inner part suffers more often. That's what we'll talk about.
On the inside of the iron door there is a frame. In some models it is metal, in others it is wooden. Fitted between the slats of the frame thermal insulation material. It can be foam or mineral wool boards. They are attached to mounting foam, which has a very small coefficient of expansion (mandatory!). From above, everything is closed with a sheet of plywood or OSB.
This standard version. If the planks are wooden, everything is fine, there are no problems - the doors will not freeze through. But if the frame inside the door is metal, in good frosts everything will freeze through - through cold bridges, which are metal ribs.
To prevent this from happening, a layer of "Isoton" or "Splen" is again laid on top of the foam / mineral wool, and plywood is already on them.
The remaining processes for upholstery of a metal door are very similar to those described above. All the difference is in the method of fixation: the upholstery is glued to a suitable high-quality glue. The excess is immediately cut off at the junction using a sharp wallpaper knife.
This is where the classic mistake was made - there is no layer that cuts off the bridges of cold. Everything else is shown well.
Quite budgetary and quickly you can change the appearance of the door if you sheathe it with leatherette. This procedure is quite simple and easy, and, most importantly, does not require the use of any special and complex tools. How to sheathe doors with leatherette? The answer to this question will be given in our article.
Pros and cons
The leatherette used for door upholstery is an artificial leather consisting of several layers. The composition is as follows: cotton fabric and nitrocellulose. In this case, these two materials are applied in layers on top of each other.


This material is used not only to change the appearance of entrance doors, but also for upholstering furniture, making bags, and even for decorating car showrooms. The manufacturers of the material themselves say that leatherette is a high-quality and presentable substitute for real leather.
But this material also has its drawbacks and advantages, which must be taken into account when choosing it.


The main advantages are:
- Resistance to the negative effects of harmful microorganisms, as well as decay.
- Moisture protection and no negative consequences for material with prolonged contact with it.
- Virtually unlimited service life with proper and careful operation.
- Ease of cleaning with water and any detergents, while the coating does not suffer from their effects.
- The ability to withstand even the lowest temperatures and not deform.

But there are some disadvantages, the main one is the impossibility of restoring part of the material. That is, if a hole appears, then you will have to upholster the entire door again. And also leatherette is easily scratched and cut, so you need to use the door upholstered with this material carefully.
But these disadvantages are significantly inferior to the advantages, so it is not surprising that the popularity of leatherette has not been falling for many years now. Popularity is also promoted by a wide range of this material.


How to choose cladding materials?
Having decided to sheathe your door leaf with leatherette, you should also purchase related materials in advance:
- Dermatin himself. It can be matte, glossy, perfectly smooth or with a small pattern.
- Insulation. It is better to use foam rubber or special mineral wool, these materials are best combined with leatherette.


Thick leatherette should be preferred, it is more durable and durable, but its color and texture are selected by the buyer, depending on personal preferences. High-quality material should be slightly springy when stretched - this indicates its quality. Carefully inspect it for scratches, cracks or chipped paint. The base itself should fit snugly, without gaps, to the top layer of leatherette.
Mineral wool should be purchased with a small margin, it will come in handy when decorative design door leaf. If such material could not be found, you can buy either isolon or batting. By the way, isolon allows you to enhance the sound insulation and thermal insulation of the front door. Therefore, this option of insulation will be the best for people living in noisy areas.


Some manufacturers offer their customers special kits that are designed for upholstering the door leaf with leatherette. Typically, such a set consists of leatherette itself, insulation, decorative trims and special carnations. Therefore, each buyer can either purchase a ready-made set or form it on their own.


Required Tools
In addition to the insulation itself and leatherette, to perform the work, you will also need: a tape measure or a meter ruler, a pencil, scissors, a stapler, decorative nails, a hammer, glue, flexible thin wire, metal corners, decorative strips, pliers, a screwdriver, pliers.
Of the above tools, not all may be required, it all depends on how exactly the upholstery will be done - in the usual way or with a pattern. In any case, all tools should be prepared in advance and placed near the work site.


Pattern options
Decorative trim of the door leaf allows not only to change its appearance, but also to make it more attractive and unusual.
Today, experts distinguish several main varieties of such drawings:
- Ordinary upholstery using special slats-rollers. With this method, the pattern, or rather, its edging, is available only at the edges of the door, the rest of the surface is perfectly even and smooth.


- Another simple pattern that consists of studs set diagonally from right to left and vice versa. Such a pattern is performed quite quickly and looks best on doors in dark shades.
- A simple, but at the same time stylish and not quite ordinary pattern, which consists of three separate ornaments. To perform it, you will need to use not only carnations, but also special rollers or applications from several strips of leatherette.


- This figure, again, consists of two. The first consists in edging around the entire perimeter of the doors with carnations, and the second is located in the center of the door leaf and consists of several small rhombuses that make up one central rhombus.
- Another example of a beautiful but simple design, consisting of only diamonds that cover the entire door leaf.


There are still a lot of options for drawings that will help decorate and highlight your door against the background of other door panels. Each of the proposed patterns is made using various carnations, inlays, rollers and applications. With creative inspiration, patience and perseverance, you can recreate almost any ornament on this material. The main thing is to make sure that everything necessary materials were at hand.
In order not to be disappointed in the work done, before drawing with carnations and attaching them to leatherette, you just need to lay out the pattern with a pencil and buttons and evaluate its appearance. At this stage, if something does not suit you, you can easily redo all the work without consequences for the material.

We upholster the input product with our own hands: step by step
Leatherette can be decorated with a door leaf made of both wood and metal. In each case, there are nuances in the performance of work. Therefore, we will consider in more detail how to properly fit the door leaf itself in each case.
The first step is to calculate the required amount of dermatin. Its quantity should be 15 cm more on each side than the same side of the door. If rollers are made, then one of them will require a piece of this material 15 cm wide and as long as two lengths of the door itself. Do not forget that such a calculation is given for the manufacture of one roller.
The size of the insulation is equal to the size of the door leaf, but you should pay attention that its thickness does not exceed two centimeters. The number of decorative carnations will depend on the presence of the pattern and its type. Their exact number can be found by studying the figures in detail.

Wooden door
It is necessary to remove the door from the hinges and lay it on a flat horizontal surface. It is also necessary to free the canvas from handles, fasteners and locks. All these details will interfere in the process of work.
Now you can form a roller. This is done right at the door. To do this, fold the bundle of insulation and lay it in the middle of the canvas. Such a strip is attached along all edges of the door, that is, on four sides. Great care must be taken to ensure that the thickness of the roller is the same everywhere.
After the roller is laid and fixed with a stapler, it is necessary to lay out the insulation on the door leaf and cover it with leatherette from above. In this case, the top coating should first be fixed around the perimeter, and only then the drawing should be done, if, of course, there will be one.

You can make a roller separately, and only then attach it to the door leaf. In this case, the base is attached to the door with a margin for the roller, then the insulation and the leatherette itself are laid, and at the end the rollers are formed.
The difference between these two methods lies in the fact that in the first case the roller itself is practically invisible, and in the second case it is clearly visible on the door. The specific way it is formed depends on personal preferences.

But there is also the option of sheathing the front wooden door with leatherette and without making rollers. In this case, with nails or staples, first the base is attached to the door leaf, then the insulation is laid out, and after that the leatherette itself is attached. The rollers on the door leafs make it possible to enhance the thermal insulation and sound insulation of the doors, as well as to reduce the noise level when they are slammed.
After completing all the work, it is necessary to install all the door fittings in place and re-secure the door in the box.
Metal door leaf
The key difference in this case is that all materials will not be nailed to the door leaf, but glued. The same applies to carnations, with which the pattern will be performed. They will have to be glued to leatherette using a special adhesive base.

The very same sequence of actions is as follows:
- Removing the door leaf from the hinges and releasing it from the fittings.
- Laying the door on a flat surface.
- Laying the base on the glue. To begin with, it is necessary to apply special glue to the entire perimeter of the door, as well as to its middle, and only after that it is necessary to lay the base from top to bottom with smoothing movements, preventing bubbles from appearing on the surface.
- Now you need to lay the insulation. To increase the strength of its fasteners, a small amount of glue can be applied again to an already laid base.
- Leatherette lining. It is necessary to apply special glue to the insulation again and lay the material on it. It is very important to smooth the leatherette correctly and clearly, otherwise the door upholstery will be uneven, bubbly, and it will be impossible to draw on it.
- Execution of the drawing according to the selected scheme.
- Installation of fittings in the door leaf.
- Hanging the door on hinges.

 Basic technologies for obtaining nanomaterials
 How to tell the time in English?
 Introduction to Multivariate Statistical Analysis
 Presentation of the analytical report of the history teacher
 Presentation on the topic "atherosclerosis"
 History of number systems
 Apple in mythology and Russian folklore